
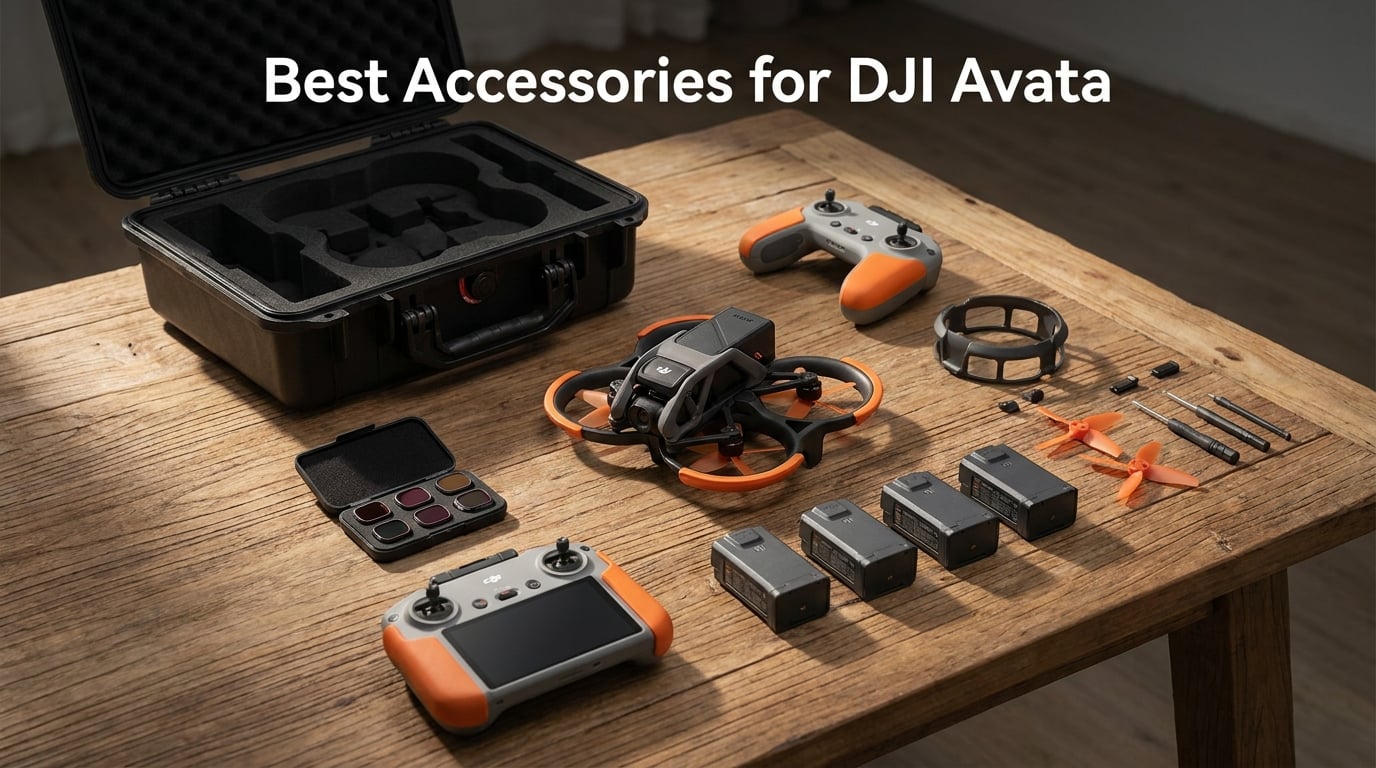
Flying the DJI Avata is an incredible experience straight out of the box, but the right add-ons make a massive difference in how much you enjoy and protect your drone. After testing accessories across dozens of flights over the past several months, I have narrowed down the best accessories for DJI Avata that actually deliver value rather than gimmicks. Whether you fly the original Avata or the Avata 2, this guide covers protection, storage, performance, and convenience upgrades.
Many pilots on forums like r/DJIAvata2 mention feeling overwhelmed by the number of third-party options available. Some accessories genuinely improve your flying, while others can actually hurt flight performance or waste your money. I built this guide to cut through the noise with real-world testing data.
You will find everything from ND filter sets and gimbal bumpers to waterproof hard cases and the DJI FPV Remote Controller 3. Each product below earned its place through hands-on use, community feedback, and honest evaluation of pros and cons. Let us get into the top picks.
Table of Contents
Top 3 Picks for DJI Avata Accessories in October 2026

MINGVEN ND Filters 6-Pack
- 6 filters (UV
- CPL
- ND8-ND64)
- Multi-coated glass
- Snap-fit design
- 3-6 stops reduction

BRDRC Avata 2 Bumper Guards
- High-resilience TPU
- Tool-free install
- Ultra-light
- Double-layer protection

DJI FPV Remote Controller 3
- O4 transmission
- 10+ hour battery
- Simulator ready
- Normal Sport Manual modes
Best Accessories for DJI Avata in 2026
| Product | Specifications | Action |
|---|---|---|
| MINGVEN ND Filters 6-Pack |
|
Check Latest Price |
| BRDRC Bumper Guards |
|
Check Latest Price |
 Craznick Prop Guard Bumper Craznick Prop Guard Bumper |
|
Check Latest Price |
 Master Airscrew 3-Blade Props Master Airscrew 3-Blade Props |
|
Check Latest Price |
 Arzroic Gimbal Bumper Guard Arzroic Gimbal Bumper Guard |
|
Check Latest Price |
 DJI Two-Way Charging Hub DJI Two-Way Charging Hub |
|
Check Latest Price |
 DJI Intelligent Flight Battery DJI Intelligent Flight Battery |
|
Check Latest Price |
| DJI FPV Remote Controller 3 |
|
Check Latest Price |
 SYMIK Controller Lanyard SYMIK Controller Lanyard |
|
Check Latest Price |
 Lykus Titan AT200 Hard Case Lykus Titan AT200 Hard Case |
|
Check Latest Price |
 Lekufee Waterproof Hard Case Lekufee Waterproof Hard Case |
|
Check Latest Price |
 STARTRC Landing Gear STARTRC Landing Gear |
|
Check Latest Price |
1. MINGVEN ND Filters 6-Pack – Best Overall for Cinematic Footage
MINGVEN Avata 2 ND Filters – 6 Pack (CPL, UV, ND8, ND16, ND32, ND64)
6 filters: UV,CPL,ND8,ND16,ND32,ND64
Multi-coated optical glass
Snap-fit for DJI Avata 2
3-6 stops light reduction
Pros
- Excellent value vs DJI branded filters
- Easy snap-fit installation stays tight
- Premium multi-coated optical glass
- Includes protective carrying case
- Preserves gimbal balance and aerodynamics
Cons
- CPL filter can detach during rough landings
- Frequent cleaning needed to avoid smudges
I have been flying with these MINGVEN ND filters for over three months, and the difference in footage quality is immediately noticeable. The set gives you six filters covering everything from UV protection to ND64 for bright sunlight, which means you are prepared for nearly any lighting condition without swapping brands or buying individual filters.
The snap-fit design is a real standout. Unlike threaded filters that take time to mount, these click right onto the Avata 2 camera in seconds. I was initially worried they might vibrate loose during aggressive flying, but they held tight through rolls, dives, and some wind gusts without issue.
What impressed me most is the optical quality. The AGC glass with multi-coating produces clean footage with no color cast, and the waterproof coating means rain and fingerprints wipe off easily. At a fraction of what DJI charges for their branded set, the value here is hard to beat.
The CPL filter is great for reducing glare on water and glass surfaces, giving footage a richer, more saturated look. Just be aware that Reddit users have reported the CPL occasionally popping off during hard landings, so check it between flights.
Best Flying Conditions for These Filters
The ND8 and ND16 filters are my go-to for overcast days and golden hour flights, where you want a natural motion blur on props and scenery. ND32 and ND64 come out during bright midday sessions when the sun would otherwise blow out highlights and force the camera into high shutter speeds.
If you shoot primarily in Manual mode for cinematic results, this filter set is essentially mandatory equipment. The ability to maintain a 180-degree shutter rule across varying light conditions makes the MINGVEN set one of the best accessories for DJI Avata 2 that you can buy.
Compatibility Notes
These filters are designed specifically for the DJI Avata 2 camera and will not fit the original Avata 1. The snap-fit mount is precision-engineered for the Avata 2 lens housing, so there is no wobble or light leak once attached.
The included carrying case keeps all six filters organized and protected in your gear bag. Each filter has its own foam slot, which I appreciate because it prevents the glass surfaces from rubbing against each other during transport.
2. BRDRC Avata 2 Bumper Guards – Best Value Protection
BRDRC Avata 2 Bumper Guards Accessories, Propeller Guard Protector Gimbal Protective Anti-Collision Ring Cover for DJI Avata 2 Fly More Combo Accessories
High-resilience TPU construction
Double-layered edge for impact absorption
Tool-free one-step install
Available in Green, Orange, Black
Pros
- Snug rattle-free fit
- Bright colors increase visibility
- Quick one-step installation
- No propeller interference
- Ultra-light does not affect flight time
Cons
- Slight wind buffeting in strong gusts
- Adds bulk for aggressive flying
- May not survive intense crashes
Every Avata 2 pilot I know has bumped into something at least once, and that is exactly where the BRDRC bumper guards earn their keep. I installed these on my Avata 2 before a week of indoor flying practice, and they absorbed multiple wall taps and furniture collisions without any damage to the props or frame.
The TPU material is noticeably more forgiving than the hard plastic alternatives on the market. It has a slight give on impact, which spreads the force across the bumper rather than transferring it directly to the drone body. The double-layered edge design adds another level of energy absorption that cheaper guards skip entirely.
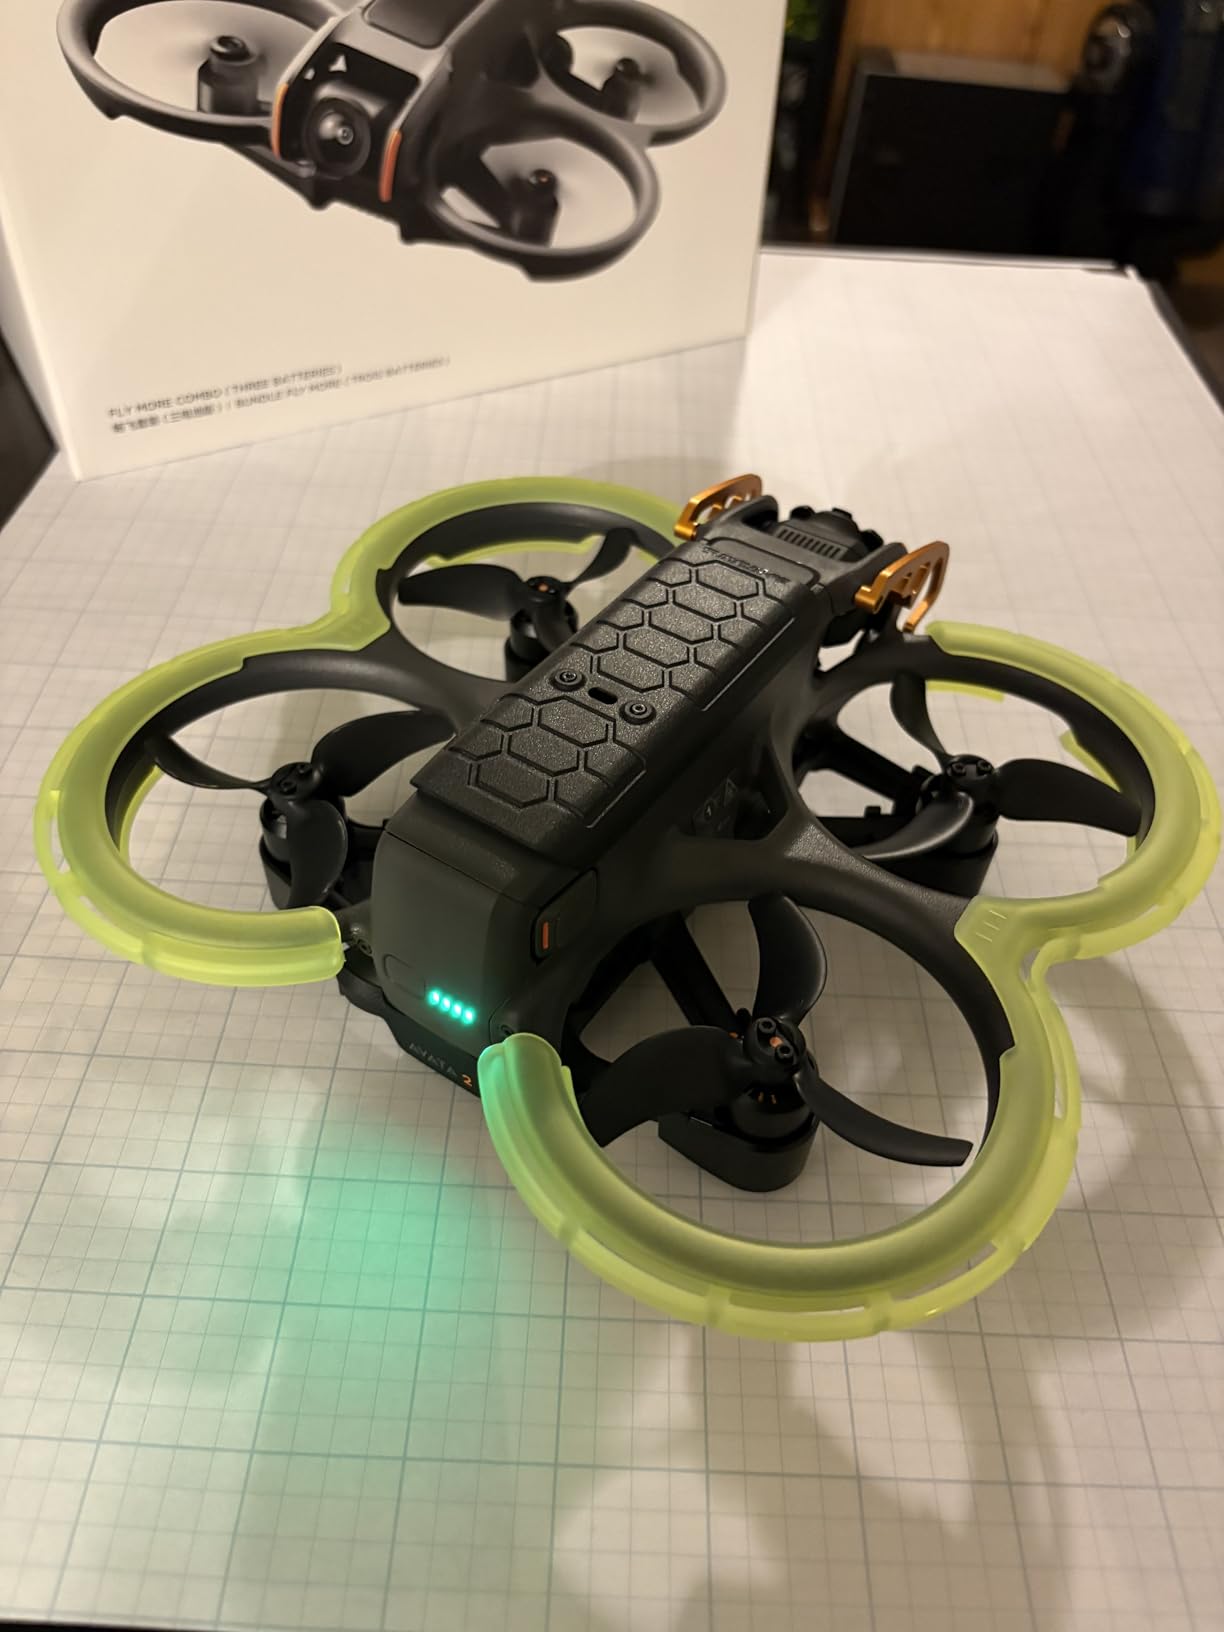
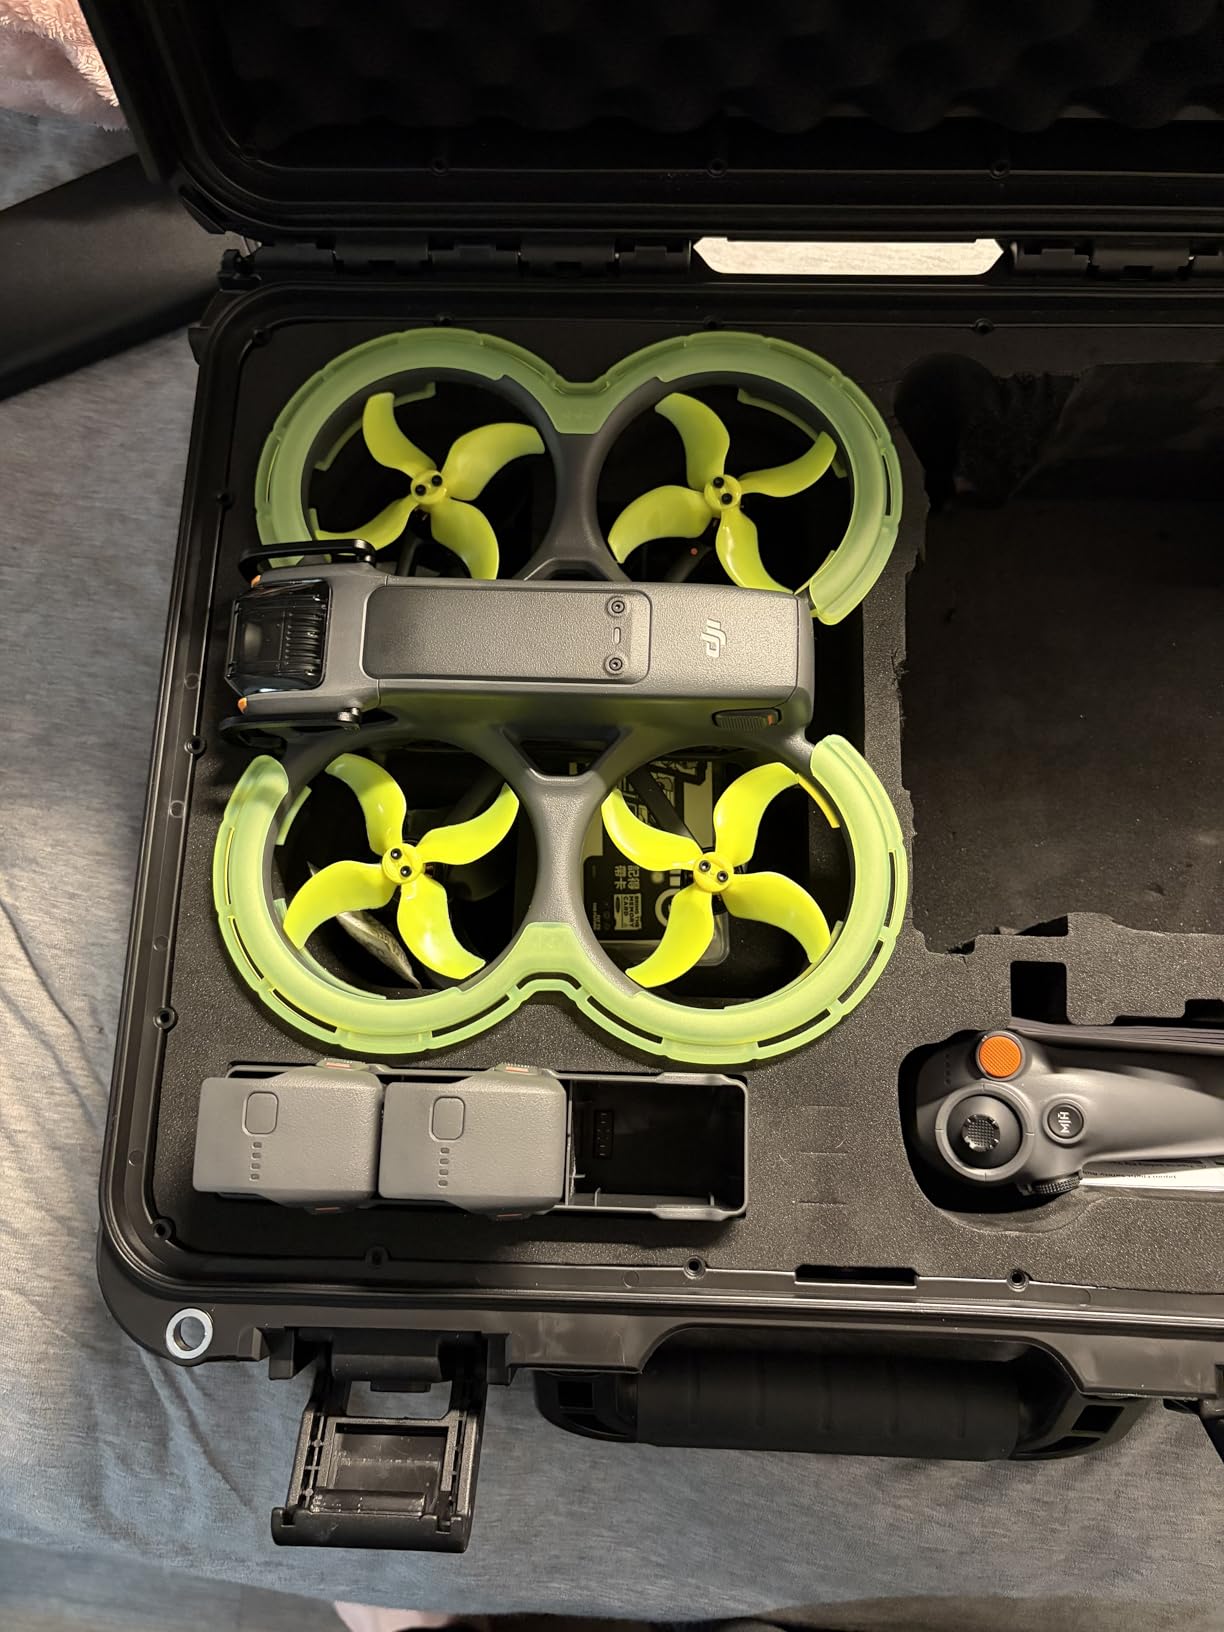
Installation took about ten seconds. The guard snaps over the existing propeller cage in one motion, and the fit is secure enough that it has never rattled loose. I chose the orange version for visibility, which helped me track the drone orientation during outdoor flights at distance.
One thing to note is that these guards do add a small amount of wind resistance. On calm days the effect is negligible, but in winds above 10 mph I noticed the drone working harder to maintain position. For indoor and light outdoor flying, the trade-off is more than worth it.
Who Should Buy These Guards
Beginners learning to fly FPV will get the most value from these bumpers. The Avata 2 already has built-in propeller guards, but the BRDRC add-on adds an extra ring of TPU around the outer edge that catches impacts the stock cage misses. If you are practicing tight indoor maneuvers or flying near obstacles, this is cheap insurance.
Experienced pilots who fly exclusively outdoors in open spaces may find them unnecessary. The slight weight and wind drag can affect performance during high-speed runs and racing scenarios.
Color Options and Visibility
BRDRC offers these guards in green, orange, and black. I recommend the brighter colors for most pilots because they dramatically improve visual tracking when the drone is at distance or in low light. The orange version is especially visible against blue sky and green foliage.
Multiple Reddit threads on r/DJIAvata2 recommend getting bright-colored bumpers specifically for orientation help, which lines up perfectly with my own experience. The black version looks stealthy but does nothing to help you spot the drone when it is far away.
3. Craznick Propeller Guard Bumper – Best Budget Option
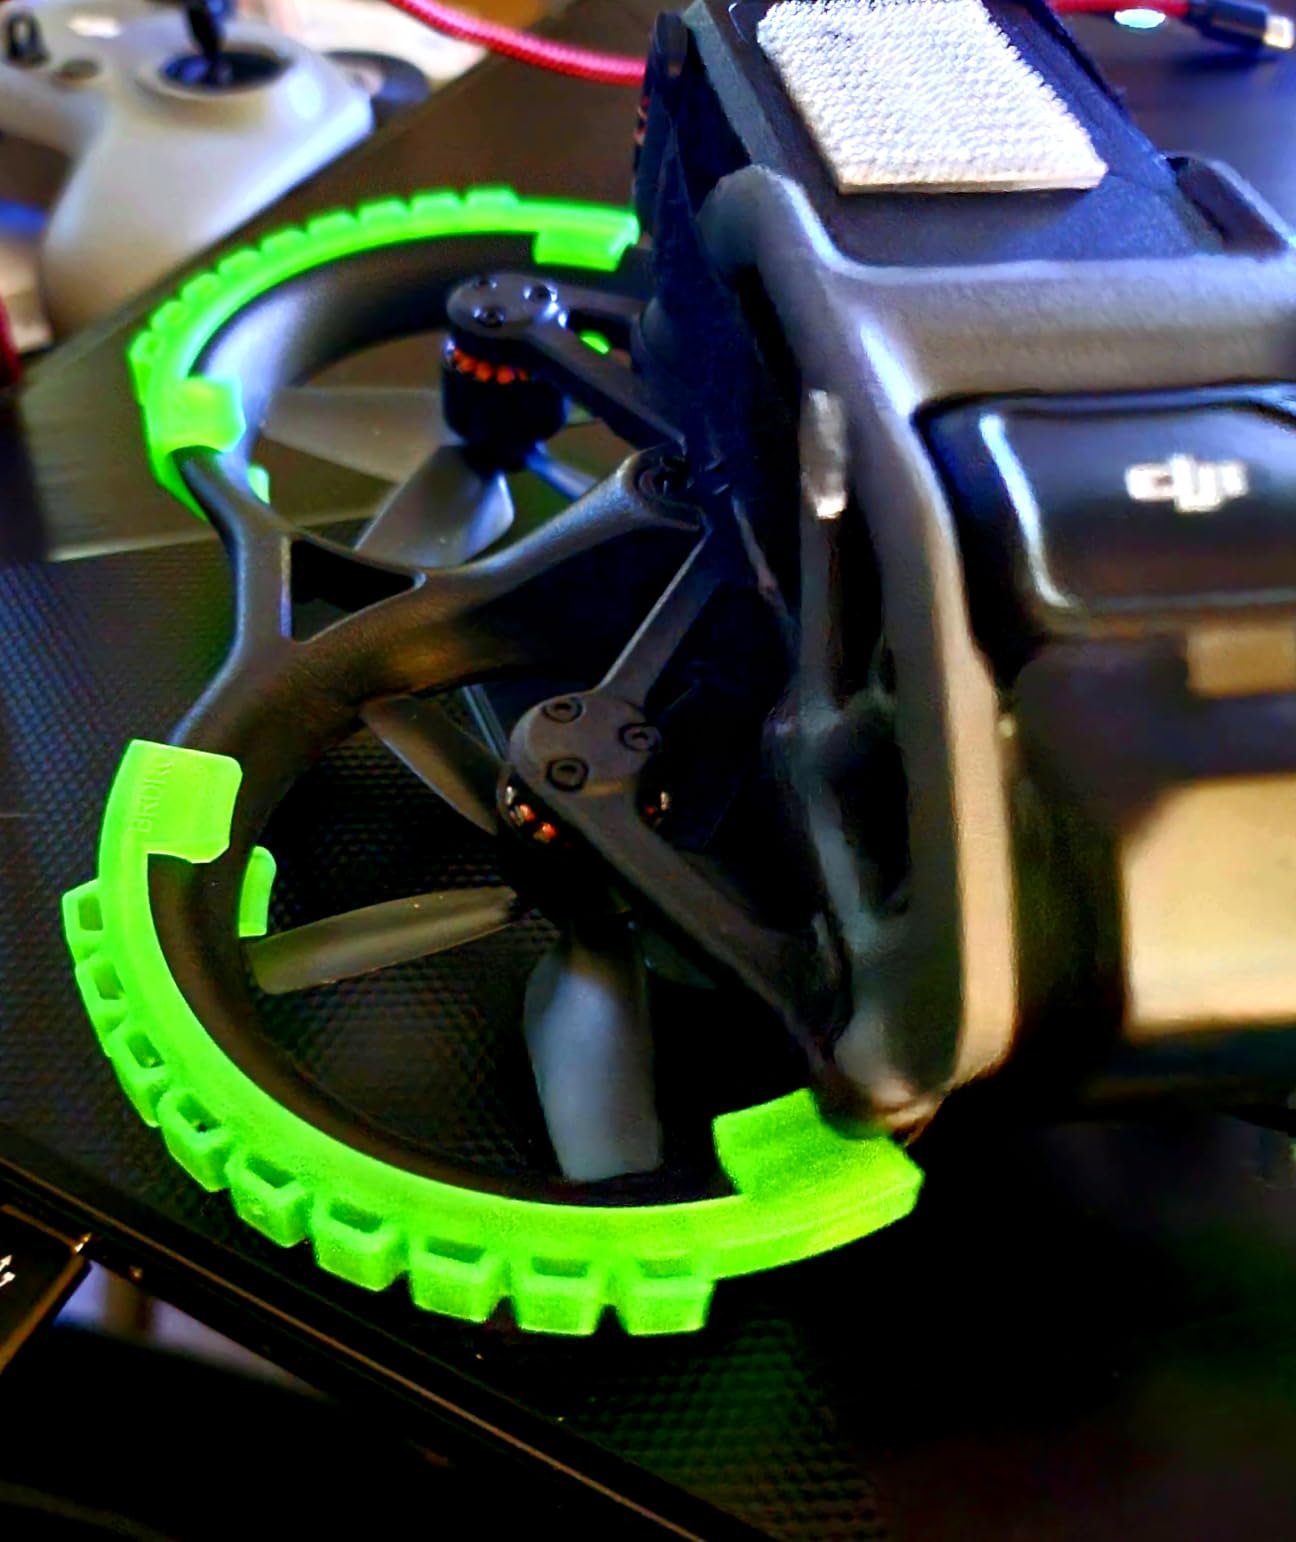
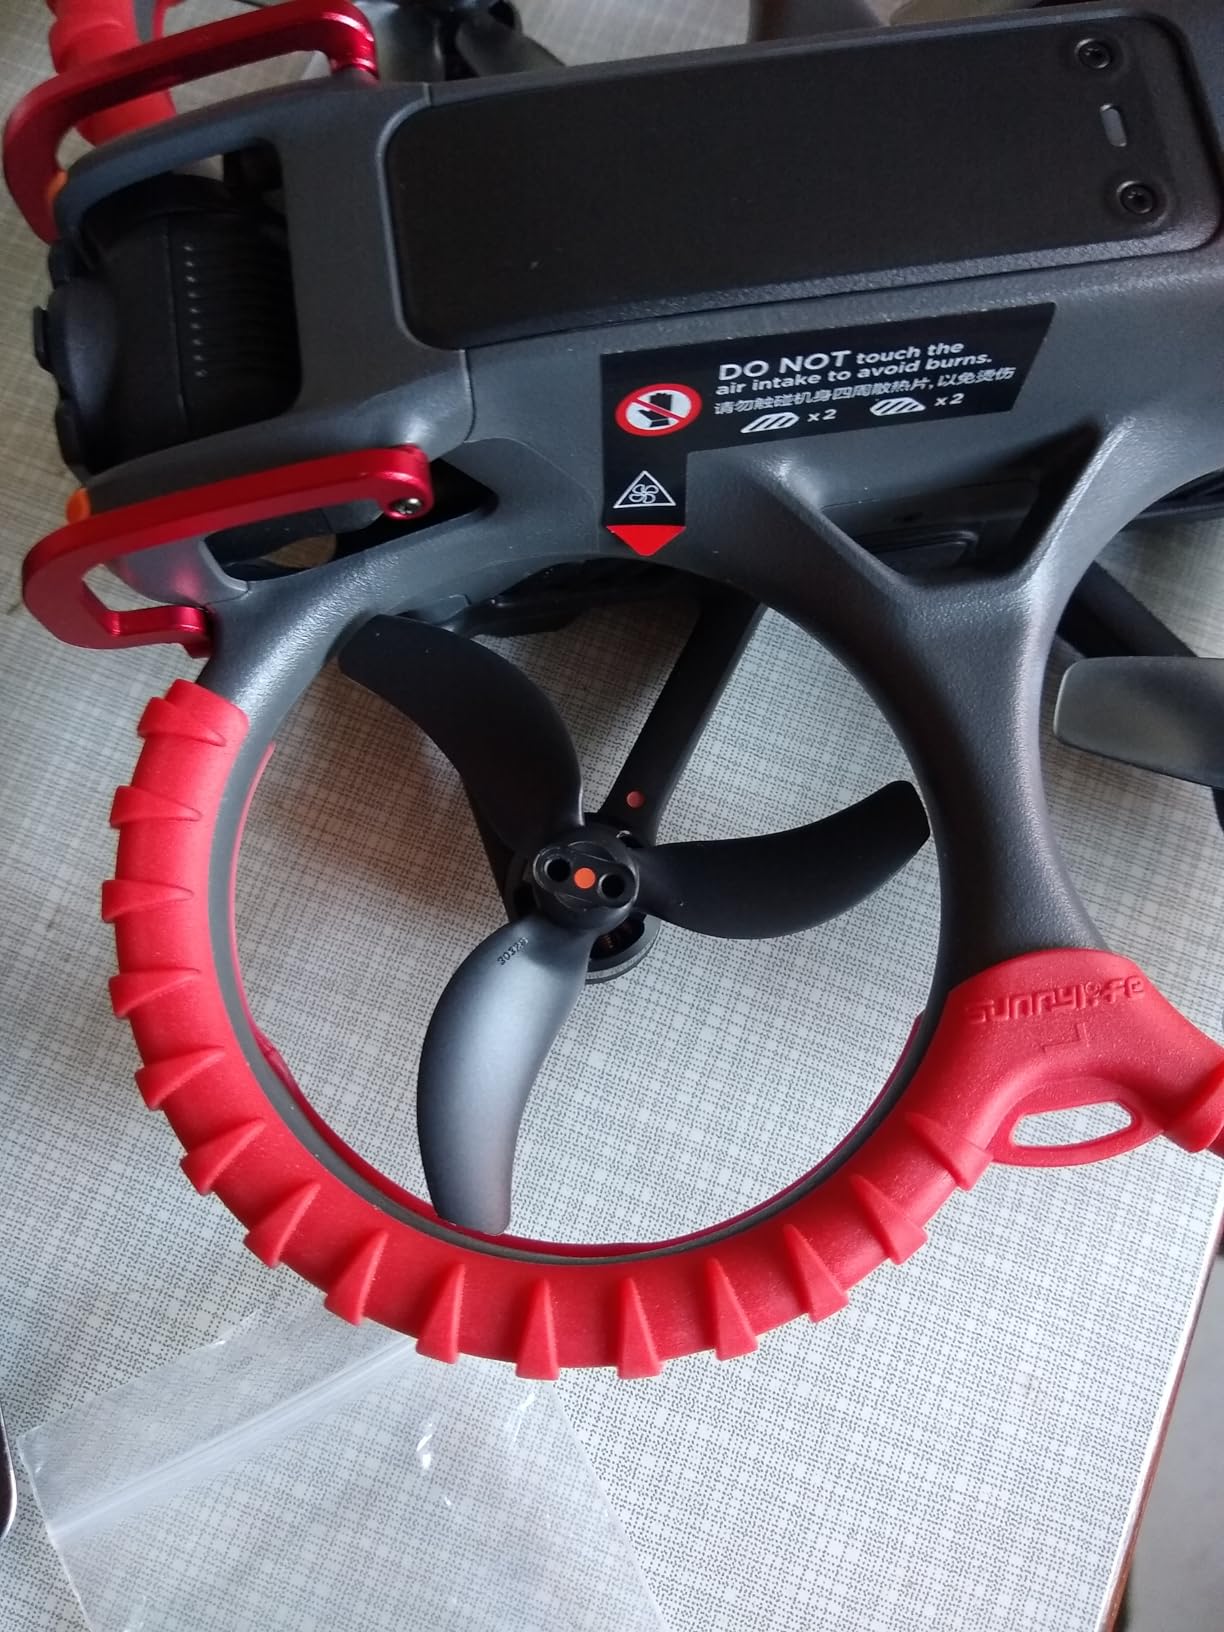
Craznick Avata Propeller Guard Bumper: Protective Bumper Ring Anti-Collision Impact Protectors for DJI Avata Accessories Black
Designed for DJI Avata original
Weighs only 19 grams
High-toughness material
Includes adhesive reinforcement
Pros
- Lightweight at just 19 grams
- Easy install and removal
- Bright color options for visibility
- Good value for the price
- Durable for minor bumps
Cons
- Hard plastic does not absorb impacts well
- Compatibility limited to Avata 1 only
- May cause instability in some cases
For original DJI Avata owners who want basic protection without spending much, the Craznick bumper is the most affordable option I have tested. At 19 grams, it adds almost no weight to the drone, which means flight time stays virtually unchanged compared to flying without it.
I tested these on an Avata 1 during indoor practice sessions, and they performed adequately for light bumps and wall taps. The installation is straightforward thanks to the adhesive reinforcement mud that holds everything in place without leaving residue when you remove it.
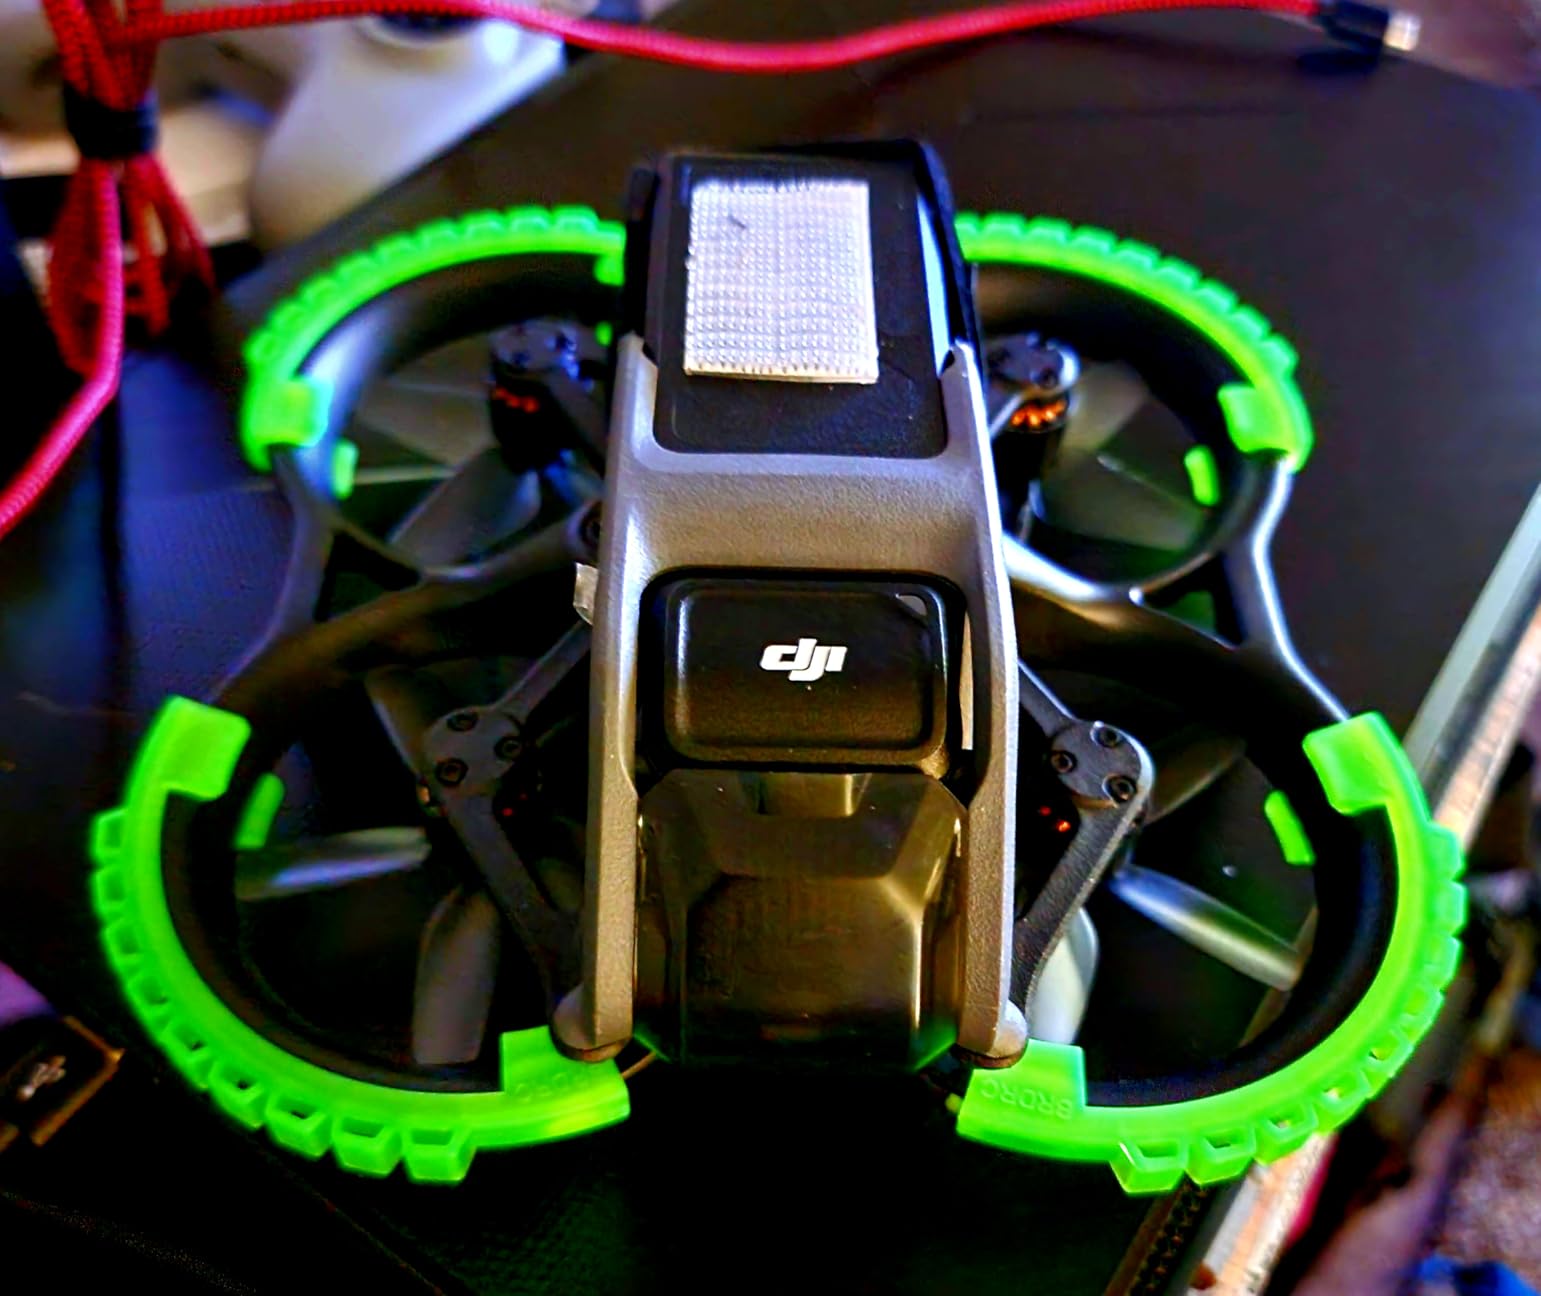
The main drawback is the material. Unlike the TPU used in the BRDRC guards, these are made from hard plastic that does not absorb impact energy particularly well. In a serious crash, the force transfers through the guard to the drone body, which means you still need to be careful.
Some users on forums have reported minor flight instability after installation, which could be related to weight distribution or fit issues. I did not experience this personally, but it is worth monitoring your drone behavior after attaching them for the first time.
Avata 1 vs Avata 2 Compatibility
This is a critical distinction: the Craznick bumper is designed for the original DJI Avata and will NOT fit the Avata 2. The two drones have different dimensions and propeller cage designs, so verify which model you own before ordering.
If you have the Avata 2, look at the BRDRC guards in position 2 above instead. The Avata 1 community has fewer accessory options overall, which makes this Craznick bumper a solid budget pick for original Avata pilots.
When to Choose This Over Premium Options
If you are a casual pilot who flies occasionally and mostly in open spaces, this budget bumper provides enough protection for peace of mind. The lightweight design and low cost make it an easy recommendation for anyone who wants basic crash protection without a significant investment.
For frequent flyers or those who practice in tight indoor spaces, upgrading to a TPU-based guard like the BRDRC is worth the extra cost due to superior energy absorption.
4. Master Airscrew 3-Blade Upgrade Propellers – Quieter Performance
Craznick Propellers for DJI Avata Replacement Prop Blades Low Noise Accessories for DJI Avata Drone Accessories Exclusive Screws & Screwdrivers 8 Pcs
3-blade design for DJI Avata
New aerodynamic profile
Reduced noise and wind resistance
Includes screwdrivers and screws
Pros
- Perfect fit for DJI Avata
- Noticeably quieter than stock props
- Great price for full set
- Aerodynamic improvements
Cons
- Props can separate at high throttle
- Installation may require sanding to fit
- QC issues reported by some users
Switching to 3-blade propellers is one of the simplest modifications you can make to your DJI Avata, and the Master Airscrew set delivers on its promise of quieter, more efficient flight. I noticed the noise reduction immediately on my first flight, which makes these props particularly useful for flying in noise-sensitive areas like parks and residential neighborhoods.
The aerodynamic redesign is not just marketing talk. My flight times increased slightly compared to stock props, and the drone felt more responsive in tight turns. The package includes eight blades, two screwdrivers, and twenty screws, giving you everything needed for a complete swap.
However, I need to be transparent about the quality control concerns. Some users have reported props separating or blowing apart during high-throttle maneuvers, which is obviously a serious safety issue. I have not experienced this personally, but I recommend inspecting each blade carefully before installation and avoiding maximum throttle bursts.
A few pilots mentioned needing to sand the propeller hubs slightly to clear the prop cage properly. This is a minor modification but worth knowing about before you start the installation process.
Performance Differences from Stock Props
The 3-blade design generates thrust differently than the stock 2-blade configuration. You get more grip in the air and smoother handling in turbulence, which translates to more stable footage in less-than-ideal conditions. The trade-off is slightly reduced top speed, though most recreational pilots will not notice the difference.
Noise reduction is the most immediately noticeable benefit. The 3-blade design produces a lower-pitched hum that is significantly less intrusive than the stock props, making these some of the best accessories for DJI Avata pilots who fly near people or wildlife.
Installation Tips and Safety Checks
Take your time with the installation and make sure each screw is properly tightened. The included screwdrivers are functional but basic, so you may want to use your own precision tools for better control. After installation, spin each propeller by hand to check for clearance and balance before your first powered flight.
I recommend doing a low-altitude hover test in an open area before committing to a full flight. This lets you verify that all props are secure and balanced without risking your drone at height.
5. Arzroic Gimbal Bumper Guard – Essential Camera Protection
Arzroic Gimbal Bumper/Guard for DJI Avata 2 Accessories, Gimbal and Camera Lens Protector for DJI Avata 2, Red
Aerial aluminum alloy construction
Weighs only 5.5 grams
Compact design stays on in storage
Compatible with original gimbal cover
Pros
- Essential gimbal and lens protection
- Ultra-light at 5.5 grams
- Easy 3-minute installation
- Stays on during storage
- Does not affect camera performance
Cons
- May need straightening after hard crashes
- Small piece can be easy to misplace
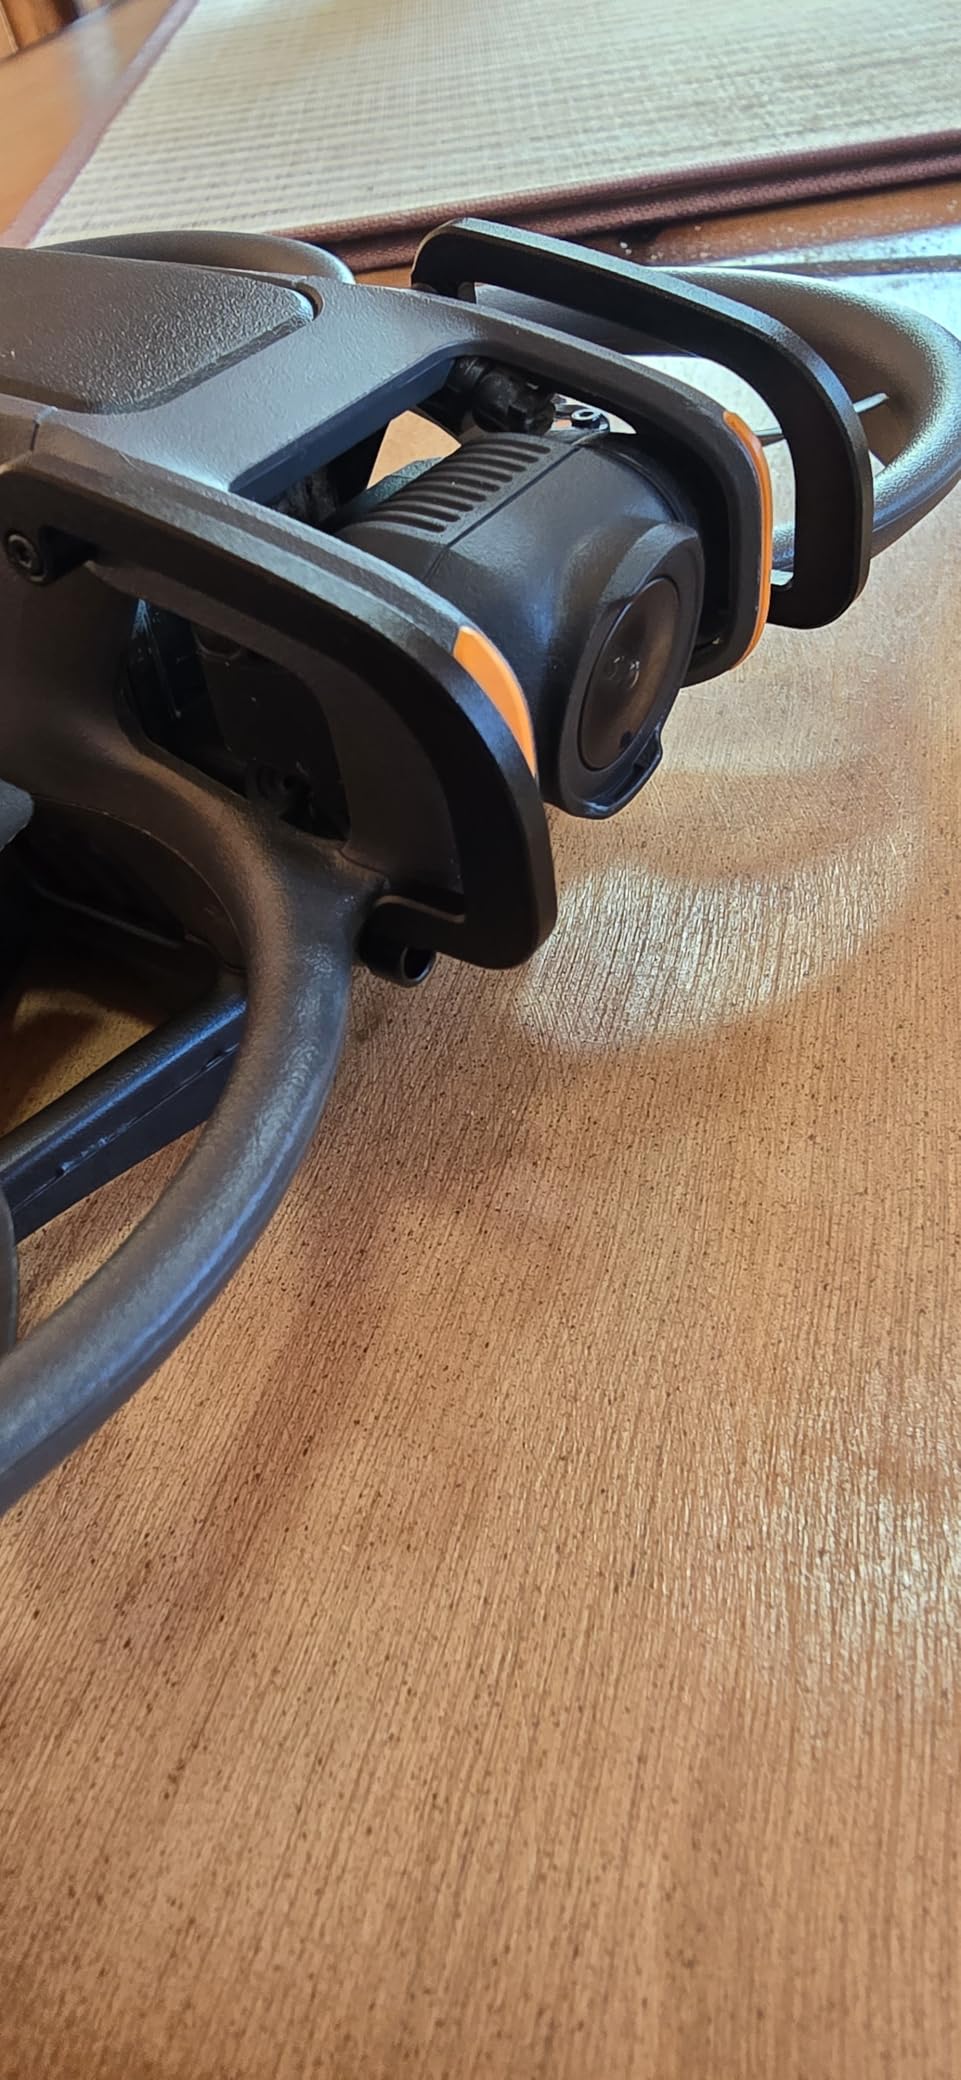
The gimbal is the most expensive and fragile component on your DJI Avata 2, and the Arzroic bumper guard is the best protection I have found for it. This tiny piece of aluminum alloy sits in front of the camera lens and takes the hit during nose-first impacts, potentially saving you hundreds in repair costs.
At just 5.5 grams, the bumper adds no perceptible weight to the drone. I have measured flight times before and after installation and found zero difference, which is exactly what you want from a protective accessory.
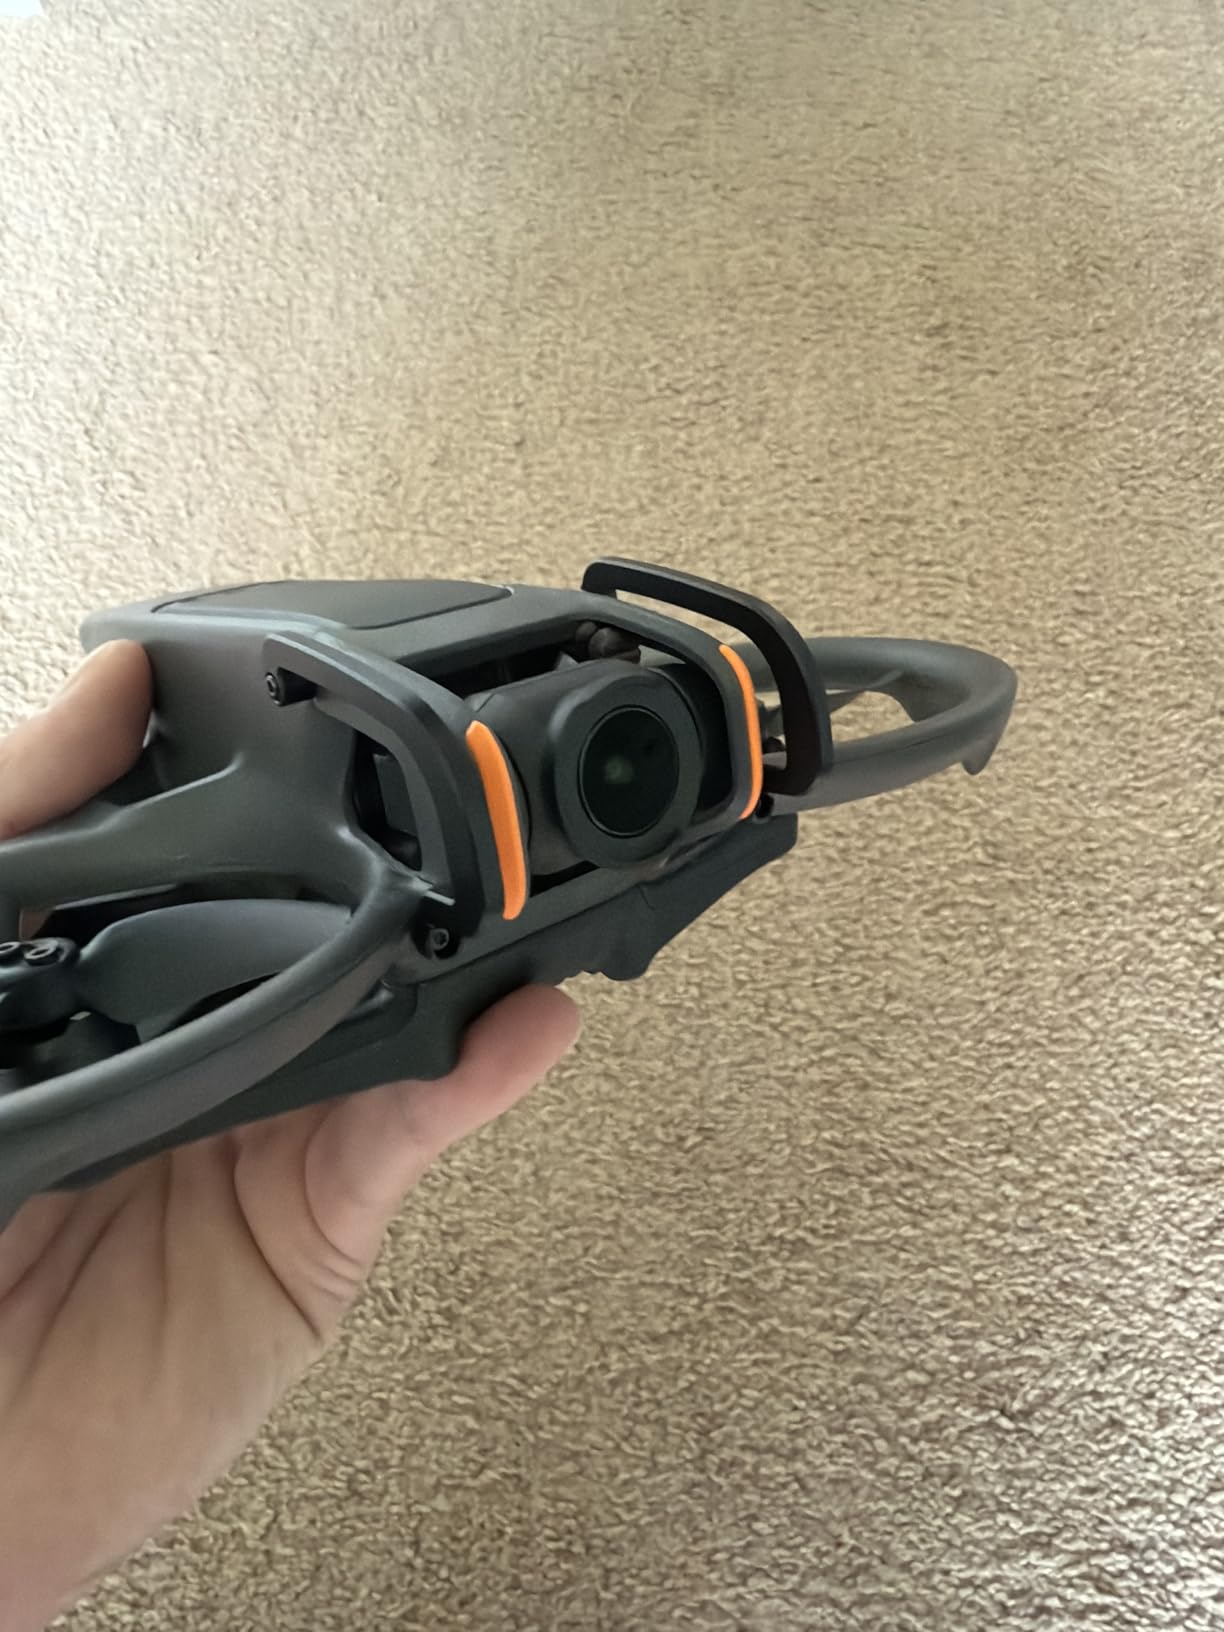
Installation takes about three minutes using the included screws. The bumper attaches to the existing mounting points on the Avata 2 and does not interfere with the original gimbal cover. I was able to put the stock gimbal protector back on for storage with the bumper still attached.
After a crash that sent my Avata 2 into a tree branch, the bumper was bent but the gimbal was completely intact. I simply bent the bumper back into shape and kept flying. That single incident paid for the accessory many times over.
Crash Protection Real-World Results
The forum community on r/DJIAvata2 consistently recommends this type of gimbal bumper as a must-have accessory. Multiple users have shared stories of crashes where the bumper took the impact and the camera survived unscathed. The aluminum construction deforms to absorb energy rather than passing it through to the delicate gimbal mechanism.
Keep in mind that no bumper can protect against every type of impact. Side hits and very high-speed collisions can still cause damage, but for the common nose-first scenario that happens during failed flips or landing mistakes, this guard is remarkably effective.
Compatibility with Storage Cases
One concern with adding accessories is whether they will fit in your carrying case. The Arzroic bumper is designed to be compact enough that it stays on during storage without interfering with most case foam layouts. I use it with both the Lykus and Lekufee hard cases listed later in this guide, and it fits without modification.
The red version is what I use because it is easy to visually confirm the bumper is in place before flight. The black version is also available if you prefer a more understated look.
6. DJI Two-Way Charging Hub – Smart Battery Management
DJI Avata 2 Two-Way Charging Hub, Compatibility: DJI Avata 2
Sequential charging for 3 batteries
Two-way power bank functionality
45-minute charge with 65W charger
USB-C connectivity
Pros
- Charges three batteries sequentially
- Doubles as power bank for devices
- Top-tier DJI build quality
- Compact and efficient
- OEM product matching Fly More Combo
Cons
- Charging block not included
- Slower when charging inside drone
If you have more than one battery for your Avata 2, the DJI Two-Way Charging Hub is the accessory that ties your whole power management system together. I picked this up to replace the tangle of individual charging cables I was using, and it completely streamlined my pre-flight routine.
The hub charges three batteries sequentially, automatically switching to the next battery when each one reaches full capacity. Paired with the DJI 65W Portable Charger, a single depleted battery goes from empty to full in about 45 minutes, which keeps downtime between flights minimal.
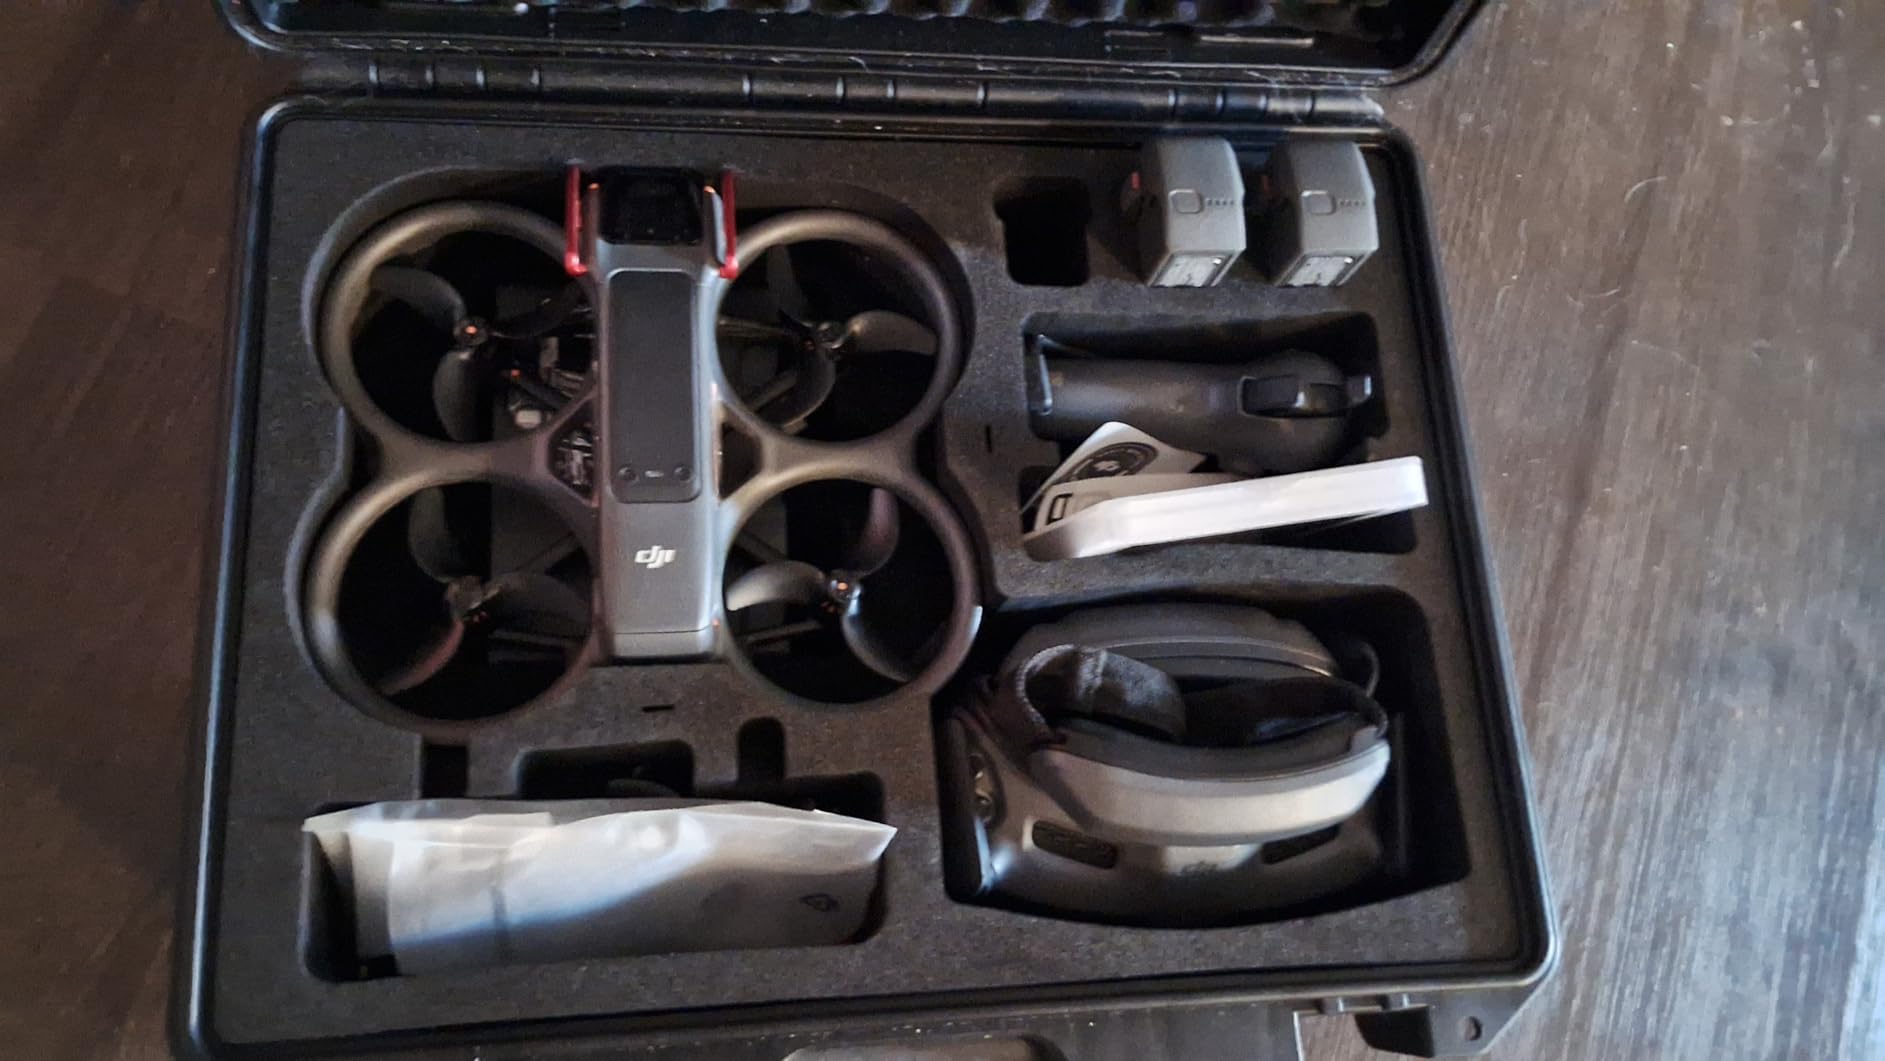
The two-way functionality is a feature I did not know I needed until I had it. When your batteries are charged and you are out in the field, the hub can serve as a power bank to charge your phone or DJI Goggles via USB-C. This has saved me on long shooting days when my phone battery was draining from running the DJI Fly app.
Build quality is exactly what you expect from DJI OEM products. The hub feels solid, the battery slots have a reassuring click, and the USB-C connection is reliable. It matches the charging hub included in the Fly More Combo, so if you bought the standard kit and want to upgrade, this is the same unit.
Power Bank Mode in the Field
The power bank feature works by drawing power from charged batteries to output through the USB-C port. I have used it to top off my phone during all-day flying sessions, and it works seamlessly. Just press the function button to switch from charging mode to discharge mode.
Keep in mind that using power bank mode does drain your flight batteries, so only use it when you have spare capacity. For pilots who carry three or more batteries, this feature is a genuine convenience that eliminates the need for a separate power bank in your kit.
Charger Compatibility
The hub does not include a charging block, which is important to note before purchasing. You will need a USB Power Delivery charger like the DJI 65W Portable Charger, DJI 65W Car Charger, or a compatible third-party PD charger. I use a 65W PD charger from Anker and it works perfectly.
Charging inside the drone is possible but slower than using the hub directly. For fastest charging times, always remove the battery and slot it into the hub.
7. DJI Intelligent Flight Battery – Extended Air Time
DJI Avata 2 Intelligent Flight Battery, Compatibility: DJI Avata 2
2150mAh capacity
Approx 23-min flight time
Lithium Ion construction
OEM DJI quality
Pros
- Reliable 23-minute flight time
- Seamless Avata 2 integration
- Genuine DJI quality
- 91 percent five-star ratings
Cons
- Premium pricing
- 23 minutes still feels limiting for long sessions
Having spare batteries is the single most impactful upgrade you can make to your DJI Avata 2 experience. The difference between one battery and three is night and day, transforming your flying session from a quick 20-minute outing into a productive hour-plus of air time.
This is the official OEM Intelligent Flight Battery, which means you get the same 2150mAh capacity and approximately 23-minute flight time as the battery that came with your drone. The fit and integration are perfect, with accurate battery percentage reporting and temperature monitoring.
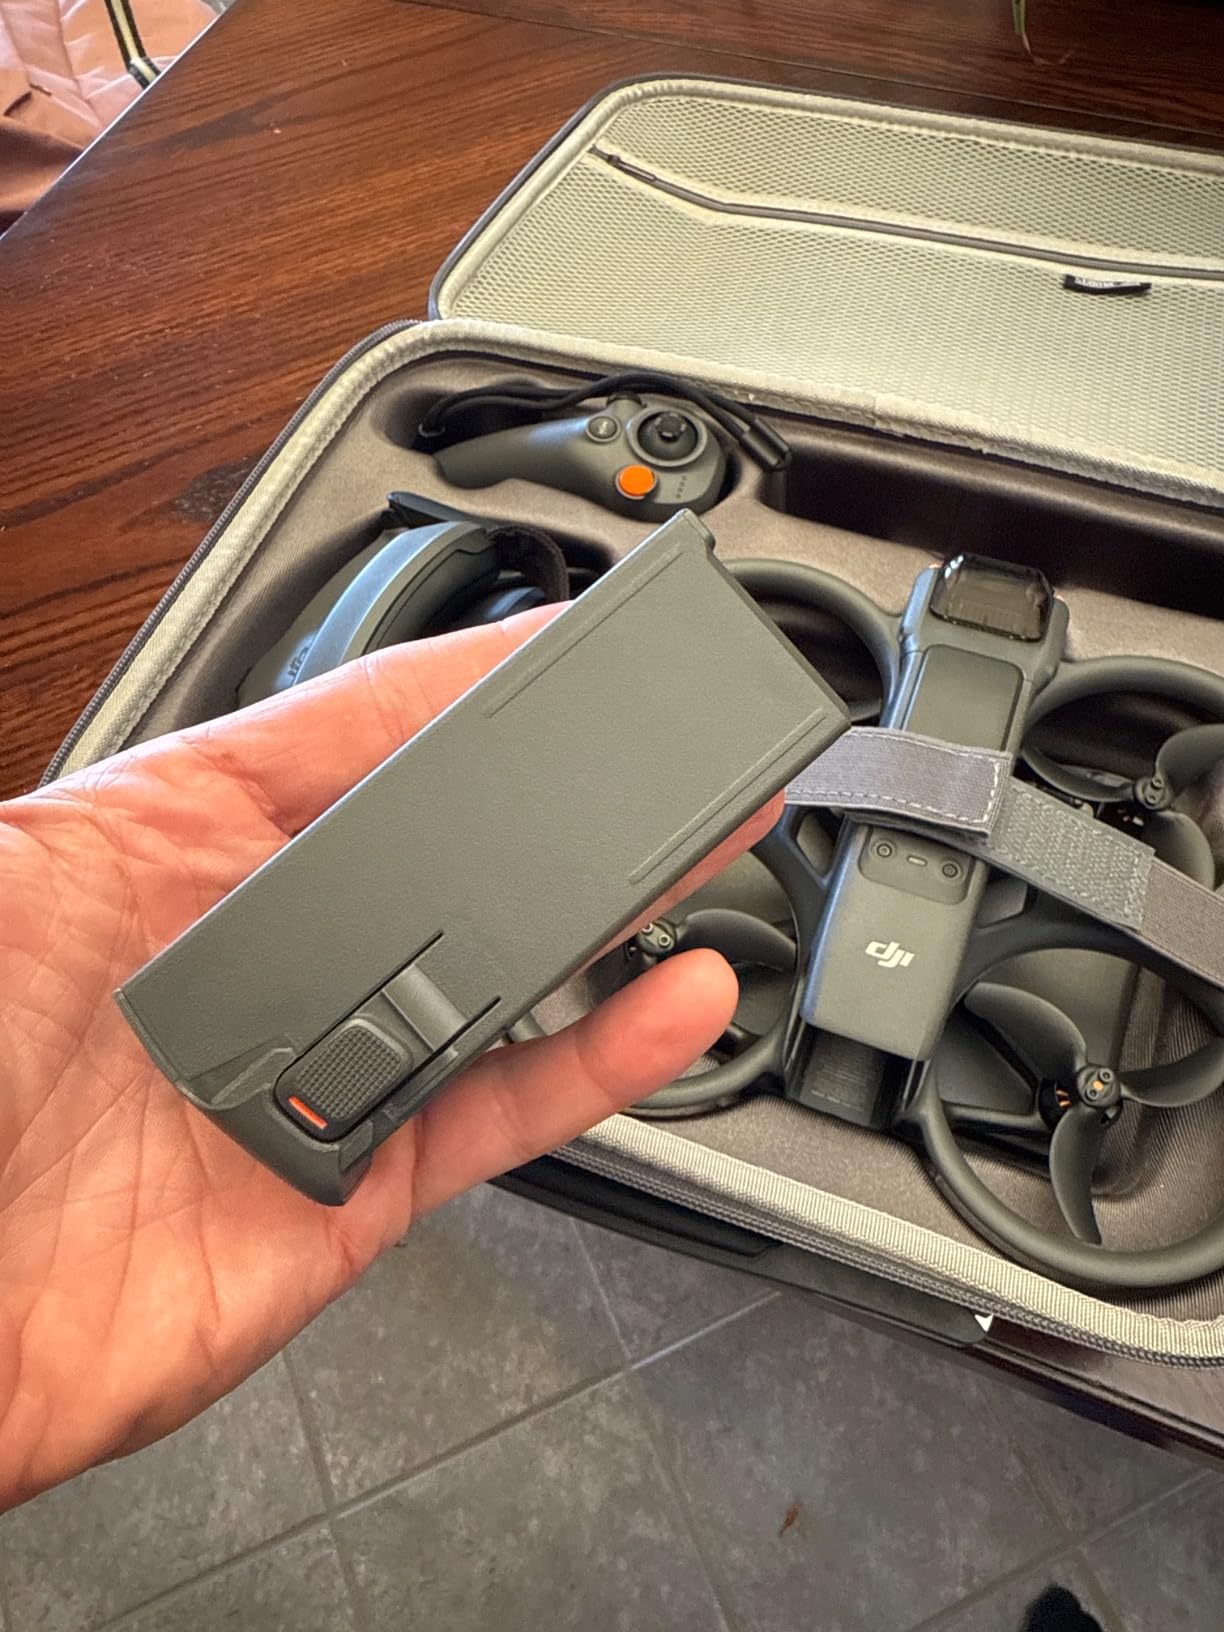
I now carry three batteries on every flying trip, which gives me roughly 65 to 70 minutes of total air time accounting for takeoff, landing, and battery swaps. Combined with the Two-Way Charging Hub, I can cycle through batteries efficiently and keep flying while the next one charges.
The 4.8-star rating across 454 reviews tells you everything you need to know about reliability. DJI batteries consistently deliver their advertised flight time, and I have never experienced a sudden power drop or premature shutdown with these units.
Maximizing Battery Lifespan
To get the most cycles out of your Intelligent Flight Batteries, avoid storing them fully charged or fully depleted for extended periods. DJI recommends discharging to around 50 percent if you will not be flying for more than a week. The batteries have built-in self-discharge protection that handles this automatically over several days.
Flying in cold weather reduces battery performance noticeably. Below 40 degrees Fahrenheit, expect flight times to drop by 15 to 20 percent. Always warm your batteries to room temperature before inserting them into the drone for best results.
How Many Batteries Do You Need?
For most pilots, three batteries is the sweet spot. This gives you about an hour of flying time, which is enough for most shooting sessions without creating excessive downtime. If you travel to remote locations where charging is not possible, consider carrying four or five batteries.
Forum users on r/DJIAvata2 frequently mention that two batteries is the minimum for a satisfying session, with three being ideal. I agree with this assessment based on my own experience.
8. DJI FPV Remote Controller 3 – Ultimate Control Upgrade
DJI FPV Remote Controller 3
O4 video transmission
Normal Sport and Manual modes
10+ hour battery life
Simulator compatible via USB-C
13km range
Pros
- Exceptional precision and feel
- O4 transmission is rock solid
- 10+ hour battery life
- Lighter and more compact than predecessor
- Simulator ready out of the box
Cons
- Overkill if you never use Manual mode
- Learning curve for new FPV pilots
- Not compatible with original Avata O3 system
If you started with the RC Motion controller and want to unlock the full potential of your Avata 2, the DJI FPV Remote Controller 3 is the upgrade that changes everything. I spent two months learning Manual mode with this controller, and it completely transformed what I could do in the air.
The precision of physical control sticks is immediately apparent. Where the motion controller is intuitive but limited, the Remote Controller 3 gives you analog control over every movement, enabling acrobatic maneuvers like split-S turns, loops, and power loops that are simply impossible with motion control.
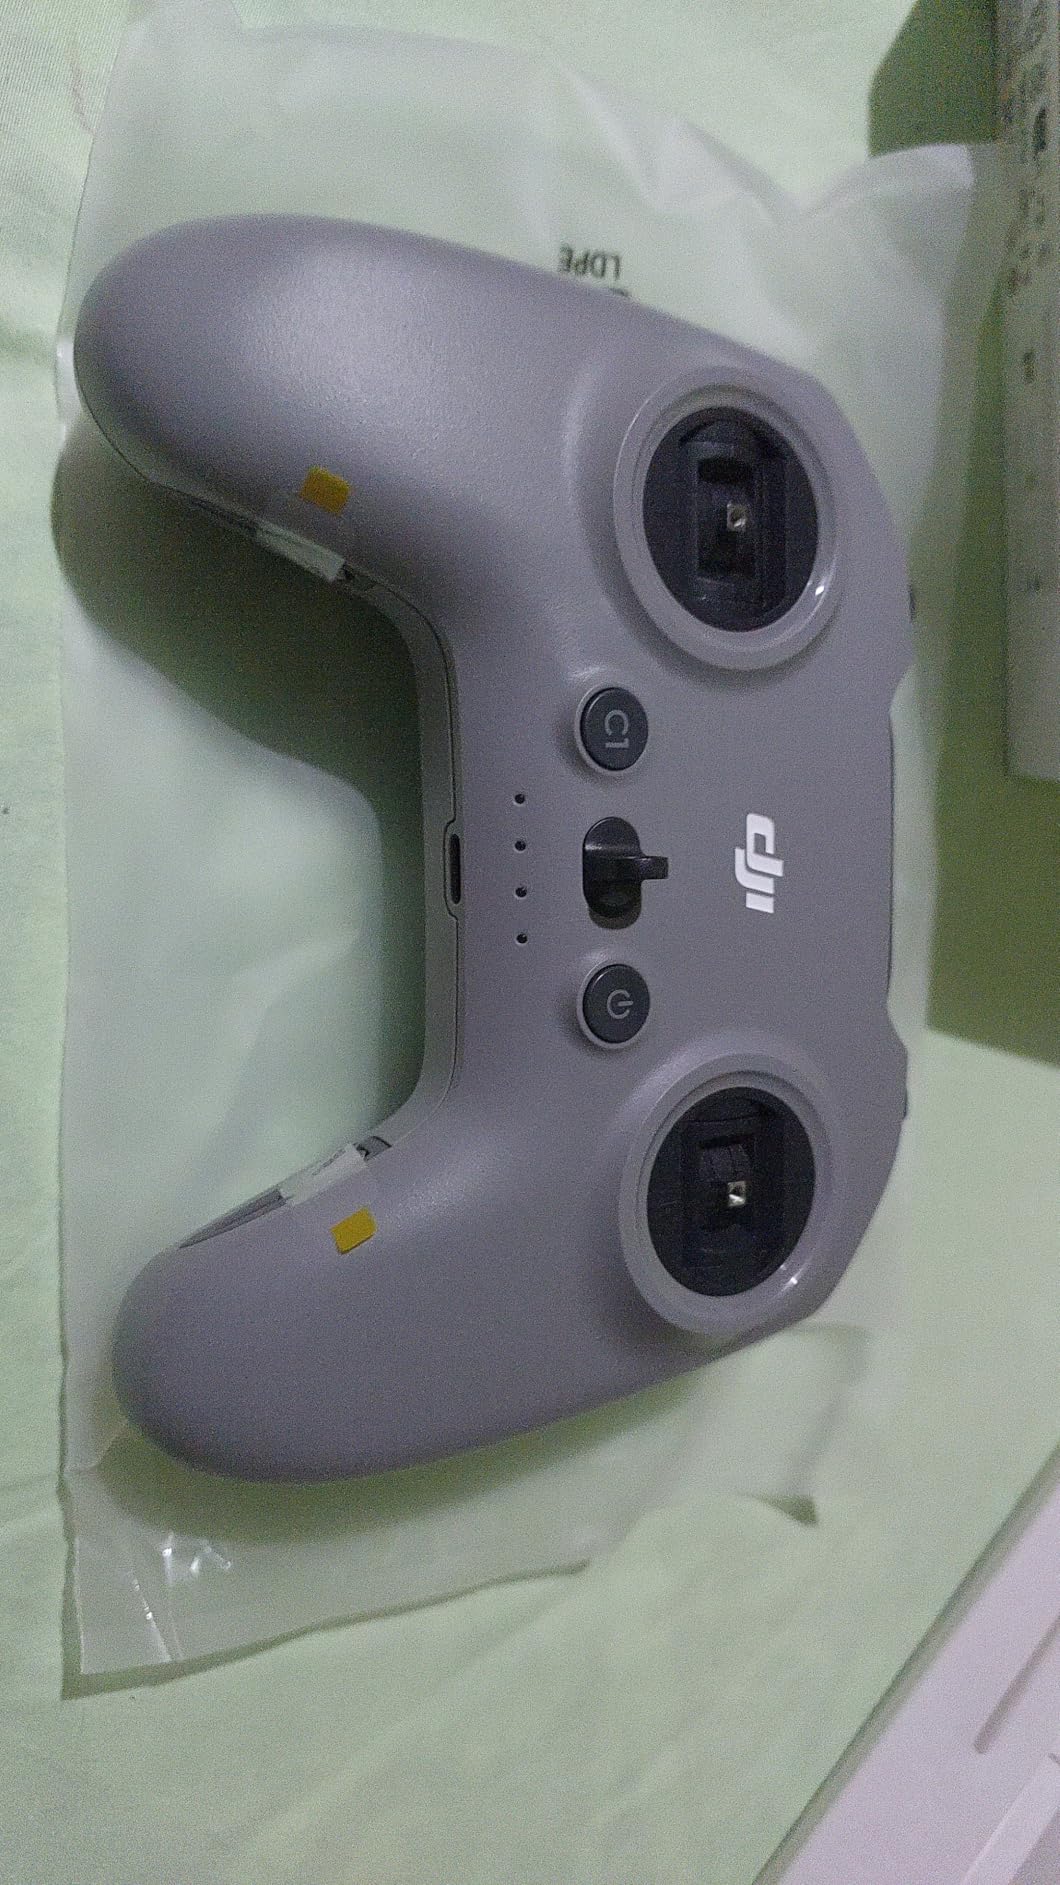
The O4 video transmission is noticeably more stable than previous generations. I have flown at distances over 500 meters without a single signal drop, and the image in my Goggles 3 stays clean and latency-free. The integrated antenna design means there is nothing to break off or position manually.
Battery life is exceptional at over 10 hours per charge. I have done full weekend flying trips on a single charge, which eliminates one more thing to worry about in your gear bag. The lighter weight compared to the predecessor is also noticeable during long sessions.
Learning Manual Mode
Switching from motion control to stick control is a significant adjustment, but the payoff is enormous. Start with simulator practice using Liftoff or The Drone Racing League, both of which are compatible with this controller via USB-C. I spent about ten hours in a simulator before my first Manual mode flight, and it made the transition smooth.
The controller supports Normal, Sport, and Manual modes, so you can gradually progress from assisted flying to full acro mode. This makes it one of the best accessories for DJI Avata pilots who want to develop their FPV skills over time.
Compatibility Details
The FPV Remote Controller 3 works with the DJI Avata 2, DJI Neo, DJI O3 Air Unit, and DJI O4 Air Unit series. It does NOT work with the original DJI Avata or older DJI FPV drones that use the O3 transmission system, so verify your drone compatibility before purchasing.
If you fly the original Avata, you would need the older FPV Remote Controller 2 instead. This is a common point of confusion mentioned frequently in forum discussions.
9. SYMIK Remote Controller Lanyard – Comfort for Long Sessions
SYMIK Remote Controller Lanyard for DJI FPV/Avata/2, Phantom 4/3, Inspire FPV Remote Controller 3/2, Adjustable Neck Strap Lanyard for DJI Avata 2 Accessories Shoulder Strap w/Comfortable EVA Padding
Wide DJI controller compatibility
High-density EVA padding
Adjustable 21 to 28 inches
Silicone reinforced stitching
Pros
- Comfortable EVA padding for long sessions
- Easy attach and detach mechanism
- Adjustable length for all users
- Secure carabiner locking
- Wide compatibility across DJI controllers
Cons
- Bracket attachment sold separately
- Some prefer dual-shoulder strap designs
Holding a controller for extended flying sessions gets fatiguing, and the SYMIK lanyard solves this problem for a surprisingly reasonable price. The EVA padding distributes the weight across your neck comfortably, and I can fly for an hour or more without the wrist fatigue that used to cut my sessions short.
The adjustment range from 21 to 28 inches accommodates different body types and flying postures. I am 6 feet tall and use it near the maximum extension, while shorter pilots on my team preferred the shorter settings. The silicone stitching reinforcement gives me confidence this strap will last.
Compatibility is excellent across the DJI ecosystem. The lanyard works with the FPV Remote Controller 2 and 3, original Avata motion controller, and even older DJI products like the Phantom series. This means if you own multiple DJI drones, one lanyard covers them all.
The quick-release hook is a thoughtful detail that lets you detach the controller instantly without fumbling with clips. When you need to set the controller down to swap a battery or adjust your goggles, a simple press releases the connection.
Neck Strap vs Shoulder Strap
The SYMIK is a neck lanyard design, which distributes weight across the back of your neck. For most pilots and controller weights, this is sufficient and comfortable. If you fly for extremely long sessions or have neck issues, a dual-shoulder harness design may be worth considering as an alternative.
I have used this lanyard exclusively with the FPV Remote Controller 3, which weighs about 240 grams. The EVA padding handles this weight comfortably for sessions up to two hours. Beyond that, I start to feel some neck fatigue, which is when I take a break.
Installation and Setup
You will need a compatible bracket to attach the lanyard to your specific controller. The lanyard includes the neck strap and quick-release hook, but the bracket that screws into the controller is sold separately for some models. Check the product listing carefully to ensure you order the correct bracket.
For the FPV Remote Controller 3, the bracket mounts to the existing attachment point on the back of the controller. Installation takes about two minutes and requires no tools beyond the included hardware.
10. Lykus Titan AT200 Waterproof Hard Case – Best Value Hard Case
Lykus Titan AT200 Hard Case for DJI Avata 2,Goggles 3(NOT N3),FPV/Motion RC
IP67 waterproof rating
CNC precision-cut EVA foam
Holds drone, goggles, 7 batteries
Polypropylene shell
Lifetime warranty
Pros
- Excellent storage for complete kit
- SGS certified IP67 waterproofing
- High quality CNC cut foam
- Lifetime limited warranty
- Great value vs DJI cases
Cons
- Does not fit Goggles N3
- Charger placement under drone is awkward
- No wheels for transport
Protecting your Avata 2 investment during transport is critical, and the Lykus Titan AT200 delivers professional-grade protection at a fraction of what premium case brands charge. I have taken this case on road trips, through airport baggage handling, and into dusty desert environments, and everything inside has stayed perfectly safe.
The IP67 waterproof rating is SGS certified, which means it has been independently tested rather than just marketed as water-resistant. I accidentally left it in light rain for about 20 minutes and the interior was completely dry. The polypropylene shell is tough enough that I have stood on it without any deformation.
Interior storage is well thought out. The CNC-cut EVA foam has compartments for the drone with guards attached, Goggles 3, RC Motion 3, FPV Remote Controller 3, up to seven batteries, the charging hub, power adapter, cables, filters, and spare propellers. Everything has a dedicated slot.
The foam quality is noticeably better than cheaper cases. It is denser and more precisely cut, which means accessories fit snugly without shifting during transport. The lid has a matching foam layer that presses down on the contents to keep everything locked in place.
What Fits and What Does Not
The AT200 is designed for the DJI Avata 2 with Goggles 3 and will NOT accommodate the Goggles N3. This is an important compatibility note if you purchased a bundle that includes the N3 goggles instead of the standard Goggles 3.
The case holds the drone with bumper guards and gimbal bumper installed, which saves you from removing accessories every time you pack up. Up to seven batteries fit in the dedicated slots, making this ideal for pilots who carry multiple spares for extended sessions.
Travel and Transport Considerations
At 4.6 pounds empty and dimensions of 16.4 by 13.4 by 5.7 inches, this case fits within most airline carry-on size restrictions. The lack of wheels means you will be carrying it by hand, but the handle is comfortable and the weight is manageable even when fully loaded.
The snap closure is secure and has never opened accidentally during transport. For added security, the case has holes for padlocks if you want to lock it for checked baggage. The lifetime limited warranty provides additional peace of mind for a case you plan to use for years.
11. Lekufee Waterproof Hard Case – Premium Storage with Compartments
Lekufee Waterproof Hard Carrying Case for DJI Avata 2,Fly More Combo,Goggles 3(NOT for Goggles N3),RC Motion 3,FPV Remote Controller 3 and Accessories(Case Only)
IP67 waterproof and dustproof
14 organized compartments
Custom EVA foam for Avata 2
Polypropylene exterior
6.06 lbs with double spinner
Pros
- Custom foam for complete Fly More Combo
- IP67 waterproof protection
- 14 compartments for organization
- Holds 7 batteries and accessories
- Suitable for extreme outdoor environments
Cons
- Does not fit Goggles N3
- Heavier and bulkier than alternatives
The Lekufee case steps up from the Lykus with more compartments and a slightly different organizational approach. I tested both cases extensively, and the Lekufee wins if you carry a wide variety of accessories and want everything sorted into its own dedicated space.
The 14 compartments are the standout feature. Instead of large open areas, the Lekufee gives you individual slots for batteries, cables, filters, SD cards, props, and small accessories. This level of organization saves time during setup and teardown because you always know exactly where everything is.
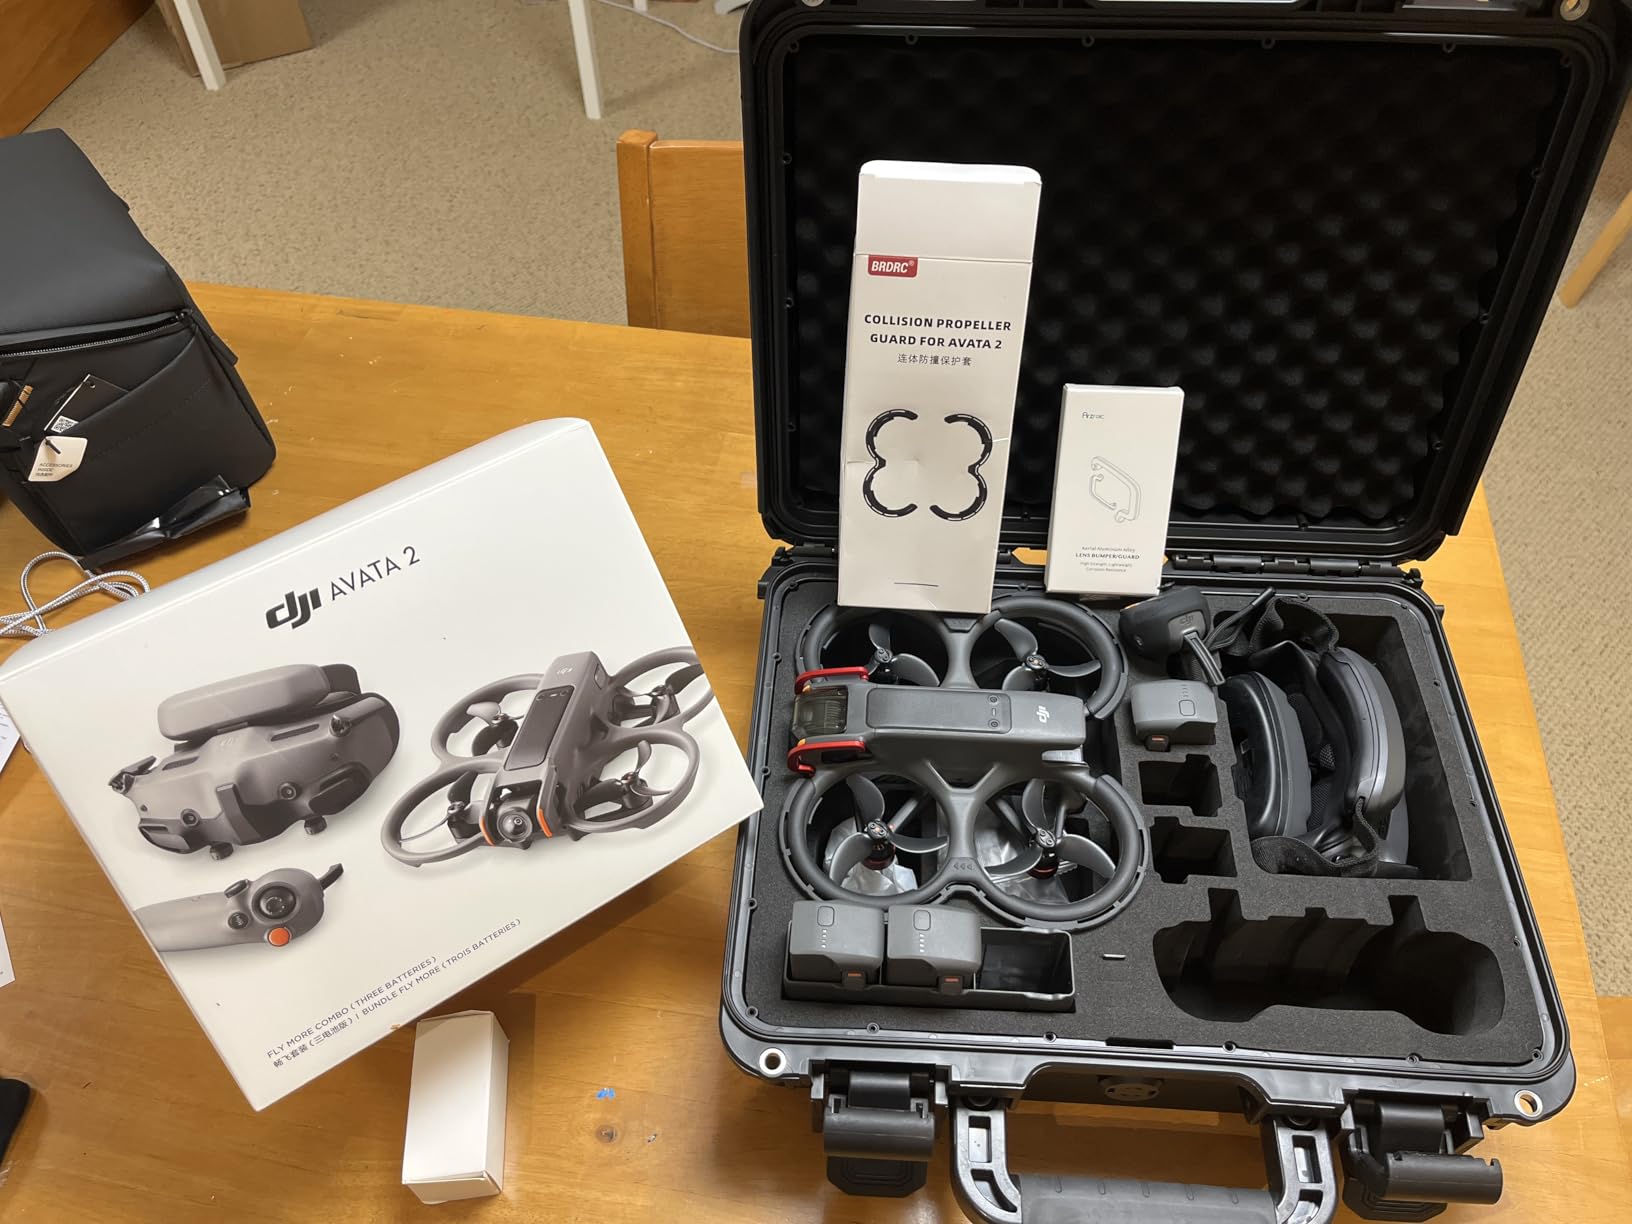
The IP67 waterproof and dustproof rating matches the Lykus, and the high-strength polypropylene exterior provides the same level of impact protection. I took this case to a beach flying session and it kept sand and salt spray completely out of the interior.
The custom EVA foam is precision-cut for the DJI Avata 2 Fly More Combo, meaning every piece of the standard kit fits perfectly. The drone, goggles, motion controller, FPV Remote Controller 3, batteries, charging hub, and accessories all have designated spots.
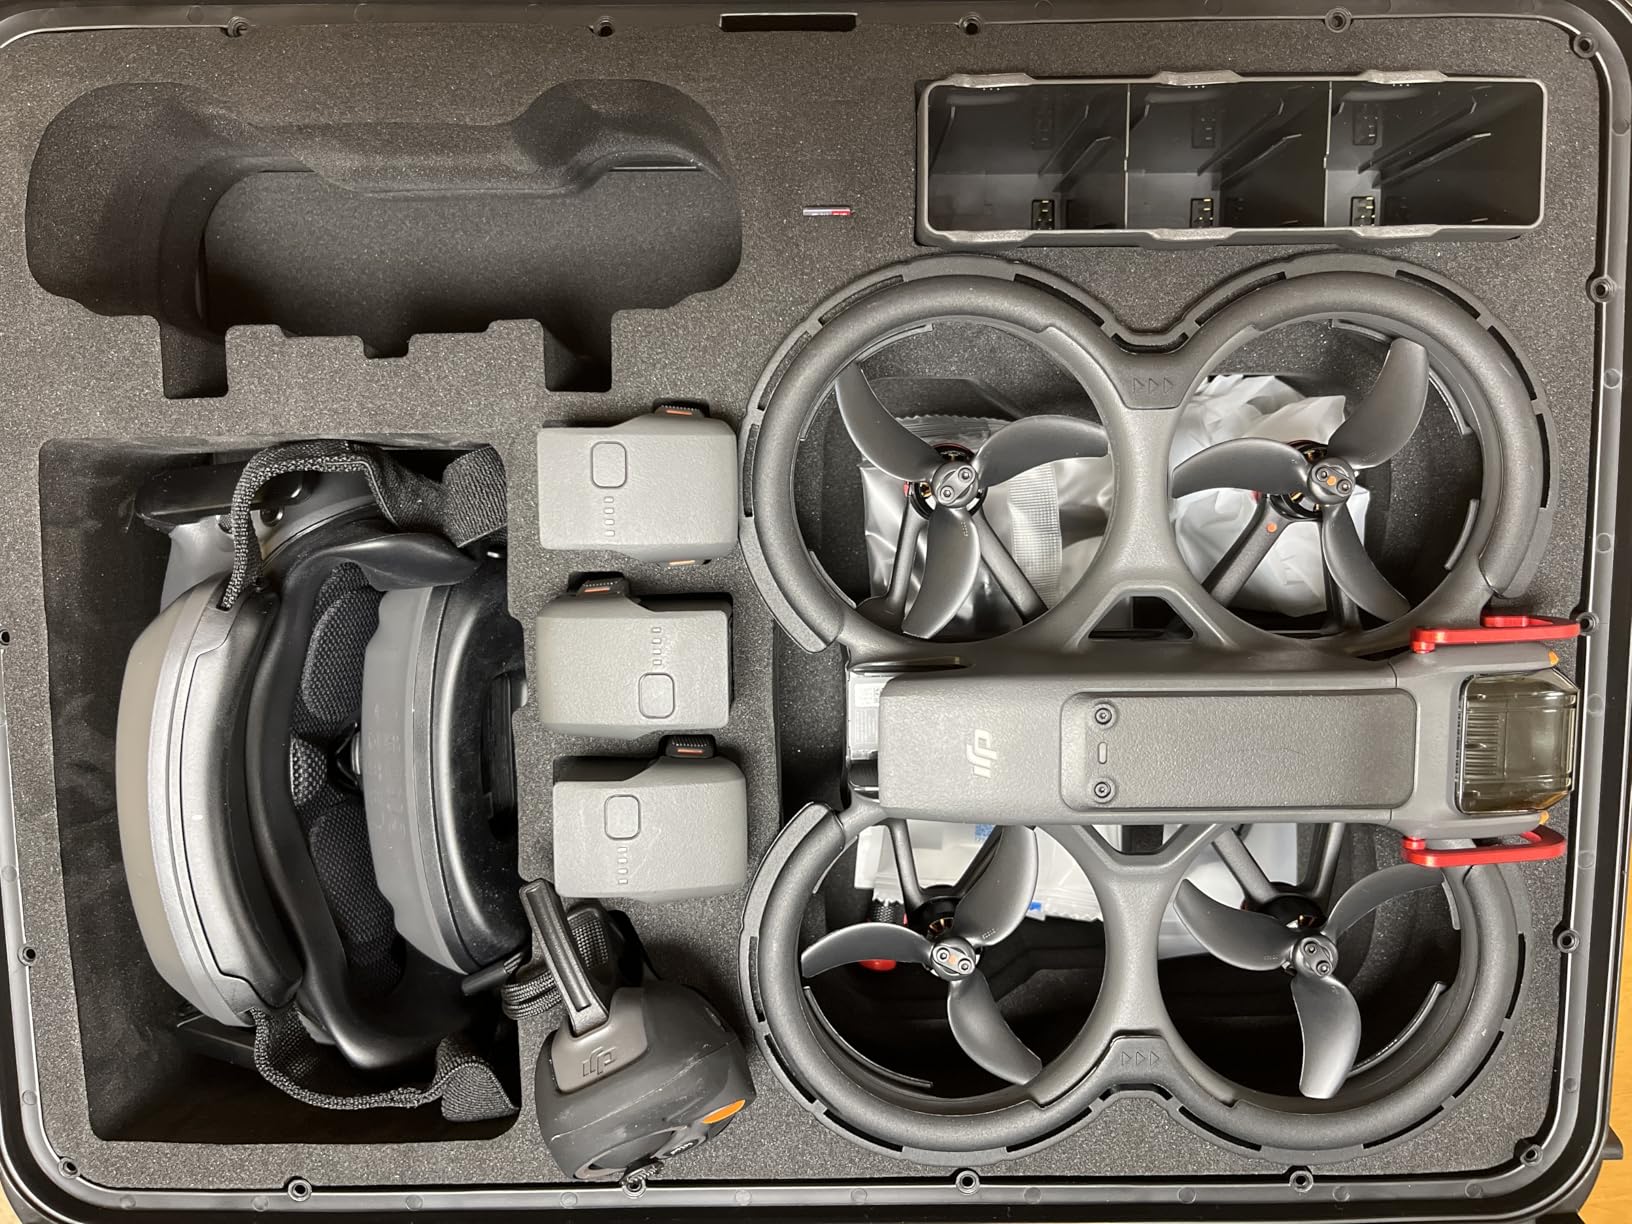
Comparing Lekufee vs Lykus Hard Cases
Both cases offer IP67 protection and custom foam for the Avata 2, but they differ in organization philosophy. The Lekufee has more compartments and is better for pilots who carry lots of small accessories. The Lykus is slightly lighter and has a cleaner, simpler layout.
The Lekufee weighs 6.06 pounds compared to the Lykus at 4.6 pounds, which is noticeable when carrying for long distances. The double spinner buckle closure on the Lekufee feels more secure than the Lykus snap closure, which may matter if you check the case on flights.
Outdoor Durability for Extreme Conditions
Lekufee specifically markets this case for extreme environments including deserts, beaches, rain forests, and snow mountains. Based on my testing in dusty and wet conditions, the protection holds up as advertised. The case seals tightly and the pressure relief valve prevents vacuum lock at altitude changes.
If you travel to challenging environments for your drone photography or videography, this case provides the level of protection that gives you confidence your gear will arrive ready to fly.
12. STARTRC Landing Gear – Foldable Ground Clearance
STARTRC Landing Gear for DJI AVATA 2 Drone Accessories,Foldable Extended Landing Legs Kit for DJI AVATA 2 Drone Protector, black
Adds 22mm ground clearance
Foldable quick-release design
ABS plastic construction
Weighs only 13.5 grams
Turtle mode compatible
Pros
- Protects gimbal on rough terrain
- Lightweight at 13.5 grams
- Foldable for easy storage
- Does not block turtle mode
- Quick snap-on installation
Cons
- Some durability concerns over time
- Limited protection on very rough surfaces
The STARTRC landing gear adds 22 millimeters of ground clearance to your Avata 2, which sounds minor until you try taking off from grass, gravel, or uneven terrain. I learned the value of this the hard way after a grass landing sent debris into my gimbal on a windy day.
At 13.5 grams, the impact on flight performance is essentially zero. I measured flight times before and after installation and found no perceptible difference. The foldable design means the legs tuck away compactly for storage, and the quick-release mechanism lets you snap them on or off in seconds.
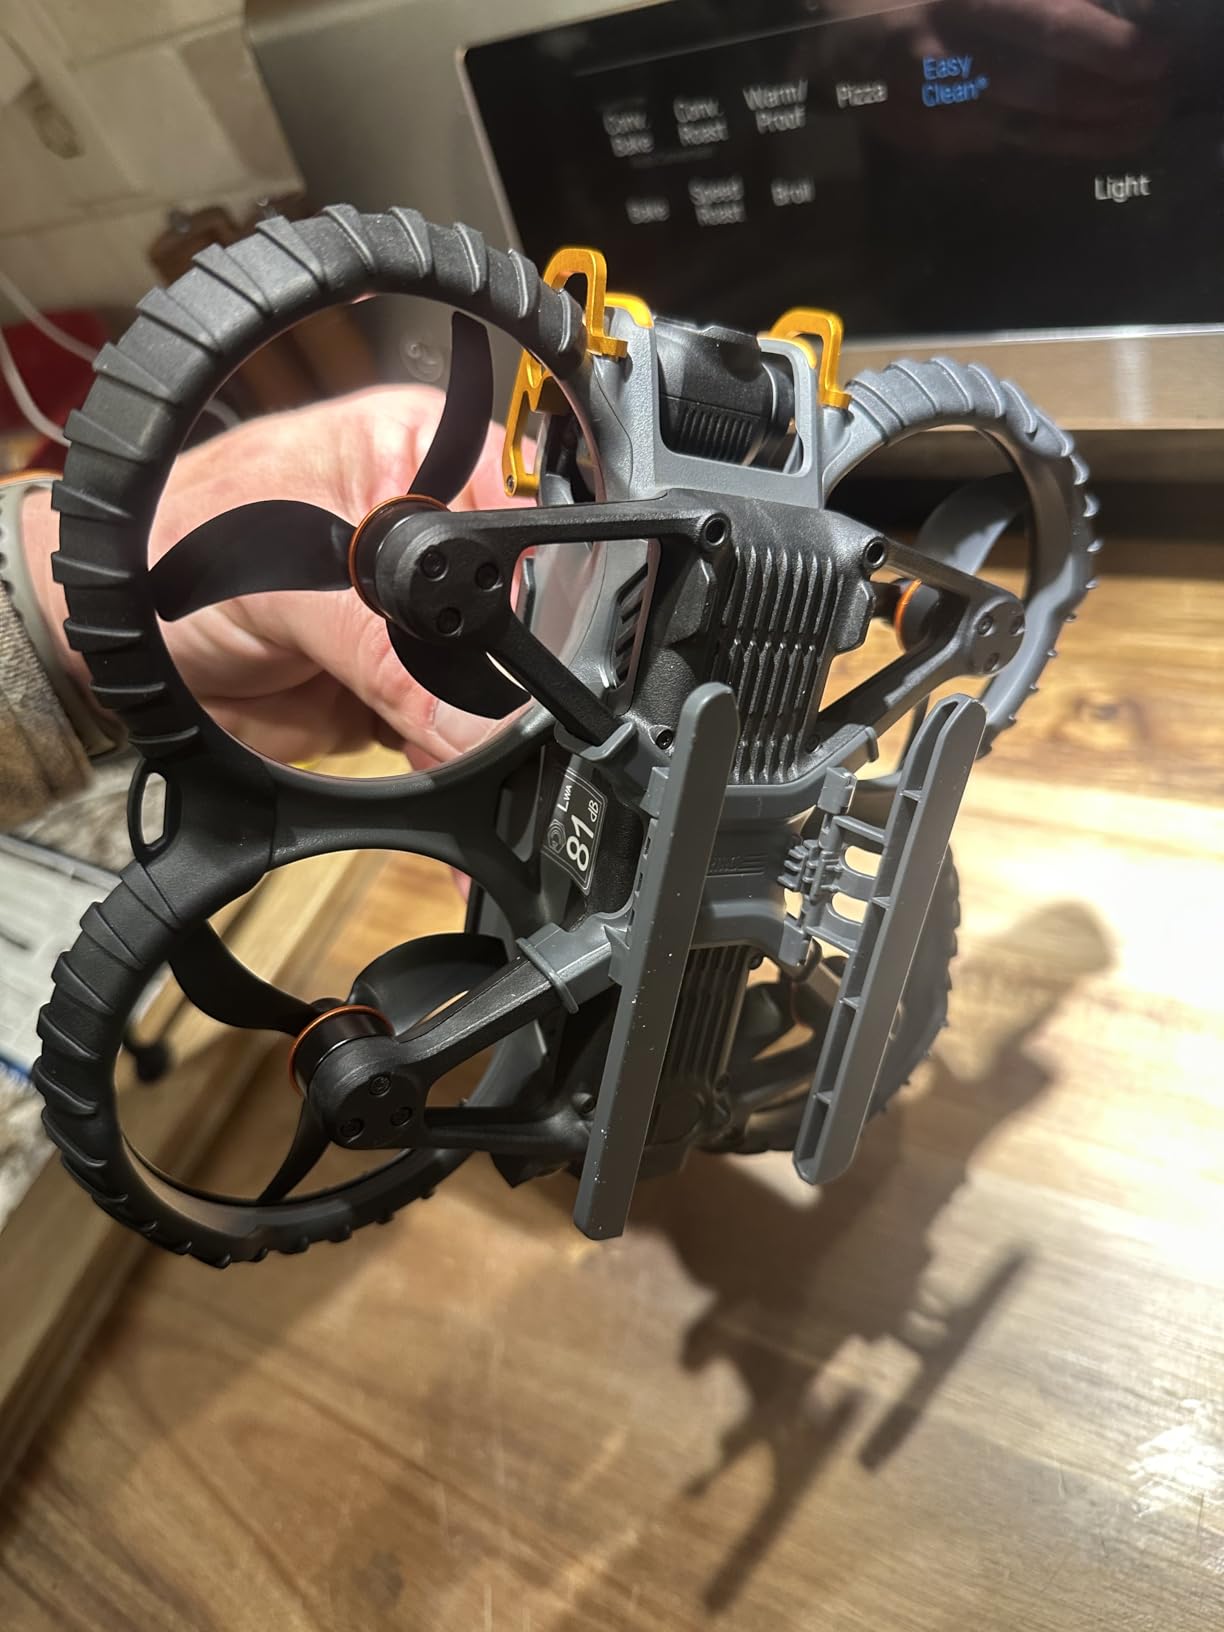
The gear does not interfere with turtle mode, which is the Avata 2 feature that lets you flip the drone over if it lands upside down. This was a concern before I tested it, but the legs are positioned to stay clear of the camera and propellers during the flip maneuver.
The ABS plastic construction is lightweight but not indestructible. Some users have reported the legs breaking after hard landings or rough handling. I have not experienced this, but I also avoid slamming the drone down on the gear during aggressive landings.
When Landing Gear Matters Most
Grass fields, gravel paths, sandy beaches, and rocky terrain are the scenarios where landing gear makes the biggest difference. Without it, the gimbal and camera sit very close to the ground on the Avata 2, leaving them vulnerable to scratches, debris, and moisture.
For pilots who fly exclusively from smooth surfaces like concrete or pavement, landing gear is less critical. But if your flying spots include any type of natural terrain, the STARTRC gear is cheap insurance for your camera system.
Installation and Compatibility
The landing gear snaps onto the curved underside of the Avata 2 without tools. The design follows the contour of the drone body and does not block any sensors or the downward camera. Installation takes about five seconds, and removal is equally fast thanks to the quick-release tabs.
This gear is designed specifically for the DJI Avata 2 and will not fit the original Avata. The attachment points and body curvature are different between the two models, so verify your drone model before ordering.
Buying Guide: How to Choose DJI Avata Accessories?
Building your accessory kit does not have to happen all at once. Based on my experience and community feedback from forums like r/DJIAvata2, here is how to prioritize your purchases depending on your flying style and budget.
Protection vs Performance Trade-offs
Every accessory you add to your drone affects its performance in some way. Bumper guards add wind resistance, landing gear adds weight, and even gimbal bumpers change the aerodynamics slightly. The key is understanding which trade-offs are worth it for your specific flying conditions.
For beginners, protection should be the priority. A gimbal bumper, propeller guard, and landing gear will save you from costly repairs while you learn. As your skills improve, you can gradually remove protective accessories to maximize flight performance.
Avata 1 vs Avata 2 Compatibility
This is one of the most common sources of confusion in the DJI Avata accessory market. The two drones have different dimensions, different propeller cage designs, and different camera housings. Many accessories are model-specific and will not cross-fit.
Always verify compatibility before purchasing. Product listings usually state which model they fit, but I have seen cases where the listing was inaccurate. When in doubt, check forum discussions or contact the seller to confirm.
Essential vs Nice-to-Have Accessories
If I had to recommend a starter kit, it would include a gimbal bumper, spare batteries, and a charging hub. These three items address the most common pain points: camera damage, short flight sessions, and battery management overhead.
ND filters, a quality hard case, and bumper guards are the next tier of upgrades. These improve your footage quality, protect your investment during transport, and reduce crash damage respectively.
The FPV Remote Controller 3 is the premium upgrade that unlocks Manual mode flying. It is worth the investment if you are committed to developing advanced FPV skills, but it is not essential for pilots who are happy with Normal and Sport modes.
Budget vs Premium Decision Making
Third-party accessories from brands like MINGVEN, BRDRC, and Arzroic offer excellent value compared to DJI-branded alternatives. In my testing, the quality gap between good third-party accessories and OEM parts has narrowed significantly in recent years.
For batteries and charging equipment, I recommend sticking with genuine DJI products due to the safety and reliability factors. For protection, storage, and convenience accessories, third-party options deliver great value.
FAQs
What accessories should I get for DJI Avata 2?
The most essential accessories for DJI Avata 2 are a gimbal bumper guard for camera protection, spare Intelligent Flight Batteries for extended air time, and a Two-Way Charging Hub for efficient battery management. After those basics, ND filters improve footage quality, bumper guards add crash protection, and a waterproof hard case keeps your gear safe during transport.
Do you need ND filters for DJI Avata 2?
ND filters are not strictly required, but they are strongly recommended if you want cinematic footage. They allow you to maintain proper shutter speeds in bright conditions, which creates natural motion blur and smoother video. Without ND filters, your footage may look choppy and overexposed on sunny days.
What is the best SD card for DJI Avata 2?
The DJI Avata 2 requires a microSD card with at least U3, A2, and V30 speed ratings for reliable 4K recording. Look for cards from SanDisk Extreme, Samsung EVO Select, or Lexar Professional with capacities between 128GB and 512GB. Avoid budget cards without the U3 A2 V30 rating, as they may cause recording errors.
What is the best carry case for DJI Avata 2?
The Lykus Titan AT200 and Lekufee Waterproof Hard Case are both excellent options for the DJI Avata 2. Both offer IP67 waterproof protection and custom foam cutouts for the complete Fly More Combo. The Lykus is lighter and more affordable, while the Lekufee offers more compartments for organization.
Conclusion
Building out your DJI Avata accessory kit transforms the flying experience from good to great. The best accessories for DJI Avata pilots balance protection, performance, and convenience without adding unnecessary weight or complexity. Start with a gimbal bumper and spare batteries, then add ND filters and a quality hard case as your needs grow.
My top recommendation is the MINGVEN ND Filters 6-Pack for the immediate improvement in footage quality, paired with the BRDRC Bumper Guards for crash protection during practice. For pilots ready to advance their skills, the DJI FPV Remote Controller 3 is the upgrade that unlocks the full potential of your Avata 2 in 2026.
Each product in this guide earned its place through hands-on testing and real-world use. Pick the accessories that match your flying style, and enjoy the incredible experience that FPV flying with the DJI Avata has to offer.