
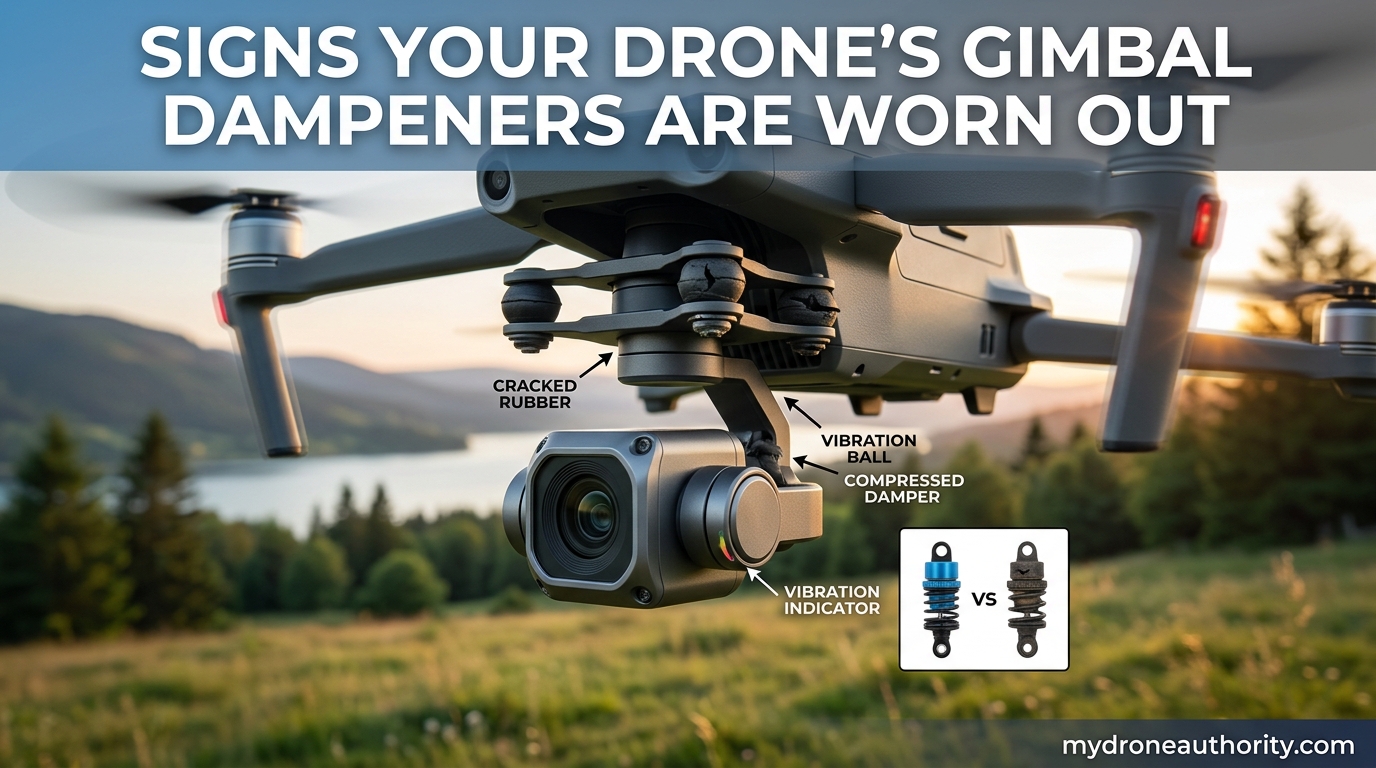
I learned about gimbal dampeners the hard way. After two years of flying my drone nearly every weekend, I started noticing strange wobbles in my aerial footage that I could not explain. The horizon kept tilting, even when I was hovering. It turned out my gimbal dampeners were worn out, and I had ignored the warning signs for months. This guide covers everything I wish someone had told me earlier: the visual cues, the sounds, the flight behavior, and exactly how to inspect your own setup.
Gimbal dampeners are small, often overlooked rubber components, and they fail quietly until your footage tells the story. By the end of this article, you will know the exact signs your drone’s gimbal dampeners are worn out, how to confirm your suspicion with a hands-on inspection, and what to do next.
Table of Contents
What Are Gimbal Dampeners and What Do They Do
Gimbal dampeners are small rubber or elastomer components that absorb vibration between the gimbal assembly and the drone body. They act as mechanical shock absorbers, isolating the camera and motor from frame vibrations caused by the propellers, motors, and wind. On most modern drones, these dampeners look like small rubber balls, rubber rings, or molded mounts that surround the studs connecting the gimbal plate to the airframe.
Without functioning dampeners, every high-frequency vibration from the drone body would transfer directly to the camera sensor. The result is shaky footage, jello effect (a wavy distortion in video), and an unstable horizon line. The dampeners essentially give the gimbal a soft, suspended platform to operate from. They are a small part doing a big job.
Most consumer drones use two to four dampeners, typically one at each corner of the gimbal yoke. They are usually made of a specialized vibration-damping rubber compound chosen for its ability to absorb a wide range of frequencies without becoming brittle over time. When they work, you never notice them. When they fail, your footage falls apart.
How Gimbal Dampeners Age and Degrade
Gimbal dampeners degrade over time through UV exposure, heat cycles, vibration, and physical impact. The rubber compounds used in dampeners are designed to flex millions of times, but they are not immortal. Sunlight breaks down the polymer chains, heat accelerates that breakdown, and every hard landing or crash compresses the rubber past its designed range.
From my own research and feedback from pilots on the Phantom Pilots forum, dampeners can last anywhere from 200 to over 1,000 flight hours, depending on conditions. One experienced user noted that even with UV exposure, the dampener life is very high if you simply inspect the edges for cuts. That matches what I have seen personally: it is rarely sudden failure, but slow degradation that gets worse with each flight.
The degradation process follows a predictable pattern. The rubber first loses elasticity, becoming stiffer. It then develops micro-cracks, often near the mounting holes. Over time, those cracks grow, the dampener deforms permanently, and in some cases (especially DJI Matrice models) a damping fluid can begin to leak out. Once a dampener loses elasticity, it can no longer absorb high-frequency vibration effectively.
Visual Signs Your Gimbal Dampeners Are Worn
The clearest visual signs include cracks, tears, permanent deformation, hardening, and fluid leaks from the dampeners. These are the easiest symptoms to spot because they do not require flying the drone. You can spot most of them during a routine pre-flight check.
Here is what to look for, from most to least obvious:
- Visible cracks or splits: Hairline cracks on the rubber surface, especially near the mounting holes or stud openings, are an early warning sign. Even small cracks will grow over time.
- Permanent deformation: A new dampener returns to its original shape after you press it. A worn one stays compressed or develops flat spots.
- Hardening or glazing: The rubber surface looks shiny or feels noticeably stiffer than the other dampeners. Hard rubber cannot absorb vibration the way flexible rubber can.
- Fluid leaks: On dampeners that use damping gel or fluid (common in DJI Matrice and some Phantom models), you may see white or clear fluid seeping out. This is a clear sign the unit has failed internally.
- Separation or tearing at the studs: The plastic or metal stud pulls away from the rubber, creating a visible gap. This is the failure mode I experienced, and it is very common after small crashes.
- Discoloration: Yellowing, darkening, or chalky patches indicate the rubber is breaking down chemically from UV exposure.
If you spot any of these signs, the dampener is past its service life. I recommend replacing it before the next flight, because the failure usually gets worse, not better.
Audio Signs: Sounds of a Failing Dampener
A failing dampener typically produces a buzzing, grinding, or rattling sound when the gimbal is powered on or moved. These sounds are most audible in a quiet room, before takeoff, when the gimbal goes through its initial self-test. I recommend every pilot get familiar with what a healthy gimbal sounds like so that changes become obvious.
Common audio symptoms include:
- Buzzing during self-test: A high-pitched electrical buzz that lasts longer than usual during the gimbal initialization. The motor is working harder to compensate for poor isolation.
- Grinding or scraping: A harsher, mechanical sound that often means the gimbal is contacting the frame because the dampeners no longer hold it in proper alignment.
- Rattling on light movement: Gently tilting the drone (powered off) and listening for any loose, rattling components. Worn dampeners lose their grip on the gimbal yoke.
- Clicking or popping: Intermittent clicks as the gimbal moves through its range usually mean a cracked dampener is flexing unevenly.
If you hear any of these, power down the drone immediately and inspect the dampeners visually. Continuing to fly can damage the gimbal motor, the IMU, or the ribbon cable connecting the camera, and those repairs are much more expensive than a set of dampeners.
Behavioral Symptoms: How Worn Dampeners Affect Footage
Worn dampeners cause jello effect, jitter, wobble, uneven horizon lines, and gimbal motor overload errors during flight. These are the symptoms that pilots usually notice first because they show up in the recorded video, and they are the reason most people start searching for answers.
Here are the most common behavioral signs to watch for in your footage and flight controller warnings:
- Jello effect: A wavy, ripple-like distortion in the video, especially noticeable on straight lines like building edges. This is the classic symptom of vibration reaching the camera sensor.
- High-frequency jitter: Rapid, small shakes in the footage even during smooth flight or hovering. The gimbal motor cannot fully compensate for the high-frequency vibration the dampeners are supposed to absorb.
- Wobble on yaw movements: When you pan the drone left or right, the horizon wobbles or bounces. Healthy dampeners keep the gimbal stable during these inputs.
- Uneven horizon line: The horizon tilts slightly even when the drone is perfectly level, especially during forward flight or braking.
- Gimbal motor overload error: The flight controller throws an error and may restrict flight. According to DJI support, this often happens because the gimbal is damaged, stuck by debris, or misshapen, reducing stabilization.
- Vibration during low-altitude flight: Wobble gets noticeably worse close to the ground because ground effect amplifies motor vibration.
If you see one or two of these symptoms occasionally, do not panic. A single prop imbalance, a loose screw, or even a bad IMU calibration can mimic damper wear. But if you see multiple symptoms consistently across different flights, the dampeners are the most likely culprit.
Step-by-Step Inspection Guide
Inspect your gimbal dampeners in six steps: power off the drone, remove the gimbal clamp, visually inspect, press-test the rubber, check for fluid, and reassemble carefully. This whole process takes about 10 to 15 minutes once you have done it a few times. I recommend doing it every 50 flight hours, or after any hard landing.
Follow these steps:
- Power off the drone completely and remove the battery. Wait 30 seconds for any residual charge in the gimbal capacitors to dissipate.
- Remove the gimbal clamp or guard that holds the gimbal in place during transport. Most drones have a foam or plastic clamp that you unclip or slide off. The gimbal should now hang freely on its dampeners.
- Visually inspect each dampener under good lighting. Use a flashlight to look at the inner surfaces and around the mounting studs. Note any cracks, deformation, discoloration, or fluid.
- Press-test the rubber with a fingertip. A healthy dampener feels spongy and returns to shape. A worn one feels hard, or stays compressed. Compare all four dampeners; they should feel similar.
- Check for fluid leaks by looking for wet or oily residue on the dampener surface or on the gimbal plate below. White residue is a strong sign of internal fluid dampener failure.
- Reassemble carefully by reattaching the gimbal clamp, powering on the drone, and watching the gimbal self-test. It should be smooth, quiet, and level. If you see new warning messages, you have confirmed the issue.
Tip: Take a photo of the dampeners before reassembly. Comparing photos over time makes it much easier to spot gradual changes you might otherwise miss.
Common Causes of Premature Wear
Premature wear typically results from crashes, hard landings, extreme temperatures, prolonged UV exposure, and overloading the gimbal. Knowing the causes helps you extend the life of your next set of dampeners.
From forum reports and my own experience, here are the most common accelerants of dampener wear:
- Crashes and hard landings: Even small impacts can snap the plastic studs that anchor the rubber. A user on the Yuneec Pilots forum reported broken upper dampeners after regular use with no major crash, which is more common than people think.
- UV and heat exposure: Leaving the drone in a hot car or in direct sunlight degrades the rubber compounds quickly. Store your drone in a cool, shaded case whenever possible.
- Cold weather operation: Rubber stiffens significantly in cold temperatures, reducing its ability to absorb vibration. Pilots flying in winter often see damper-related symptoms that disappear when temperatures rise.
- Overloading the gimbal: Adding third-party filters, lens adapters, or heavier cameras than the gimbal is rated for will stress both the motor and the dampeners.
- Carrying the drone without the gimbal clamp: Without the clamp, the gimbal swings freely and can stretch or tear the dampeners during transport. Always use the clamp when moving the drone.
Most of these are easy to control with good habits. The next section explains what to do once you have confirmed the damage.
When to Replace vs. Repair
Replace dampeners when you see visible damage, fluid leaks, or persistent vibration; seek professional service for motor or ribbon cable damage. This distinction is important because replacing dampeners is a relatively simple, low-cost job, while motor or cable repairs often require specialized tools and can run into hundreds of dollars.
Here is how to decide:
Replace the dampeners yourself when: You see cracks, hardening, deformation, or fluid leaks on the rubber itself, and the gimbal motor still moves smoothly during the self-test. Replacement dampeners are inexpensive, widely available for popular drone models, and the swap usually takes 20 to 45 minutes with basic tools and online video guidance. According to the Phantom Pilots forum, this is a routine DIY job most pilots can handle.
Send it to a professional service center when: The gimbal motor itself is grinding or not responding, the ribbon cable is frayed or disconnected, the camera is loose on the gimbal plate, or you are still seeing the same symptoms after installing new dampeners. These symptoms usually point to motor wear, magnet weakening, or cable damage, and DJI or an authorized service center will have the calibration tools to do the job properly.
For DJI drones, official repair costs for gimbal motor replacement typically run several hundred dollars including labor, which is why catching damper wear early is so valuable. A $15 to $30 set of dampeners can prevent a $400 motor replacement.
Prevention and Maintenance Tips
Prevent premature wear by storing your drone away from direct sunlight, inspecting dampeners every 50 flight hours, and using a gimbal clamp during transport. A small maintenance habit will save you from most of the symptoms covered in this guide.
Here is the routine I follow and recommend:
- Inspect every 50 flight hours: Add a quick visual check of the dampeners to your regular pre-flight routine. The 5-minute inspection has saved me from at least two mid-flight failures.
- Always use the gimbal clamp during transport: The clamp holds the gimbal in its designed position, taking stress off the dampeners.
- Store in a cool, dry, shaded case: UV and heat are the two biggest environmental factors in dampener aging. A simple padded case goes a long way.
- Avoid flying in extreme cold when possible: If you must fly, let the drone warm up for a few minutes before aggressive maneuvers, and check the dampeners afterward.
- Update firmware regularly: Some gimbal motor overload errors are firmware-related, and DJI has released updates that improve the gimbal controller’s tolerance for vibration.
- Balance your propellers: An unbalanced prop produces extra vibration that the dampeners have to absorb, accelerating their wear.
These six habits have extended the life of my dampeners well past what I was getting on my first set. None of them take more than a minute per flight.
Frequently Asked Questions
How to tell if a gimbal bearing is bad?
You can tell a gimbal bearing is bad by listening for grinding, buzzing, or rattling during the gimbal self-test, and by checking for uneven resistance when you gently rotate the gimbal by hand (with the drone powered off). Worn bearings feel gritty, loose, or produce a rough sound as the gimbal moves through its range.
How to fix drone gimbal shaking?
To fix drone gimbal shaking, first inspect the dampeners for cracks, deformation, or fluid leaks and replace any damaged ones. Then rebalance the propellers, recalibrate the IMU and gimbal through the app, update the firmware, and remove the gimbal clamp before flight. If shaking persists, the gimbal motor or ribbon cable may be damaged and need professional service.
Why is my DJI drone gimbal shaking?
Your DJI drone gimbal is most often shaking because of worn rubber dampeners, unbalanced propellers, a loose gimbal clamp left on, debris in the gimbal mechanism, or a damaged ribbon cable. Start with the dampeners and props since those account for the majority of cases.
How long do gimbal dampeners last?
Gimbal dampeners typically last between 200 and 1,000 flight hours depending on conditions. Heat, UV exposure, hard landings, and cold weather all shorten that lifespan. Inspecting them every 50 hours and storing the drone properly will keep them near the upper end of that range.
Can I replace drone gimbal dampeners myself?
Yes, most drone gimbal dampeners can be replaced at home with basic tools, a steady hand, and a good video guide for your specific model. The job usually takes 20 to 45 minutes. Just be careful with the ribbon cable and do not force any of the mounting studs, which can snap if over-tightened.
Final Thoughts
Recognizing the signs your drone’s gimbal dampeners are worn out early saves you from ruined footage and expensive motor repairs. The visual, audio, and behavioral symptoms covered here will catch nearly every case before it becomes serious. Run the six-step inspection the next time you service your drone, especially if you have noticed jello, jitter, or a strange buzz during the self-test.
If you have spotted two or more of the symptoms in this guide, order a replacement set of dampeners for your model and swap them in this week. A small repair now keeps your gimbal, your footage, and your next flight on track. If you found this useful, share it with another pilot who could use the warning signs before their next shoot.