
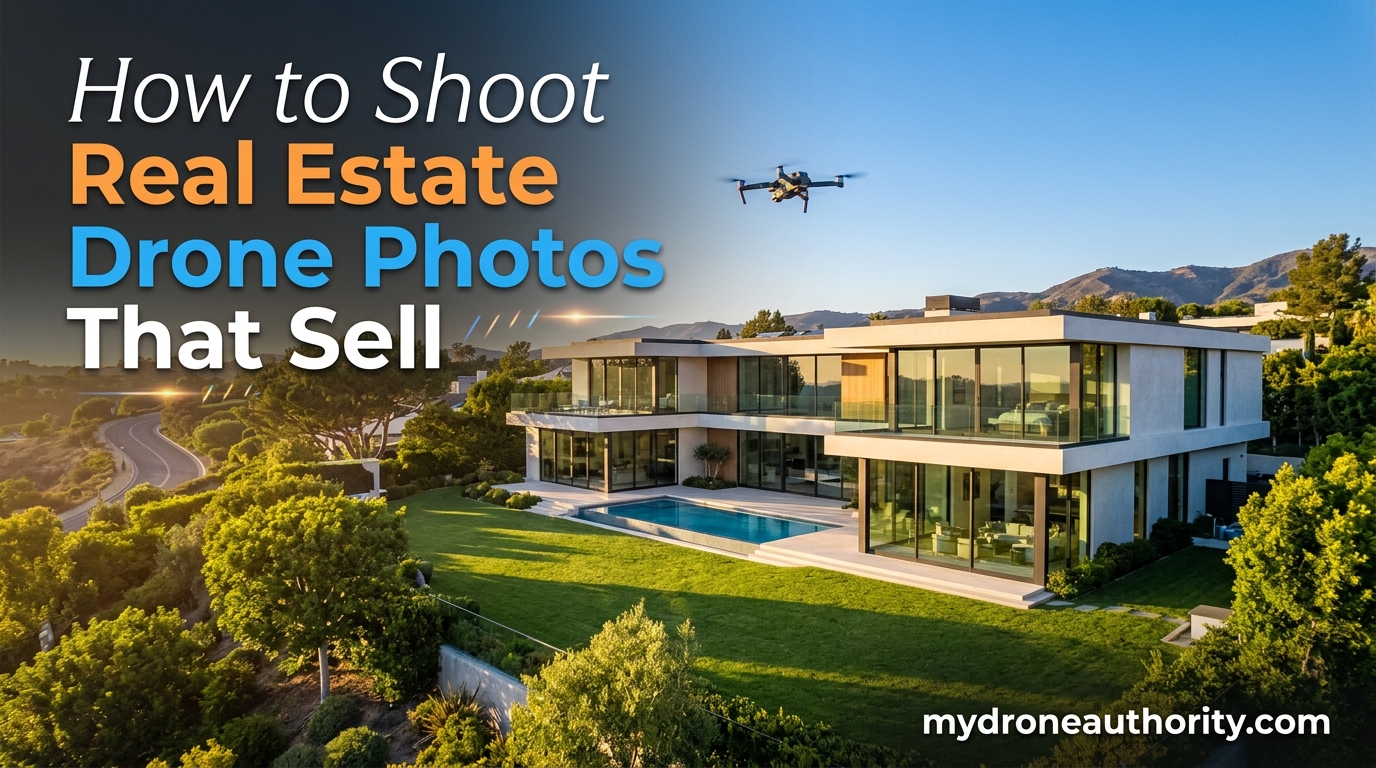
If you want to learn how to shoot real estate drone photos that sell, you’re in the right place. Listings with aerial photography sell 68% faster than those without, and properties featuring drone shots are 65% more likely to land in-person showings. Those two stats alone explain why realtors in 2026 are paying premium rates for pilots who can deliver clean, professional aerial imagery.
I’ve spent years flying camera drones over homes ranging from $200,000 starter properties to multi-million dollar estates. The difference between a photo that sells a listing and one that gets scrolled past comes down to planning, technique, and editing. Most beginners skip the prep work and end up with crooked horizons, blown-out skies, and grainy interiors.
This guide walks you through the full process: licensing, equipment, shot planning, camera settings, lighting, post-processing, and pricing. Whether you’re a realtor wanting to shoot your own listings or a photographer building a side business, you’ll have a complete workflow by the end. We’ll cover the exact shot list I use on every property, the settings that consistently produce listing-ready images, and the mistakes I see beginners make on their first 10 shoots.
Real estate drone photography is one of the most accessible ways to break into paid aerial work. The barrier to entry is reasonable, the demand is consistent, and once you build a portfolio, the work tends to repeat. Let’s get into it.
Table of Contents
What Is Real Estate Drone Photography?
Real estate drone photography is the practice of using a camera-equipped drone to capture aerial photos and videos of properties for sale. Instead of shooting only from the ground, the pilot flies above and around the property to give potential buyers a bird’s-eye view of the home, lot lines, neighborhood, and surrounding amenities.
A typical real estate drone package includes 10 to 20 still images and a short 60 to 90 second video. The stills cover everything from wide establishing shots of the entire property to tight detail shots of the roof, pool, or acreage. The video usually follows a planned flight path that showcases the property from multiple angles.
What separates drone photography from traditional ground-level listing photos is context. A standard photo shows the front of the house. A drone photo shows how big the yard is, what the neighbor’s property looks like, how close the home sits to a park or school, and the overall layout of the land. For rural properties, large estates, and homes with significant outdoor features, aerial shots aren’t optional anymore – they’re expected by buyers.
Why Drone Photos Sell Properties Faster
The numbers behind real estate drone photography are hard to ignore. According to multiple listing services and industry studies, properties marketed with aerial photos sell up to 68% faster than comparable listings without them. That single statistic is the pitch I use with every new realtor client, and it’s the reason demand for this service keeps growing.
Here’s why drone shots drive faster sales. First, they show scale. A buyer browsing listings on their phone can’t always tell if a property sits on a quarter-acre or five acres from a ground photo. An aerial shot makes lot size immediately obvious. Second, they reveal location context. Buyers want to know what’s next door – a highway, a forest, a school, a lake. Drone photos answer that question in a single frame.
Third, drone imagery catches attention in a crowded feed. In 2026, most buyers start their search online, scrolling through dozens of nearly identical front-of-house photos. A well-composed aerial shot stops the scroll. MLS data shows listings with drone photos receive significantly more views and click-throughs than those without.
For luxury properties, waterfront homes, large parcels, and homes with notable outdoor amenities like pools, gardens, or equestrian facilities, drone photography isn’t a nice-to-have. It’s often the deciding factor in whether a qualified buyer books a showing. I’ve had realtors tell me a single aerial pool shot generated three offers within 48 hours of listing.
Licensing and Legal Requirements
Before you charge a single dollar for real estate drone photography, you need the right legal foundation. In the United States, any commercial drone operation – including paid real estate photography – requires a Remote Pilot Certificate under FAA Part 107. There are no exceptions for small drones, quick jobs, or low-altitude flights.
To get your Part 107 certification, you must be at least 16 years old, pass a 60-question aeronautical knowledge test at an FAA-approved testing center, and complete the TSA background check. The test costs around $160 and covers topics like airspace classifications, weather, drone regulations, emergency procedures, and airport operations. Most pilots spend 15 to 30 hours studying using free FAA materials or paid prep courses.
Once certified, you must register your drone with the FAA for $5 per aircraft (valid for three years), display your registration number on the drone, and carry your certificate when flying commercially. You also need to follow operational rules: maximum altitude of 400 feet above ground level, visual line-of-sight at all times, daylight-only flights unless you have a waiver, and no flying over people who aren’t part of the operation.
Insurance is the second non-negotiable. Realtors and property owners will ask for proof of coverage before hiring you. At minimum, carry general liability insurance of $1 million. Many pilots add hull coverage, which protects the drone itself in case of a crash. Annual policies for commercial drone operators typically run $500 to $1,500 depending on coverage limits and flight volume. Some providers offer per-flight policies if you only shoot occasionally.
Airspace restrictions matter too. Many properties sit within five miles of an airport or in controlled airspace. You’ll need to request LAANC (Low Altitude Authorization and Notification Capability) approval before flying in these areas. The process takes minutes through apps like Aloft or AirMap, but skipping it can result in FAA fines. I check airspace on every single job, even in neighborhoods I’ve flown dozens of times.
Equipment You Need to Shoot Real Estate Drone Photos That Sell
You don’t need a $5,000 cinema drone to produce listing-ready real estate photos, but you do need a few core capabilities. Here’s what to look for when choosing equipment for real estate aerial work.
The drone itself should have a 1-inch or larger image sensor. This is the single biggest factor in image quality. Smaller sensors produce noisy, soft images that fall apart when you crop or edit them. A 1-inch sensor or better gives you the dynamic range and detail needed for professional listing photos.
A mechanical 3-axis gimbal is essential. This stabilizes the camera in flight and eliminates the jitter and wobble that ruins otherwise good shots. Every drone I recommend for real estate work has a mechanical gimbal – software stabilization alone is not enough for professional results.
RAW photo capability is non-negotiable. Shooting in RAW gives you the flexibility to recover highlights, fix white balance, and pull detail from shadows during editing. JPEG-only drones lock you into the camera’s processing and limit what you can fix later. All of my listing photos are shot RAW.
Flight time matters more than you might think. Look for drones offering at least 30 minutes per battery. Real estate shoots involve hovering, repositioning, and waiting for clean light. Short battery life means rushed shots and extra batteries to carry. I bring a minimum of three charged batteries to every shoot.
Other must-have features: obstacle avoidance sensors (front, back, and downward) to prevent crashes near buildings and trees; GPS return-to-home so the drone comes back if you lose signal; and 4K video capability even if you’re primarily shooting stills, because most clients want both.
Beyond the drone, invest in these accessories: a tablet or bright screen for outdoor viewing, a sun hood so you can actually see your screen, ND filters to control shutter speed in bright light, extra propellers, a carrying case that fits batteries and controllers, and microSD cards rated for 4K recording (V30 or faster).
How to Shoot Real Estate Drone Photos That Sell: Step-by-Step
This is the workflow I follow on every real estate drone shoot. Following these steps in order is how you consistently produce images that realtors actually want to use in their listings.
Step 1: Get licensed and insured. Complete your FAA Part 107 certification and secure liability insurance before booking any paid work. This protects you legally and gives clients confidence.
Step 2: Scout the property remotely. Before arriving, pull up the address on Google Earth and aerial views. Identify the property boundaries, neighboring structures, airspace class, and potential obstacles like power lines or tall trees. Note which direction the home faces so you can plan for sun position.
Step 3: Check airspace and weather. Use a LAANC app to confirm you’re cleared to fly at the location. Check wind speed (anything over 12 to 15 mph makes for shaky footage), precipitation, and cloud cover. Reschedule if conditions are poor.
Step 4: Coordinate with the realtor or homeowner. Confirm the shoot time, ask them to move cars from the driveway, open pool covers, mow the lawn, and put away trash bins. Small prep details show up clearly from above.
Step 5: Arrive early and walk the property on foot. Don’t launch immediately. Walk the lot, identify your launch spot (flat, open, away from obstacles), and note any hazards. Confirm the shot list with the client if they’re on site.
Step 6: Set your drone camera to RAW. Lock exposure manually for consistent results across shots. Set white balance to a fixed value rather than auto. Check that your gimbal is level and your horizon is straight before each capture.
Step 7: Fly the shot list in order. Start with the wide establishing shot from altitude, then work your way through orbit shots, side angles, front elevations, backyard views, and detail shots of amenities. I cover the full shot list in the next section.
Step 8: Shoot more than you think you need. Take 3 to 5 frames of each angle. Tiny variations in drone position and wind drift mean some frames will be sharper than others. Memory is cheap; reshoots are not.
Step 9: Review your footage on site. Before packing up, zoom into your shots on your controller screen. Check for sharpness, straight horizons, proper exposure, and full property framing. It’s far easier to re-fly a shot while you’re on location than to come back another day.
Step 10: Edit in RAW and deliver within 24 to 48 hours. Import into Lightroom or your preferred editor, apply your standard real estate preset, fix horizons, recover sky detail, and export at MLS-appropriate resolution. Fast turnaround is what keeps realtors calling you back.
Essential Drone Shot List for Real Estate Listings
Having a consistent shot list ensures you deliver complete coverage on every property. Here are the 11 shots I capture on every real estate drone shoot, in the order I fly them.
1. Front elevation establishing shot. Hover at 30 to 40 feet directly in front of the home, camera level. This is the hero image for most listings – the one that gets used in marketing materials and MLS thumbnails.
2. Wide property context shot. Climb to 100 to 150 feet and capture the full property plus surrounding neighborhood. This shows lot size, proximity to neighbors, and street layout.
3. Front orbit. Fly a slow 180 to 360 degree orbit around the front of the home at 40 to 60 feet. This showcases the facade from multiple angles and works great as video.
4. Side elevation shot. Position the drone perpendicular to the side of the home to show depth, side yard, and any side-entry features like garages or patios.
5. Backyard and rear elevation. This is often the most important shot for properties with pools, decks, gardens, or water access. Capture both a straight-on rear view and a wider angle showing the full backyard.
6. Top-down or bird’s-eye view. Point the camera straight down (90 degrees) and shoot from 80 to 120 feet. This flat layout shot is invaluable for showing lot boundaries, driveway configuration, and outdoor living spaces.
7. Approach or push-in shot. Start 100 feet out at altitude and slowly descend toward the front door or key feature. This creates a cinematic fly-in that works well in listing videos.
8. Neighborhood and surroundings shot. Fly to a vantage point that captures nearby amenities – parks, schools, water features, or shopping. Buyers care about what’s around the property, not just the property itself.
9. Roof and structural detail. Capture a clear overhead view of the roof condition. Realtors and home inspectors love this shot, and it demonstrates transparency to buyers.
10. Twilight or golden hour hero shot. If scheduling allows, return at sunset for a warm-lit front elevation shot. These images stand out dramatically in MLS feeds and get shared more often on social media.
11. Seasonal or feature-specific extras. Add shots based on the property’s selling points: dock and waterfront for lake homes, acreage boundaries for rural properties, tennis courts or guest houses for luxury estates. Tailor these to what makes the property unique.
Best Drone Settings for Real Estate Photography
Consistent camera settings produce consistent results. Here’s what I run on every real estate drone shoot.
Image format: Always RAW. Never JPEG for paid work. RAW preserves all the data your sensor captures and gives you editing flexibility.
Aspect ratio: 3:2 or 4:3, depending on the drone. Avoid 16:9 for still photography – it crops away resolution you’ll want for cropping and print.
ISO: 100 in daylight. Only push to 200 or 400 in low light. Higher ISO introduces noise that becomes obvious when images are viewed full screen.
Aperture: f/2.8 to f/5.6 for most real estate shots. Avoid going wider than f/2.8 (softens corners) or narrower than f/8 (diffraction reduces sharpness).
Shutter speed: 1/200 to 1/400 for sharp still images. Use ND filters to achieve these speeds in bright sun without overexposing. For video, follow the 180-degree shutter rule (shutter speed double your frame rate).
White balance: Set manually to 5500K to 6000K for daylight. Don’t use auto white balance – it can drift between shots and make editing harder.
Gimbal and horizon: Calibrate the gimbal before every shoot. Verify the horizon is level on your controller screen before each capture. A crooked horizon is the most common giveaway of amateur work.
Lighting and Weather Planning
Light is what separates professional-looking drone photos from amateur ones. The best real estate drone photographers plan their shoots around the sun, not around their own convenience.
Golden hour – the hour after sunrise and the hour before sunset – produces warm, soft, directional light that flatters properties. Front and side elevations look best when the sun hits them directly. North-facing homes photograph best in late afternoon; south-facing homes favor morning light. I map the home’s orientation during scouting and schedule accordingly.
Avoid harsh midday sun. Between 11am and 2pm, overhead light creates harsh shadows under eaves, blows out bright surfaces, and produces flat, unflattering images. If a client insists on a midday shoot, set expectations about image quality in advance.
Weather planning matters just as much as lighting. Wind over 15 mph makes even stabilized drones produce shaky footage. Heavy clouds create flat, cool light that can work for some properties but usually drains warmth from the scene. Light overcast can actually be good for even lighting, but heavy gray skies make exteriors look depressing. Rain is a hard no – not worth the equipment risk or the poor results.
Always have a reschedule policy in your client agreement. I include a free weather reschedule clause so clients don’t feel penalized when conditions force a postponement. This builds trust and protects your portfolio from mediocre images.
Client Preparation Checklist
This is the prep checklist I send to every realtor and homeowner before a shoot. Most pilots skip this step, and it’s why their images often show garbage cans, cars in the driveway, or closed pool covers. Set clients up to look good.
Property prep: Mow the lawn within 24 hours of the shoot. Sweep driveways and walkways. Store trash bins out of sight. Roll up garden hoses. Remove toys, yard decor, and clutter from outdoor living spaces. Open pool covers and run the pump so the water looks clean. Park vehicles in the garage or on the street, not in the driveway.
Home prep: Open all interior blinds and curtains if interior drone shots are planned. Turn on interior lights for twilight photography. Make sure pets are secured indoors.
Realtor prep: Provide the property address, gate codes if applicable, and any specific features the seller wants highlighted. Confirm whether twilight shots are wanted (these require an evening visit). Let neighbors know a drone will be flying so you don’t get reported.
Day-of coordination: Confirm arrival time the morning of the shoot. Text the client when you launch so they know you’re on site. Send preview images within a few hours to build confidence, then deliver the full edited set within 24 to 48 hours.
Editing Workflow for Listing-Ready Photos
Editing is where good drone footage becomes listing-ready. A consistent post-processing workflow saves time and keeps your portfolio looking professional.
I edit everything in Lightroom Classic. Import your RAW files, apply a real estate-specific preset as your starting point, then fine-tune each image. The standard adjustments: recover blown highlights (especially skies), lift shadows to show detail in shaded areas, add clarity and texture sparingly, and warm up white balance if the scene looks cool.
Straighten the horizon on every image. Even with a calibrated gimbal, slight tilts happen. A crooked horizon is the single most common flaw in amateur real estate drone work, and it’s the easiest to fix.
Sky replacement is often necessary. Drone cameras struggle to expose for both the ground and a bright sky in the same frame. Use Lightroom’s sky selection tool or Photoshop to drop in a clean sky from your library. Just keep it realistic – oversaturated blue skies with fake clouds scream amateur.
Export at 3000 to 4000 pixels on the long edge, JPEG quality 80 to 85. This gives MLS platforms plenty of resolution without creating massive files that fail upload limits. Always keep your RAW originals in case a client requests a different crop or edit later.
For video, edit in Premiere, DaVinci Resolve, or your preferred NLE. Real estate listing videos run 60 to 90 seconds. Cut to music, add subtle transitions, and end with a clear shot of the property address or agent branding. Keep motion smooth and pacing unhurried.
Pricing Your Real Estate Drone Photography
Pricing varies widely based on market, experience, and deliverables. Here’s what you can expect in 2026 based on forum reports and industry rates.
Beginner rates: $75 to $150 per property for 10 to 15 still images. This is typical for new pilots building their first portfolio. You’re trading lower rates for experience and referrals.
Mid-level professional: $200 to $350 per property for 15 to 20 stills plus a 60-second video. This is the sweet spot once you have 20 to 50 shoots of experience and a polished portfolio.
Experienced specialist: $400 to $800+ per property. Includes twilight shots, multiple visits, full video packages, virtual tours, and 24-hour delivery. Luxury markets and high-volume realtors pay these rates without hesitation.
Package your services. Offer a basic stills package, a stills-plus-video package, and a premium twilight package. Clear pricing tiers help realtors choose without back-and-forth negotiation. Most of my clients land in the middle tier.
Charge extra for travel beyond your local area, rush delivery under 24 hours, additional visits for weather reshoots, and heavy editing requests like object removal or sky replacement on every image. Don’t give away your time.
Common Mistakes to Avoid
These are the mistakes I see in nearly every beginner’s first dozen shoots. Avoid them and you’ll skip months of trial and error.
Crooked horizons. Always calibrate your gimbal and verify the horizon on screen before capturing. Fix in editing if needed.
Over-processing. Heavy HDR, oversaturated colors, and fake-looking sky replacements make listings look amateur. Subtle edits win.
Shooting only one frame per angle. Wind, focus drift, and exposure variations mean some shots will fail. Capture 3 to 5 frames minimum per composition.
Skipping the prep checklist. Cars in the driveway, open trash bins, and unmowed lawns ruin otherwise great shots. Send the prep list to every client.
Flying too high. Above 150 feet, homes start looking like tiny dots. Most real estate shots work best between 30 and 100 feet.
Ignoring airspace rules. Flying without LAANC approval in controlled airspace can lead to FAA fines and lost clients. Check every time.
How to take drone pictures for real estate?
Plan your shot list, check airspace and weather, prep the property with the homeowner, fly at 30 to 100 feet using a 3-axis gimbal drone shooting in RAW, capture 11 standard shot types including front elevation, orbit, backyard, and top-down views, then edit in Lightroom and deliver within 48 hours.
How much do realtors pay for drone photos?
Beginner photographers charge $75 to $150 per property, experienced professionals charge $200 to $350, and luxury market specialists earn $400 to $800+. Most packages include 10 to 20 still images plus optional short video.
Do I need a license to sell drone photos?
Yes. In the United States, any commercial drone photography including paid real estate work requires FAA Part 107 Remote Pilot Certification. The test costs around $160, requires 15 to 30 hours of study, and must be renewed every two years. Liability insurance is also expected by clients.
How to sell drone images?
Build a portfolio of 10 to 20 polished property shoots, cold-call local realtors, list on directories like Thumbtack or Bark, partner with existing real estate photographers, and post work samples on Instagram and LinkedIn targeting real estate professionals in your market.
What is the 3 wall rule in real estate photography?
The 3 wall rule means composing interior shots so three walls are visible in the frame, creating depth and a sense of space. This typically means shooting from a corner of the room toward the opposite corner. The rule helps rooms look larger and more inviting than a flat head-on shot.
Do drone photographers make good money?
Yes, experienced real estate drone photographers earn $200 to $800 per property and can shoot 2 to 4 properties per day. Full-time specialists in active markets earn $60,000 to $120,000 annually. Side income of $1,000 to $3,000 per month is achievable within the first year of consistent marketing.
Conclusion
Learning how to shoot real estate drone photos that sell comes down to respecting the fundamentals: get licensed, plan every shoot, follow a consistent shot list, nail your camera settings, light for the property, prep your clients, and edit to a professional standard. Skip any of these steps and your results will show it.
The market for aerial real estate photography keeps growing because the results are measurable. Listings with drone photos sell faster, get more views, and win more showings. Once you build a portfolio and start landing repeat clients, this becomes one of the most reliable photography side hustles available in 2026.
If you’re just starting, focus on your Part 107 certification first, then invest in a drone with a 1-inch sensor and mechanical gimbal. Practice on your own property or a friend’s listing before charging. Build a portfolio of 10 to 20 polished shoots, then start marketing to local realtors. Consistency beats talent in this business – pilots who show up on time, deliver clean images, and respond quickly get the long-term clients.
The next step is yours. Pick your drone, schedule your Part 107 test, and start practicing. Every professional aerial photographer started exactly where you are right now.