
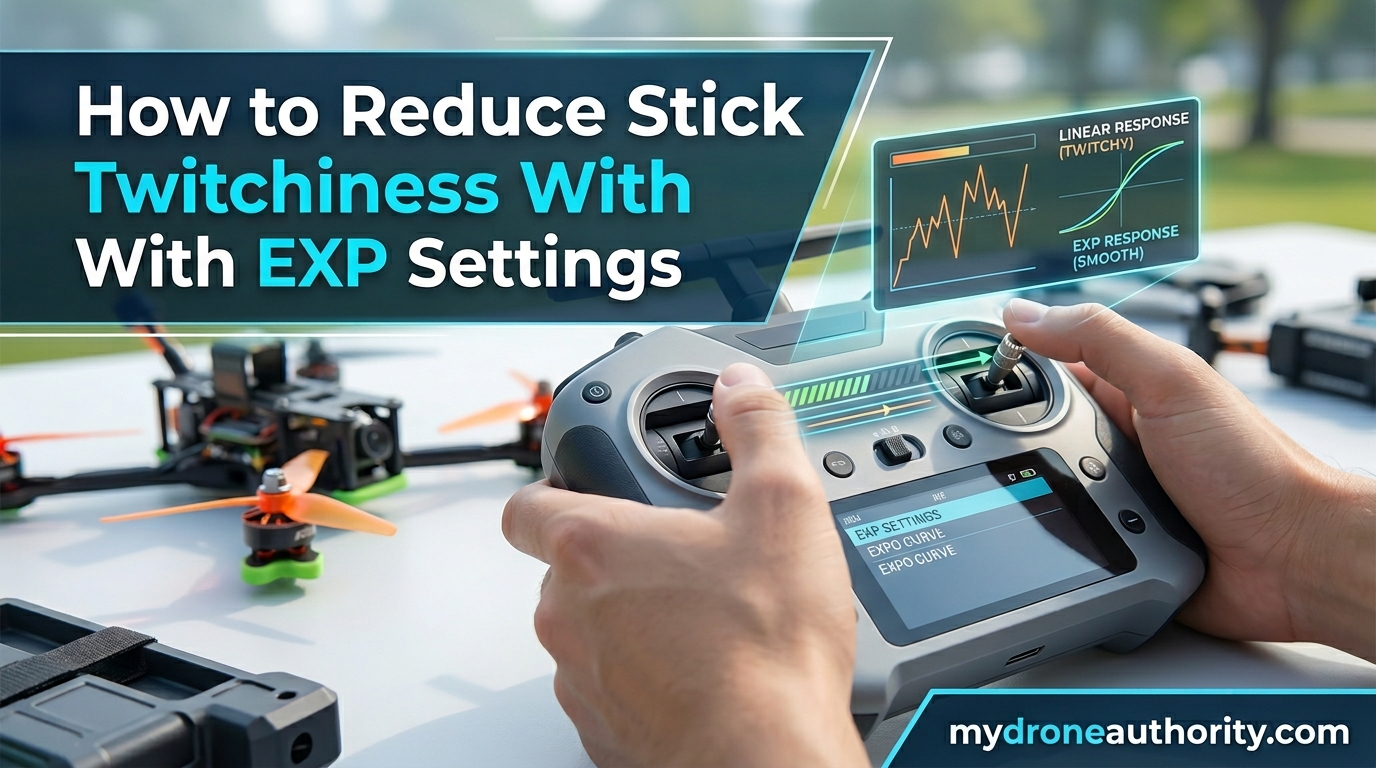
You lined up the perfect cinematic shot, flew it exactly the way you wanted, then opened the footage on your computer and saw tiny jerks and micro-stutters everywhere. Almost every drone pilot has been there. The good news is that the fix is rarely your flying — it is almost always your stick sensitivity settings.
This guide walks through how to reduce stick twitchiness with EXP settings for smoother footage, whether you fly a DJI Mavic, Air, Mini, Phantom, FPV, or Avata. EXP (also called EXPO) is the single most important setting for curing jerky movements because it controls how your drone interprets every millimeter of stick input.
By the end you will know exactly what EXP does, where to find it in DJI Fly and DJI Go 4, the specific values that experienced pilots recommend, and how the supporting settings (Yaw Endpoint, Brake Sensitivity, Gimbal SmoothTrack) work together. You will also get tips the forum community swears by, including physical stick modifications and Gyroflow post-processing.
If your footage looks shaky even when your hands feel steady, EXP settings are the first thing to tune. Let’s get into it.
Table of Contents
What Are EXP (EXPO) Settings?
EXP settings — short for “exponential” and often labeled EXPO in the DJI Go app — control how your drone translates physical stick movement into actual flight response. Instead of a straight one-to-one relationship where 50 percent stick equals 50 percent response, EXP applies a curve to that relationship.
Think of it this way: with a linear (no EXP) curve, every millimeter you move the stick produces the same amount of drone movement. That sounds fair in theory, but in practice your hand is not perfectly steady. Tiny finger twitches become tiny drone jerks, and those jerks show up clearly in 4K footage.
EXP solves this by softening the response around stick center, where most small corrections happen. Near the middle of the stick travel, the drone barely reacts. As you push further toward the edges, the response ramps up faster, so you still have full authority when you need aggressive movement.
The result is a “soft center” feel. Small accidental inputs get absorbed, while intentional full-stick movements still work normally. This is exactly what you want for cinematic flying — buttery smooth near center, with full control reserved for when you actually need it.
The setting works on four axes: pitch (forward/backward), roll (left/right tilt), yaw (rotation left/right), and throttle (up/down). Each axis has its own EXP value you can tune independently, which matters because yaw often needs different treatment than pitch.
How to Reduce Stick Twitchiness With EXP Settings for Smoother Footage
Adjusting EXP settings is a five-minute change that can transform your footage. Here is exactly how to do it in both modern and older DJI apps.
Step 1: Connect Your Drone and Open the App
Power on your drone and remote controller, then launch either DJI Fly (Mavic 3, Air 3, Mini 4 Pro, Avata, etc.) or DJI Go 4 (Phantom 4, Mavic Pro, Mavic 2, Spark). Connect as you normally would for a flight.
Step 2: Open the Main Controller Settings
In DJI Fly, tap the three dots in the upper-right corner to open settings, then navigate to the Control tab. In DJI Go 4, tap the drone status bar at the top, then tap the Controller icon, and open the “MC Settings” (Main Controller) section.
Step 3: Find the EXP / Sensitivity Submenu
Under the Control or MC Settings tab you will see options labeled “EXP” or “Sensitivity.” In newer DJI Fly versions this is often grouped under Advanced Settings. You should see separate sliders or input boxes for Pitch, Roll, Yaw, and sometimes Throttle EXP.
Step 4: Enter Your Starting Values
For smooth cinematic footage, the community-tested sweet spot is 0.15 to 0.20 for Pitch, Roll, and Yaw. Start with 0.20 across the board if this is your first time tuning. You can always dial it up or down after a test flight.
For Throttle EXP, 0.25 to 0.35 is common because throttle benefits from a softer climb response, especially on heavier drones.
Step 5: Save, Take Off, and Test Gently
Save the settings, take off in a clear open area, and fly slow deliberate movements. Try a gentle forward push, a slow yaw, and a soft climb. You should immediately feel that small stick inputs no longer produce jerky reactions.
If the drone feels sluggish when you push harder, lower the EXP value slightly (try 0.15). If small twitches still appear in footage, raise it (try 0.25). The right value depends on your drone model, your camera, and your flying style.
Understanding the EXPO Curve Graph
The EXP settings screen shows a graph that is the key to understanding what you are actually changing. The graph has stick position on the X-axis (from -100 percent to +100 percent) and drone response on the Y-axis (also -100 percent to +100 percent).
A straight diagonal line from corner to corner means linear response — no EXP applied. This is the default on many setups and is why stock footage looks twitchy. Every stick movement produces an equal drone response, including all your tiny finger shakes.
An EXP curve bends that line into an S shape. Near the center (around 0 percent stick), the line flattens out, meaning small inputs produce very little drone response. As you push toward the edges (toward 100 percent), the line steepens, giving you full response when you really need it.
Higher EXP values bend the curve more aggressively. An EXP of 0.40 produces a very flat center and a very steep edge. An EXP of 0.10 produces only a slight softening near center. For cinematic work you typically want a noticeable but not extreme curve — somewhere in that 0.15 to 0.25 range.
Reading the graph before you fly helps you predict the feel. If the curve looks almost like a straight line, your footage will still be twitchy. If it looks like a sharp S, your drone may feel unresponsive when you push hard for evasive moves. The middle ground is where smooth cinematic footage lives.
Recommended EXP Values for Smooth Footage
Specific numbers matter more than theory when you are tuning. Below are the values that consistently come up in pilot forums (Phantom Pilots, Mavic Pilots, r/fpv) and from experienced aerial cinematographers. Use these as starting points and fine-tune from there.
Cinematic Smooth Footage (Default Starting Point)
Pitch EXP: 0.20. Roll EXP: 0.20. Yaw EXP: 0.15 to 0.20. Throttle EXP: 0.25. These values give you a noticeably soft center with full control at the edges, which is ideal for slow pans, tracking shots, real estate, and landscape videography.
Extra-Smooth Tripod-Style Flying
Pitch EXP: 0.30. Roll EXP: 0.30. Yaw EXP: 0.25. Throttle EXP: 0.35. Pushing EXP higher slows everything down near center. This is great when you want absolute stillness, like precision indoor shots or close-up passes near structures.
Sport Mode and Aggressive Flying
Pitch EXP: 0.10 to 0.15. Roll EXP: 0.10. Yaw EXP: 0.10. Throttle EXP: 0.20. Sport mode overrides many of your smoothing settings, so you typically run lower EXP here because you want fast response. Be aware that Sport mode footage will never look as smooth as Normal mode footage no matter what you set.
FPV Drones (DJI FPV, Avata, Avata 2)
In Normal mode on DJI FPV systems, the same 0.20 range works well. In Manual (Acro) mode, EXP is replaced by Betaflight-style rate curves, which is a different system covered in the FPV section below.
Normal vs Sport Mode Behavior
Normal mode respects your EXP settings fully and is the mode you should use for any footage you care about. Sport mode partially bypasses smoothing to give you speed and agility, so even perfect EXP values will look rougher in Sport mode. Cinematic mode (on supported drones) goes the other direction, slowing gimbal and stick response even more than your EXP settings.
Yaw Endpoint and Brake Sensitivity
EXP is the biggest lever, but two related settings matter almost as much for smooth footage. Many pilots skip these and wonder why their pans still look choppy.
Yaw Endpoint
Yaw Endpoint sets the maximum rotation speed the drone can reach at full stick. Even with perfect EXP, if your Yaw Endpoint is set high, a hard push on the stick will still spin the drone faster than looks cinematic. Experienced pilots on Phantom Pilots call Yaw Endpoint “the real key” to smooth pans.
Lower your Yaw Endpoint to between 60 and 80 (on the 0-100 scale) for cinematic work. This caps your maximum rotation speed so even a full stick movement cannot produce a jarring spin. Combined with a Yaw EXP of 0.15 to 0.20, your pans will start gently, move at a controlled pace, and stop smoothly.
Brake Sensitivity
Brake Sensitivity controls how aggressively the drone stops when you release the sticks. A high Brake Sensitivity means the drone halts quickly, which can introduce a forward pitch and a visible jerk in footage. A low Brake Sensitivity lets the drone coast to a stop.
For cinematic footage, set Brake Sensitivity low — around 100 to 110 on a typical DJI scale. The drone will decelerate gradually, which is what you want for clean shot transitions. Higher values are useful for photography where you need to hold position precisely, but they hurt video.
Attitude Sensitivity
Attitude Sensitivity controls how much the drone tilts (pitches forward or sideways) in response to stick input. A lower Attitude Sensitivity means the drone stays flatter, which keeps the camera horizon level and reduces that “diving forward” look in your footage. Try 100 to 120 for smooth cinematic flying.
Gimbal Pitch Smoothness and SmoothTrack
EXP fixes stick twitchiness on the flight side, but the gimbal has its own sensitivity settings that matter just as much for the final image. If your gimbal tilts and pans feel abrupt, fix these next.
Gimbal Pitch Speed
Gimbal Pitch Speed sets how fast the camera tilts up and down when you move the gimbal wheel. A high value gives you fast tilts, but fast tilts look jerky in footage. For cinematic work, drop this to around 20 to 30 on the 0-100 scale.
This forces every tilt to be slow and deliberate, which is exactly what you want for reveal shots and dramatic pans across a landscape.
Gimbal Pitch Smoothness
Gimbal Pitch Smoothness eases the start and end of each tilt movement. A higher value adds a brief ramp-up and ramp-down so the camera does not snap into motion or stop dead. Set this to 15 to 25 for cinematic footage.
Combined with low Pitch Speed, Smoothness is what gives you that “bowling ball” smooth tilt that looks professional.
SmoothTrack (The “Magic” Setting)
SmoothTrack is the feature that experienced pilots on Phantom Pilots describe as “MAGIC.” When enabled, instead of the gimbal instantly following your stick movement, it slowly catches up. The result is a delayed, smoothed motion that hides every small twitch in your thumb.
SmoothTrack has separate settings for Pitch and Yaw. A common starting point is Pitch SmoothTrack at 20 to 30 and Yaw SmoothTrack at 15 to 25. Too high and the gimbal feels disconnected and laggy. Too low and you are back to twitchy footage.
Synchronized Gimbal Pan Follow
This setting links the gimbal’s horizontal movement to your yaw input so the camera turns with the drone. When tuned correctly alongside Yaw EXP and Yaw Endpoint, your pans feel like one fluid motion instead of the body turning and the camera catching up.
Physical Stick Tips and Practice
Settings will get you 80 percent of the way to smooth footage. The last 20 percent comes from your physical setup and your thumb technique. Several forum tips come up again and again.
Lengthen Your Sticks
Longer control sticks give you more physical travel for the same angular movement. More travel means finer resolution — the same finger motion produces a smaller percentage of full stick deflection. Many Mavic Pilots and Phantom Pilots users call this the single most underrated fix for twitchy footage.
Aftermarket stick extenders are cheap and snap onto your existing sticks. Even a few extra millimeters makes a noticeable difference in fine control.
Be Aware of the Center Detent
The spring that pushes your stick back to center is called the detent. When you rest your thumb against it, small hand vibrations transfer straight into the stick. Try to fly with a light touch and avoid bracing against the detent.
Some pilots prefer pinch grip (thumb and index finger) instead of thumb-only grip for exactly this reason — pinch grip gives you more damping through finger friction.
Practice in a Flight Simulator
Before flying your real drone with new EXP values, test them in a flight simulator. The DJI Virtual Flight app (for DJI FPV and Avata) and Liftoff (for general FPV practice) let you feel how different EXP values respond without risking your gear.
Make small changes in the simulator, fly the same route each time, and pay attention to how the drone feels near center stick versus at the edges. Once you find values that feel right, transfer them to your real drone.
Be Gentle on the Sticks
No setting can fully fix aggressive thumb technique. Smooth footage comes from slow, deliberate inputs. Think about guiding the drone rather than pushing it. Many experienced pilots say practice and gentle hands matter as much as any setting.
FPV-Specific EXP Considerations
If you fly FPV — whether a DJI FPV, DJI Avata, Avata 2, or a custom Betaflight build — EXP works differently than on camera drones. This is an area that most general guides skip, so it is worth covering in detail.
Normal Mode vs Manual Mode on DJI FPV
DJI FPV drones have multiple flight modes. Normal mode behaves like a camera drone — it self-levels and respects your EXP settings the same way a Mavic does. The 0.15 to 0.20 range works well here.
Sport mode on DJI FPV sits between Normal and Manual. It still self-levels but allows more aggressive angles. Lower your EXP to around 0.10 to 0.15 here.
Manual (Acro) Mode and Betaflight Rates
In Manual mode the drone no longer self-levels and the EXP system is replaced by Betaflight rate curves. Rate curves use three values — RC Rate, Super Rate, and RC Expo — to define how stick input maps to rotation rate. RC Expo is the closest equivalent to DJI EXP and softens the center of the stick the same way.
A typical smooth-flying FPV rate setup is RC Rate around 0.8 to 1.0, Super Rate around 0.7 to 0.9, and RC Expo around 0.25 to 0.40. Higher RC Expo values give you that soft center that prevents small twitches from becoming visible in footage.
Why FPV Footage Needs Extra Help
FPV drones carry less gimbal stabilization than camera drones. Most FPV builds have a single-axis or two-axis gimbal at best, so every stick twitch shows up directly in the footage. This is why FPV pilots rely heavily on Gyroflow post-processing to clean up what settings alone cannot.
If you fly FPV for cinematic footage, plan to use Gyroflow on every clip. Settings help, but Gyroflow is what makes FPV footage look professional.
Post-Processing With Gyroflow
Even with perfect EXP settings, sometimes footage still has micro-jitters from wind, motor vibration, or hand shake. Gyroflow is a free open-source tool that stabilizes footage using the gyro data recorded by your drone or action camera.
Gyroflow works differently from in-camera Electronic Image Stabilization (EIS). EIS crops the frame and shifts pixels to compensate for movement, which reduces resolution and can introduce jello. Gyroflow uses actual gyroscope data to map every frame’s orientation and then counter-rotates the footage for true optical-style stabilization.
Basic Gyroflow Workflow
Step one is to make sure your camera or drone is logging gyro data. GoPro, Insta360, and most modern action cameras do this automatically. For custom FPV builds with a GoPro mounted, the camera logs gyro internally.
Step two is to open Gyroflow, load your video file, and let the software detect the gyro log. Step three is to apply a lens profile for your camera so Gyroflow knows the field of view and distortion. Step four is to set your output resolution and framing method (you will lose some edge area to the stabilization crop).
Step five is to render. Gyroflow exports a stabilized video that you can drop straight into DaVinci Resolve, Premiere Pro, or Final Cut. The result is noticeably smoother than what your raw footage showed.
Gyroflow vs In-Camera EIS
For FPV footage Gyroflow almost always beats in-camera EIS because it has access to higher-resolution gyro data and a wider correction range. For camera drones like the Mavic 3, the in-camera stabilization is already very good, so Gyroflow is less critical but can still clean up small jitters.
The best practice is to fly with smoothing EIS turned off (or set to a low level) if you plan to use Gyroflow in post. This avoids double-stabilization artifacts.
How to get smooth drone footage?
Start by setting your EXP values to 0.20 for Pitch, Roll, and Yaw, then lower your Yaw Endpoint to around 70 and set Gimbal Pitch Smoothness to 20. Fly in Normal mode, use SmoothTrack if your drone supports it, and keep your inputs slow and deliberate. For FPV footage, add Gyroflow stabilization in post.
What are the settings for drone Expo?
For cinematic footage, most pilots use EXP values of 0.15 to 0.20 for Pitch, Roll, and Yaw, and 0.25 to 0.35 for Throttle. Lower values around 0.10 give faster response for sport flying. Higher values around 0.30 create a very soft center for tripod-style slow shots.
How to stop choppy drone videos?
Choppy footage usually comes from high EXP-related sensitivity settings or high Brake Sensitivity. Set EXP to 0.20 across the board, lower Brake Sensitivity to around 100 to 110, and enable Gimbal SmoothTrack. Also make sure you are not shooting with an excessively fast shutter speed that makes motion look stuttery.
Why is my drone footage twitchy?
Twitchy footage is almost always caused by linear stick response with no EXP applied, a high Yaw Endpoint that allows fast spins, or a high Brake Sensitivity that causes abrupt stops. Small hand tremors transfer directly into the drone without EXP to soften them.
How to stabilize drone footage in Gyroflow?
Open Gyroflow, load your video file, let the software detect the gyro log, apply the lens profile for your camera, set your output resolution and framing method, and render. Gyroflow uses gyro data to counter-rotate each frame for true stabilization that beats in-camera EIS, especially for FPV footage.
Conclusion
Fixing twitchy drone footage is mostly a settings problem, not a flying problem. Once you understand how to reduce stick twitchiness with EXP settings for smoother footage, the fix takes five minutes in the app and a single test flight to confirm.
Start with EXP at 0.20 for Pitch, Roll, and Yaw. Add a Yaw Endpoint around 70, a low Brake Sensitivity, and a Gimbal SmoothTrack value in the 20 to 30 range. Test in a flight simulator before you commit to a real shoot.
If you fly FPV, plan to add Gyroflow in post for the final polish. And remember — gentle thumbs and longer physical sticks will always outperform any single setting. The combination of tuned EXP values, supporting sensitivity settings, smooth gimbal behavior, and post-processing is what turns shaky hobby footage into cinematic shots you actually want to share.