
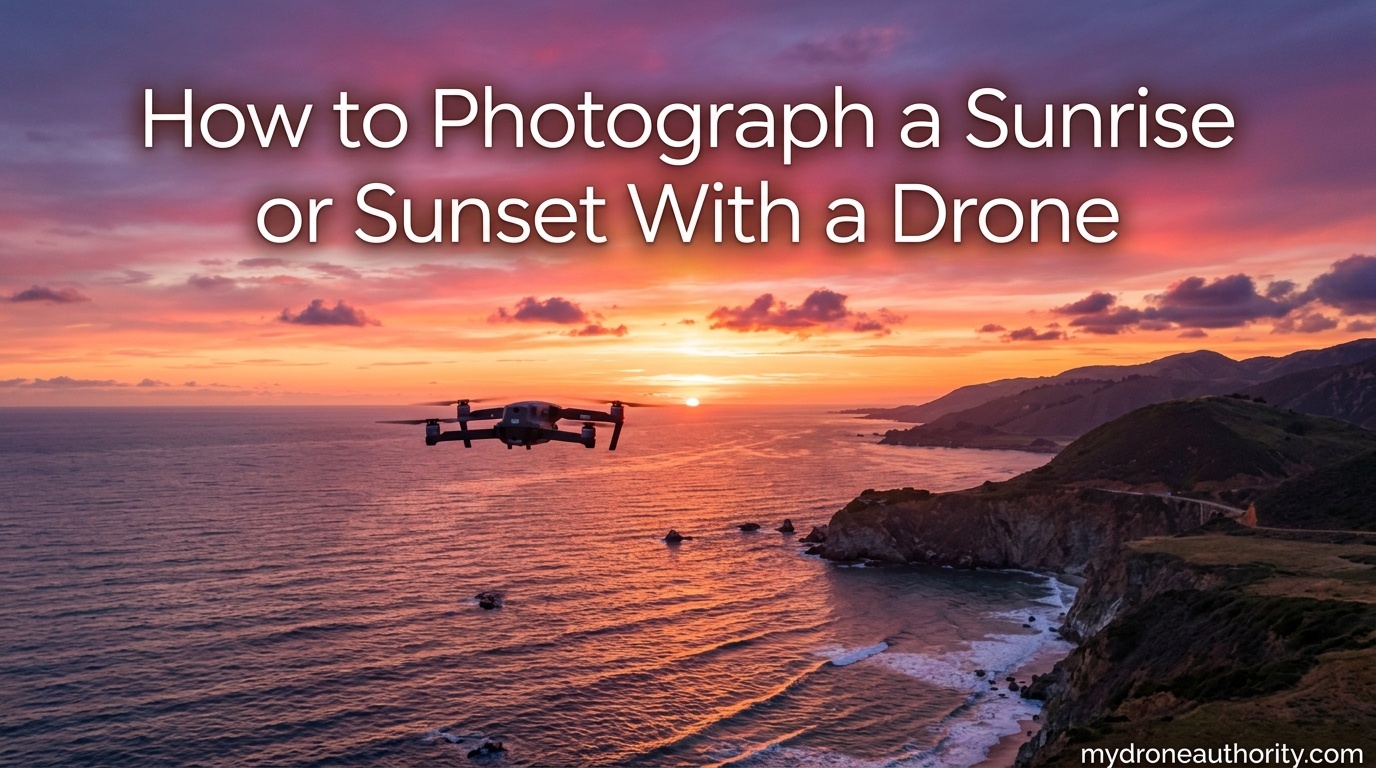
Learning how to photograph a sunrise or sunset with a drone completely changed the way I shoot aerial landscapes. The golden hour is the single most rewarding time to fly, and once you dial in the right settings, your drone becomes a tool for images that simply are not possible from the ground.
This guide walks through everything I have learned from hundreds of golden hour flights, including the exact camera settings I use, the apps I rely on for planning, the panorama and HDR techniques that handle high-contrast skies, and the mistakes that cost me shots early on. Whether you are flying a DJI Mini, Air, or Mavic series drone, the workflow below will help you capture sunrise and sunset photos worth printing.
By the end of this article you will have a complete, repeatable process for photographing sunrise sunset drone scenes from the first scouting step all the way through post-processing in Lightroom.
Table of Contents
Why the Golden Hour Matters for Drone Photography
The golden hour is the short window of soft, warm light just after sunrise and just before sunset. For drone pilots, it is the best time of day to fly for three reasons: the light is directional and flattering, wind is typically calmer, and the sky puts on a color show you simply cannot reproduce at midday.
During golden hour, the low sun angle creates long shadows that reveal texture in the landscape below. Hills, trees, buildings, and coastlines all gain depth and dimension. From an aerial perspective, this shadow play is amplified because you can see those long shadows stretching across large areas that a ground-based photographer could never capture.
The warm color temperature also helps. That golden-orange light enriches natural features like water, rock, sand, and foliage in a way that no filter can truly fake. Combine that warmth with dramatic clouds, and your drone sensor is recording data that looks stunning straight out of camera.
Sunrise vs. Sunset: Which Is Better?
Both sunrise and sunset produce beautiful golden hour light, but they behave differently for drone work. Sunrise usually offers cleaner air, calmer wind, and fewer people in your frame. The downside is the early start and colder temperatures that can drain your battery faster.
Sunset gives you the advantage of scouting your location in full daylight before the light turns good. Air tends to be dustier, which can add warmth but also haze. For drones specifically, I prefer sunrise because the still air produces sharper images and the pre-sunrise blue hour is magical for long exposures.
Planning Your Sunrise or Sunset Drone Shoot
Planning is where most sunrise sunset drone photos are won or lost. You cannot show up five minutes before the sun crosses the horizon and expect great results. I treat every golden hour shoot like a small mission, and the steps below are the workflow I follow every single time.
Start by scouting your location in daylight a day or two before the shoot. Walk or drive the area, note any flight restrictions, identify safe takeoff and landing zones, and look for foreground interest like water, roads, or interesting terrain. From the air, even a boring field can look good, but strong foreground elements take a photo from nice to unforgettable.
Next, check the weather. You want partly cloudy skies for the best color. A completely clear horizon produces a fast, plain sunset, while too much cloud cover hides the sun entirely. Thin, high clouds lit from below are the holy grail.
Plan to arrive at your launch spot at least 45 minutes before the published sunrise time, or 45 minutes before sunset if you are shooting in the evening. The best color often happens before the sun actually breaks the horizon at sunrise, and after it dips below at sunset.
Best Apps for Drone Sunrise and Sunset Planning
I use a small stack of apps for every golden hour flight. These tools take the guesswork out of timing, location, and conditions.
Sun Surveyor is my go-to for visualizing exactly where the sun will rise or set relative to my location. The augmented reality mode lets you hold up your phone and see the sun’s path overlaid on the actual scene, which is invaluable for pre-visualizing compositions.
UAV Forecast tells me wind speed at different altitudes, KP index for GPS stability, and cloud cover. I will not fly if winds aloft exceed 15 mph, and this app gives me that data before I leave the house.
PhotoPills is another excellent option that combines sun positioning with a drone-specific planner. It also calculates blue hour timing, which matters more than people realize for drone work.
DJI Fly itself includes useful tools like the Golden Hour indicator and Hyperlapse planning. I always open the app before takeoff to confirm GPS lock and update any firmware.
Essential Camera Settings for Drone Sunrise and Sunset Photography
If you take one thing from this article, let it be this: get out of auto mode. Auto exposure will almost always overexpose the sky when shooting toward the sun, blowing out the exact colors you are trying to capture. Manual mode is the foundation of golden hour drone photography settings.
Here are the baseline settings I use for most sunrise and sunset drone shots. These are starting points, not rules, and I adjust based on the specific light in front of me.
ISO Settings
Keep your ISO low, between 100 and 200. Drone sensors are small, and noise becomes visible quickly at higher ISO values, especially in the shadow areas of a high-contrast golden hour scene. ISO 100 gives you the cleanest file with the most dynamic range to work with later in post.
The only time I bump ISO to 200 or 400 is when I need a faster shutter speed to freeze motion, like shooting waves or moving subjects in dim blue hour light. Even then, I test the noise on the back of the controller before committing to a full panorama.
Aperture
Drone cameras have a fixed aperture on most consumer models like the DJI Mini series, so you cannot change it. If you fly a Mavic 3 or Air 3S with an adjustable aperture, aim for around f/5.6 to f/8. This range gives you the sharpest image across the frame without diffraction softening.
Stopping down to f/8 or f/11 also helps control brightness when shooting directly into the sun. Pair it with an ND filter for the best results.
Shutter Speed
Shutter speed is your main exposure control during golden hour because the light changes constantly. I start around 1/100 second and adjust from there, watching the histogram on my controller screen. As the sun gets brighter, I speed up the shutter, and as light fades, I slow it down.
For sharp handheld drone shots, keep your shutter speed at least 1/60 second or faster. A drone hovering in calm air is remarkably stable, but any wind will introduce motion blur at slower speeds. For smooth water effects or motion blur in clouds, you will need ND filters to allow longer exposures.
White Balance
Auto white balance will fight you during golden hour because the camera keeps trying to “correct” the warm light you actually want. Set a manual white balance between 5000K and 6500K, or use the cloudy preset, which sits around 6000K and preserves warm tones.
If you shoot RAW, which you should, white balance is fully adjustable later in Lightroom. But setting it close in-camera means your preview matches what you will deliver, and that helps you make better composition decisions on the fly.
Shoot in RAW, Always
JPEG files discard data your drone captured, and during golden hour that data is gold. RAW files give you 12 to 14 stops of dynamic range to recover blown highlights, lift shadows, and fine-tune color temperature in post.
Golden hour scenes routinely have a 10-stop dynamic range or more between the bright sun and the shadowed ground beneath it. JPEG cannot hold that range. RAW can, especially when you also use AEB bracketing to extend it further.
Using ND Filters for Golden Hour Drone Shots
ND (neutral density) filters are sunglasses for your drone camera. They reduce the amount of light hitting the sensor without changing color, which lets you use slower shutter speeds or wider apertures in bright conditions. For golden hour work, they are essential when shooting toward the sun.
The main reason I use ND filters at sunrise and sunset is to control exposure without cranking the shutter speed so high that I lose detail. An ND8 or ND16 filter is usually right for the brighter moments of golden hour, while an ND32 helps when the sun is directly in the frame.
A graduated ND filter, which is darker on top and clear on the bottom, is a specialty tool that mimics what landscape photographers use on full-frame cameras. Some drone filter systems offer these, and they are perfect for balancing a bright sky against a darker ground.
Polarizing filters are a different tool that reduces reflections and saturates colors. They work wonders over water and wet surfaces, intensifying reflections of colorful skies. They are not the same as ND filters, though, and they only work their best when pointed 90 degrees from the sun.
Composition Techniques for Aerial Sunrise and Sunset Photos
Great light means nothing without strong composition. Aerial photography gives you composition options ground shooters can only dream of, but it also makes lazy framing easy because everything looks cool from above.
I always fly with a specific composition in mind before I launch. Sometimes that plan changes once I see the scene from the air, but having a starting point keeps me focused instead of just orbiting and hoping for a good frame.
Foreground and Midground Layers
The biggest composition weakness in drone sunrise sunset photos is a flat, featureless horizon. To fix this, find foreground elements like a winding road, a body of water, or a row of trees that lead the eye toward the sun. The aerial perspective lets you layer foreground, midground, and background in a way that creates real depth.
Water is especially powerful at golden hour because it reflects the colorful sky. Lakes, rivers, and ocean shorelines double the impact of a sunrise by mirroring the warm tones. Get your drone low, just above the water surface, for a reflection shot that fills the frame with color.
Silhouettes from Above
Silhouettes are one of my favorite golden hour techniques. Expose for the bright sky, and any object on the ground becomes a clean, graphic shape against the color. From the air, you can frame lone trees, lighthouses, windmills, or boats as silhouettes against the rising or setting sun.
The trick is finding isolated subjects that read clearly as a shape from above. A cluttered skyline becomes a messy silhouette. A single, well-placed subject becomes iconic.
I also love shooting straight down during golden hour. Top-down views of long shadows stretched across a textured landscape look abstract and modern. The low sun angle makes every bump and ridge cast a shadow that emphasizes form.
Panorama and HDR Techniques for High-Contrast Skies
The biggest technical challenge in golden hour drone photography is dynamic range. The sky near the sun is extremely bright, while the ground below is often 5 to 8 stops darker. A single exposure cannot capture both. This is where panoramas and HDR techniques come in.
AEB (Auto Exposure Bracketing)
AEB is the secret weapon for sunrise sunset drone photography. When enabled, the drone takes three or five shots in rapid succession at different exposure values, typically one stop apart. You then blend these in Lightroom or Photoshop to recover detail in both highlights and shadows.
I shoot AEB for almost every golden hour scene. The five-shot bracketing option, available on most modern DJI drones, gives you 5 stops of dynamic range expansion. That is enough to capture detail in the sky around the sun and the shadowed ground in the same image.
The workflow is simple. Enable AEB in the camera settings, frame your shot, and press the shutter once. The drone fires all exposures automatically. Keep the drone perfectly still during the burst, since any movement between frames creates ghosting when you blend them later.
180 vs 360 Panorama Modes
Panoramas let you capture scenes wider than your drone’s field of view. The DJI Fly app offers automated panorama modes that handle the shooting and stitching for you, which is fantastic when the light is changing fast.
A 180-degree panorama sweeps across the horizon, perfect for wide coastal sunrises or mountain ridges. The drone takes a horizontal row of images and stitches them together. This is my favorite mode for golden hour because the entire horizon line gets captured in one ultra-wide image.
A 360-degree panorama captures everything around the drone in a full sphere. It is more demanding on the drone and more work to display, but it captures the entire sky, including the sun and the opposite horizon where the sky is often a deeper blue. I use 360 panoramas when I want to print large or share interactive views online.
For the ultimate in quality, I shoot manual panoramas with AEB at each position. This produces an HDR panorama with massive dynamic range. The workflow takes practice but the results are breathtaking, especially printed large.
Step-by-Step: How to Photograph a Sunrise or Sunset With a Drone
Here is my exact step-by-step process for capturing a sunrise or sunset with a drone. Follow these steps in order and you will consistently come home with strong images.
Step 1: Scout the location in daylight. A day or two before your shoot, visit the location. Identify safe launch spots, check for obstacles, and confirm there are no flight restrictions. Note interesting foreground elements and think about where the sun will be.
Step 2: Check the weather and forecast. Open UAV Forecast and check wind at your planned altitude, cloud cover, and KP index. Aim for partly cloudy skies with winds under 12 mph. Postpone if conditions look bad.
Step 3: Plan the sun position. Use Sun Surveyor or PhotoPills to confirm exactly where the sun will rise or set relative to your subject. The sun’s position shifts throughout the year, so check this every time.
Step 4: Arrive 45 minutes early. Set up your drone, attach ND filters if needed, and complete pre-flight checks. Make sure your batteries are warmed if it is cold.
Step 5: Launch during blue hour. Get airborne 20 to 30 minutes before sunrise to capture the blue hour and the first hints of color. This is when you find your compositions and dial in your settings.
Step 6: Switch to manual mode. Set ISO 100, aperture f/5.6 to f/8, and adjust shutter speed to expose correctly for the brightest part of your scene. Enable the histogram on your controller screen and use it, not the preview image.
Step 7: Enable AEB bracketing. Use 3 or 5 shot AEB for every composition during golden hour. This protects you against the high dynamic range of sunrise and sunset scenes.
Step 8: Shoot multiple compositions. Move through your planned shots quickly because the light changes fast. Capture wide scenes, tighter details, top-down views, and silhouettes.
Step 9: Keep flying through the full golden hour. Do not pack up the moment the sun appears or disappears. Some of the best color happens 10 to 20 minutes after sunrise and before sunset.
Step 10: Land safely and back up your files. Once the color fades, land, pack up, and back up your RAW files immediately. Then start editing while the shoot is fresh in your mind.
Drone Battery Management in Cold Morning Conditions
Sunrise shoots mean cold mornings, and cold is the enemy of lithium drone batteries. A battery that delivers 25 minutes of flight time at 70 degrees Fahrenheit might give you 15 minutes at 40 degrees. At freezing temperatures, performance drops even more dramatically.
Always store and transport your batteries at room temperature. I keep mine in an insulated bag inside my car, and I never leave them in a cold vehicle overnight. If your drone batteries are cold when you launch, the voltage sag can cause unexpected low-battery warnings or even automatic landings.
Some drones, including newer DJI models, have a battery warm-up feature or will warn you when batteries are too cold to fly safely. Always heed these warnings. If you see a low-temperature alert, land, warm the battery, and try again.
I bring at least three fully charged batteries to every sunrise shoot. One for blue hour and the first part of golden hour, one for the main event, and one as a backup. Landing to swap batteries mid-golden-hour is frustrating, so plan your power carefully.
Safety and Legal Considerations for Low-Light Flying
Flying at sunrise and sunset introduces safety challenges that daylight flights do not. Lower light means reduced visibility, both for you watching the drone and for the drone’s obstacle avoidance sensors. Many consumer drones rely on optical sensors that struggle in dim conditions.
Always fly within visual line of sight, which is harder at dawn and dusk. If you cannot clearly see your drone, you are too far away. Use strobe lights, like those from Firehouse, to make your drone visible at distance.
Be aware of the rules where you fly. In the United States, Part 107 pilots can fly at night, but recreational pilots face different requirements depending on current regulations. Always check your local rules and airspace before launching, and never fly in controlled airspace without authorization.
One rule worth knowing is the so-called 1:1 rule, which refers to maintaining a horizontal distance from people equal to your altitude, as a safety buffer. It is not a legal requirement in every country, but it is a smart habit, especially in low light when you cannot react as quickly to obstacles.
Common Mistakes to Avoid
I have made every mistake on this list, and so has every drone photographer I know. Learning to avoid them will save you hours of frustration.
Mistake 1: Shooting in auto mode. Auto exposure overexposes the sky during golden hour, blowing out the colors you want. Manual mode is non-negotiable.
Mistake 2: Arriving too late. If you show up at the published sunrise time, you have already missed the best light. The pre-sunrise color is often the most beautiful part of the morning.
Mistake 3: Ignoring the histogram. The preview image on your controller lies in bright conditions. The histogram tells you the truth about exposure. Learn to read it.
Mistake 4: Shooting only JPEG. JPEG throws away the dynamic range you need for golden hour. Shoot RAW, always, with no exceptions.
Mistake 5: Forgetting ND filters. Without ND filters, you will be stuck at high shutter speeds that kill any sense of motion in your images. ND filters unlock creative options.
Mistake 6: Packing up too early. The second wave of color after sunset, or just after the sun clears the horizon at sunrise, is often the best. Stay until the color is truly gone.
Mistake 7: Not using AEB. Single exposures almost never capture the full dynamic range of a sunrise or sunset scene. AEB bracketing is the difference between a snapshot and a photograph.
Mistake 8: Flying in wind. Wind picks up fast after sunrise as the ground warms. Check conditions before you fly, and land immediately if winds increase while you are in the air.
Post-Processing Your Golden Hour Drone Photos
Capture is only half the job. Post-processing is where your golden hour drone photos come to life. Even a well-exposed RAW file benefits from careful editing to balance contrast, recover highlight detail, and enhance color.
I do all my editing in Adobe Lightroom Classic. Start by importing your RAW files and reviewing them at full screen to pick the keepers. For AEB brackets, group them together so you can blend them as HDR in batches.
The first edit I make is white balance. Even though I set it manually in-camera, golden hour light is tricky, and a small adjustment can dramatically warm or cool the image. I aim for rich, warm tones without going orange.
Next, recover highlights in the sky and lift shadows in the foreground. With HDR blends from AEB, you have plenty of data to work with. Push the highlights down until you see detail in the brightest clouds, and lift shadows just enough to reveal texture in the ground.
Add clarity and texture sparingly. Too much clarity looks unnatural, but a small amount enhances the dimensionality that golden hour light provides. Vibrance, not saturation, is the better tool for enriching color without making skin tones or neutral areas look cartoonish.
For panoramas, use Lightroom’s Photo Merge feature. It handles both HDR blending and panorama stitching in a single step if you shot AEB at each position. Crop the result, fix any distortion, and apply your normal adjustments.
Finally, sharpen for your output. Screens need less sharpening than prints. Export at full resolution for printing, or sized appropriately for web sharing.
What are the best drone settings for sunrise?
For sunrise drone photography, use manual mode with ISO 100-200, aperture f/5.6 to f/8, and a shutter speed fast enough to avoid blur, typically 1/100 second or faster. Set white balance manually between 5000K and 6500K, shoot RAW, and enable AEB bracketing to capture the full dynamic range of the high-contrast scene.
How to capture a perfect sunrise photo with a drone?
Arrive 45 minutes before sunrise, scout your location in advance, switch to manual camera mode with ISO 100 and aperture f/8, enable AEB bracketing, and shoot RAW. Fly during blue hour to find compositions, then capture multiple frames as the light changes, including wide scenes, silhouettes, and top-down views.
What time is golden hour for drone photography?
Golden hour begins roughly 30 minutes after sunrise and ends about 30 minutes before sunset. For drone photography, the practical golden hour window is slightly longer because you can shoot into the pre-sunrise and post-sunset color. Plan to fly from 30 minutes before sunrise until about 60 minutes after, or the reverse at sunset.
How to avoid overexposed sunrise drone photos?
To avoid overexposed skies when shooting toward the sunrise, switch to manual mode, lower your ISO to 100, stop down the aperture, increase shutter speed, use ND filters to reduce light, and enable AEB bracketing so you always have an underexposed frame with sky detail preserved.
What is better for photography, sunrise or sunset?
Both produce beautiful golden light, but sunrise typically offers cleaner air, calmer wind, and fewer people in your frame, which is ideal for drone work. Sunset is easier to plan since you can scout in daylight, but it tends to have dustier air and more air traffic. Many drone photographers prefer sunrise for sharper images.
What is the best time of day for drone photography?
The best time of day for drone photography is golden hour, which is the hour after sunrise and the hour before sunset. The low sun angle produces warm, directional light with long shadows and rich colors. Blue hour, just before sunrise and after sunset, is also excellent for moody aerial images.
Should I shoot RAW or JPEG for drone golden hour photos?
Always shoot RAW for golden hour drone photography. RAW files retain 12 to 14 stops of dynamic range, which you need to recover blown highlights and lift shadows in high-contrast sunrise and sunset scenes. JPEG files discard this data and cannot be recovered later.
Do I need ND filters for drone sunset photography?
ND filters are highly recommended for drone sunset photography because they reduce the amount of light hitting the sensor, letting you use slower shutter speeds and wider apertures for creative effects. They also help control exposure when shooting directly into the sun. An ND8 to ND32 filter covers most golden hour conditions.
Conclusion
Learning how to photograph a sunrise or sunset with a drone takes patience and practice, but the workflow is straightforward once it becomes habit. Plan with the right apps, fly during the full golden hour window, use manual mode with low ISO and bracketed exposures, compose for layers and silhouettes, and finish with thoughtful post-processing in Lightroom.
The golden hour is the most rewarding time to fly a drone. The light, the colors, and the stillness come together in a way no other time of day can match. Grab your drone, set your alarm, and get out there for the next sunrise. The images you bring home will be worth every early morning.