
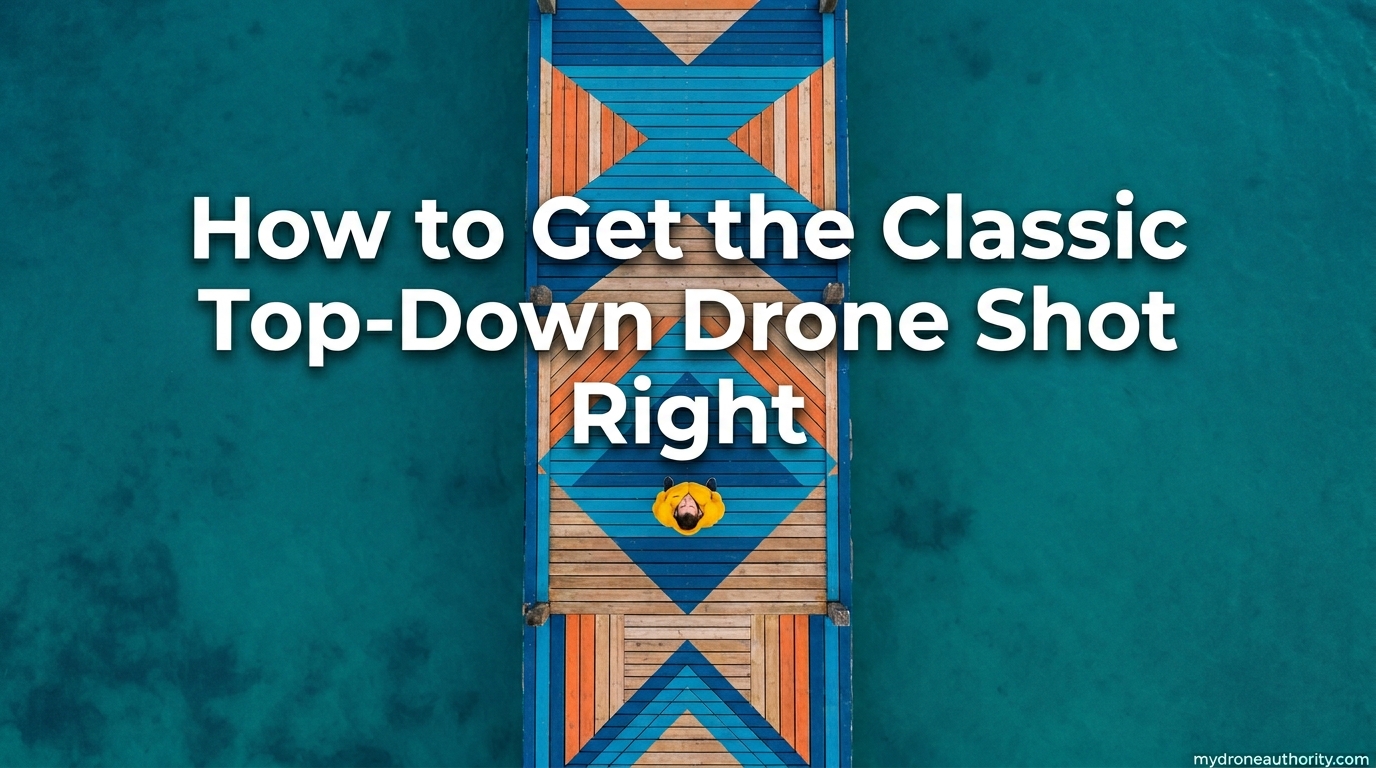
A top-down drone shot, also called a nadir shot or bird’s eye view, is an aerial photograph taken with the camera pointed directly perpendicular to the ground. To get the classic top-down drone shot right, you need three things locked in: a gimbal angled at negative 90 degrees, sharp camera settings (low ISO, fast shutter, RAW capture), and a drone that holds its position without drifting. That combination is what separates a flat, forgettable overhead image from the striking map-like compositions that make viewers stop scrolling.
Our team has spent hundreds of flight hours refining this exact technique across coastlines, farmland, urban grids, and mountain valleys. The top-down angle is the one shot that beginner pilots consistently get wrong, yet it is also the most rewarding once you understand the fundamentals. In this guide we will walk through every step, from camera settings to stabilization to composition, so you can learn how to get the classic top-down drone shot right the first time you try it.
Unlike oblique aerial shots that lean on horizon lines and sky for drama, the classic top-down drone shot strips photography down to pure pattern, geometry, and texture. There is no horizon to lean on. The ground becomes your entire canvas, which means every choice, altitude, lighting, subject selection, matters twice as much.
Table of Contents
What Is a Top-Down Drone Shot?
A top-down drone shot, sometimes called a nadir shot or bird’s eye view photograph, is captured when the gimbal is tilted to a full negative 90 degrees, pointing the lens straight at the ground below. The word nadir comes from surveying and cartography, where it describes the point on the ground directly beneath an observer. In aerial photography terms, that means your drone is the observer and the ground directly underneath it is the nadir point.
This differs from an oblique aerial shot, where the camera is angled between roughly 15 and 75 degrees and the horizon is still visible. Oblique shots show depth and scale through perspective. A true top-down drone shot flattens perspective completely, turning a three-dimensional scene into what looks like a two-dimensional map, painting, or textile.
The look is unmistakable once you train your eye for it. Agricultural fields become patchwork quilts. Parking lots turn into geometric grids. Ocean waves freeze into textured blue marble. Swimming pools read as clean rectangles of turquoise. That flattening effect is what gives the classic top-down drone shot its graphic, almost abstract quality, and it is exactly why this style has become so dominant on Instagram and in travel photography portfolios.
Camera Settings for the Perfect Top-Down Drone Shot
Getting camera settings right is the single biggest factor in capturing a sharp, professional top-down drone shot. Because the ground is being photographed from altitude, any motion blur, high ISO noise, or exposure miss will be magnified when viewers zoom in on those satisfying details.
Start with ISO 100
Always shoot at the lowest native ISO your drone supports, typically ISO 100. Top-down scenes usually have plenty of light hitting them from above, so you do not need the sensitivity boost. High ISO adds grain that destroys the clean, graphic quality this style depends on. Only raise ISO if you are shooting at dusk or dawn and you have already maxed out your shutter speed and aperture options.
Use a Fast Shutter Speed
Even when your drone appears to be hovering perfectly, it is constantly making micro-corrections for wind and GPS drift. A shutter speed of 1/800 second or faster freezes that movement and keeps ground details razor sharp. For fast-moving subjects like waves, traffic, or sports fields, push to 1/1600 or faster. Slow shutter speeds are the number one cause of soft top-down images.
Lock Your Aperture
Most consumer drones have a fixed or near-fixed aperture, but if yours allows adjustment, shoot around f/2.8 to f/4 for sharpness across the frame. Stopping down too far on a small drone sensor actually softens the image due to diffraction. The goal is not deep depth of field here, the entire ground plane is effectively at the same distance, so maximize lens sharpness instead.
Set White Balance Manually
Auto white balance can shift between frames and ruin panoramas. Set a fixed value around 5200K to 5600K for daylight top-down work. If you are shooting over water, snow, or sand, those reflective surfaces can fool the camera into cooling the image. A locked white balance keeps colors consistent across a session.
Always Shoot RAW
JPEG files throw away the data you need to recover highlights in bright sand, lift shadows in dense forests, and correct white balance later. RAW capture gives you roughly 12 to 14 stops of dynamic range to work with in Lightroom or Capture One. Experienced drone photographers on Reddit and dpreview almost universally recommend RAW as the non-negotiable starting point for serious aerial work.
Use Bracketing for High-Contrast Scenes
Top-down scenes often mix bright reflective surfaces with deep shadows, especially over water or urban environments. Auto Exposure Bracketing (AEB) captures three to five frames at different exposures that you can later blend using luminosity masking in Photoshop or HDR merge in Lightroom. This preserves detail in both the brightest and darkest parts of the scene.
Add ND Filters for Video
If you are capturing top-down video rather than stills, ND filters are essential. They cut light so you can maintain a shutter speed of roughly twice your frame rate, which produces natural motion blur. Without an ND filter, your video will look choppy and over-sharp. A 3-stop or 4-stop ND filter covers most daytime top-down conditions.
Drone Positioning and Altitude Control
Once your camera settings are dialed in, the next challenge is positioning the drone so the gimbal can hold a true 90-degree angle without the aircraft drifting. Positioning mistakes are subtle but they show up immediately in the final image as motion blur, skewed horizontals, or visible subject shift.
Set the Gimbal to Negative 90 Degrees
Most modern drones including DJI models have a one-tap option to set the gimbal straight down. Verify this in your app by checking the gimbal angle readout shows negative 90. Do not try to eyeball it. Even a few degrees off perpendicular introduces unwanted perspective distortion that ruins the flat, map-like quality of the shot.
Lock GPS and Let the Drone Settle
Wait for a strong GPS lock of at least 12 satellites before you tilt the gimbal down. Once locked, fly to your shooting altitude and let the drone hover for 5 to 10 seconds before pressing the shutter. This gives the flight controller time to stabilize and settle into a true stationary hover. Rushing this step is why so many beginners end up with slightly soft images.
Choose the Right Altitude
Altitude changes everything about a top-down composition. Low altitude, around 20 to 50 feet, isolates small details like a single car, a person, or a small structure. Mid altitude, 100 to 200 feet, captures medium-scale scenes like a building, a small park, or a backyard pool. High altitude, 300 to 400 feet, reveals large patterns like agricultural fields, coastlines, or city blocks. There is no single best altitude, the right height depends on whether your subject is a single object or a sprawling pattern.
Avoid Windy Conditions
Even with GPS lock, wind forces the drone to constantly fight for position, which translates into micro-movements that blur the shot. Wind speeds above 10 to 12 mph are generally too much for clean top-down photography. Check wind forecasts before you fly and aim for calm early-morning conditions whenever possible.
How to Stabilize Top-Down Drone Footage
If there is one topic that dominates drone forums on Reddit, it is the frustration of shaky top-down footage. Pilots point their gimbal straight down, capture what looks like a smooth hover, and discover in post that the footage jitters, bounces, or drifts. This is the single most common complaint in the r/drones and r/drone_photography communities, and the fix involves both in-flight technique and post-processing.
Calibrate the Gimbal Before Every Shoot
A gimbal that is even slightly out of calibration will produce a horizon that drifts and a frame that never quite feels locked. Run a full gimbal calibration on a perfectly flat surface before any serious top-down session. This takes two minutes and eliminates a surprising number of stabilization issues.
Switch to Tripod or Cinematic Mode
Most modern drones offer a Tripod Mode or Cinematic Mode that slows down stick response and smooths out flight inputs. Use it for every top-down sequence. The drone responds more gently to wind corrections, which translates into visibly smoother footage.
Fly Slower Than You Think You Need To
If you need motion in your top-down shot, fly at a crawl. The slower the drone moves, the easier it is for the gimbal to compensate and for post-stabilization software to clean up any remaining jitter. Fast top-down passes almost always look chaotic.
Use Post-Production Stabilization Sparingly
Tools like Warp Stabilizer in Premiere Pro, stabilization in DaVinci Resolve, and the ReelSteady plugin can rescue borderline footage, but they degrade quality by cropping into the frame. The Reddit community is unanimous on this point, fix stabilization in flight first, then use post tools only as a last resort. Over-reliance on post-stabilization is what gives drone footage that wobbly, jelly-like look.
Composition Techniques for Top-Down Photography
Composition is where most top-down drone photography falls apart. Without a horizon line, leading lines from foreground to background, or traditional perspective cues, photographers are left with a flat canvas that demands a completely different visual approach.
Hunt for Patterns and Textures
The best top-down drone shots are almost always about pattern. Look for agricultural fields with plowing lines, ocean swells, sand ripples, city grids, parking lots, vineyard rows, or tidal flats. The camera flattens these into graphic textures that read like abstract art. Train yourself to spot repeating shapes from altitude, they are the foundation of compelling top-down work.
Use Symmetry and Geometry
Top-down photography rewards symmetry. Center your subject, frame circular forms like roundabouts or fountains dead-center, and align geometric subjects like swimming pools, tennis courts, or piers along grid lines. The flat perspective turns geometry into the main visual hook.
Apply the Rule of Thirds Vertically
The rule of thirds still works from above, but you apply it to the ground plane. Place a single subject, a boat, a person, a vehicle, at one of the four intersection points rather than dead-center. This creates visual tension and keeps the image from feeling too symmetrical.
Isolate Your Subject
The strongest top-down drone shots feature one clear subject against a clean background. A single red kayak on dark water. A lone swimmer in a turquoise pool. One car on an empty highway. Clutter kills the effect. If a scene has too many competing elements, climb higher to simplify the composition or pick a different subject.
Embrace Negative Space
Large areas of empty ground, water, sand, or snow give the eye room to rest and make your subject pop. Do not be afraid of composition that is 80 percent empty space with a single small subject. That is exactly the kind of minimal top-down shot that performs well in portfolios and on social media.
Best Subjects for Top-Down Drone Shots
Reliable top-down subjects include swimming pools, tennis and basketball courts, marinas, agricultural fields, winding rivers, beach shorelines, parking lots with painted lines, forest canopies, mountain switchbacks, and urban intersections. Water is particularly rewarding because it reflects light and color in ways that change with every minute of the day.
Lighting Conditions That Make or Break Top-Down Shots
Lighting from above behaves differently than lighting at ground level. There is no backlight, sidelight, or frontlight in the traditional sense, the sun is illuminating the same plane your camera is pointed at. This makes timing and weather matter more than for any other drone shot style.
Golden Hour Is Not Always Best
For oblique landscape shots, golden hour is almost always the right answer. For top-down work, it can actually work against you. Long shadows from trees and buildings can dominate the frame and obscure the patterns you are trying to capture. Golden hour top-downs work best when the shadows themselves are the subject, like dunes, forests, or city skylines.
Midday Sun Reveals Color
Overhead sun brings out the true color and saturation of the ground below. Water reads as deep turquoise, grass is vivid green, and urban materials show their full tonal range. Midday is often dismissed in traditional photography, but it is one of the best times for color-rich top-down work over water, fields, and reflective surfaces.
Overcast Days Are a Secret Weapon
A high, even cloud cover acts like a giant softbox. It eliminates harsh shadows, smooths out reflections, and brings out subtle textures that direct sun washes out. Overcast conditions are ideal for forest canopies, rocky coastlines, and any scene where you want detail over drama.
Watch for Lens Flare
Because the camera is pointed straight down, lens flare is rarely an issue, unless the sun reflects off water or glass directly below you. If you see a hot spot forming in your frame, shift the drone a few feet to break the reflection angle.
Common Top-Down Drone Shot Mistakes to Avoid
Even experienced pilots make these mistakes. Knowing them in advance saves hours of frustration and ruined shoots.
1. Tilting the Gimbal During Capture
If you bump the gimbal wheel while shooting, even by a few degrees, the shot is no longer a true nadir. Lock the gimbal at negative 90 before you frame your shot and avoid touching the controls until you are done.
2. Flying Too Low
Low altitude captures more detail but shows less of the pattern that makes top-down work interesting. If your images feel busy or chaotic, climb 50 feet and try again.
3. Ignoring Wind Forecasts
Wind is the silent killer of top-down sharpness. Always check a forecasting app like UAV Forecast before you leave home. If gusts are above 12 mph, reschedule.
4. Shooting JPEG Only
JPEG capture throws away the data you need to recover highlights and fix white balance. RAW is mandatory for serious top-down photography, especially in high-contrast scenes.
5. Over-Processing in Post
The flat, graphic look of a top-down drone shot is easy to ruin with aggressive clarity, vibrance, and saturation sliders. Pull back on every adjustment until the image feels natural. Subtle editing preserves the clean, professional look that defines the style.
FAQs
What is a top-down drone shot called?
A top-down drone shot is technically called a nadir shot, meaning the camera points directly at the nadir point on the ground below. It is also commonly referred to as a bird’s eye view, overhead shot, or aerial top-down photograph.
How do you get top down shots on a drone camera?
Set your gimbal to negative 90 degrees so the lens points straight down, lock GPS and let the drone hover for several seconds, use a fast shutter speed of at least 1/800 second, shoot in RAW at ISO 100, and compose for pattern, symmetry, and geometry rather than traditional horizon-based framing.
What is the best altitude for top-down drone photography?
There is no single best altitude. Low altitude, 20 to 50 feet, isolates small subjects. Mid altitude, 100 to 200 feet, works for buildings and small parks. High altitude, 300 to 400 feet, captures large patterns like fields and coastlines. Match altitude to the scale of your subject.
How do I stabilize shaky top-down drone footage?
Calibrate the gimbal on a flat surface before every shoot, fly in calm conditions under 12 mph wind, use Tripod or Cinematic mode, fly slower than feels necessary, and let the drone settle for several seconds before recording. Use post-production stabilization only as a last resort because it crops the frame and degrades quality.
What is the 400 foot rule for drones?
In the United States, the FAA Part 107 rule limits recreational and commercial drone flights to a maximum altitude of 400 feet above ground level. This gives you plenty of room for top-down work, but always check local regulations before flying in any new location.
What are the best camera settings for a top-down drone shot?
Use ISO 100, a shutter speed of 1/800 second or faster, aperture around f/2.8 to f/4, manual white balance near 5500K, RAW capture, and exposure bracketing for high-contrast scenes. Add an ND filter if you are shooting video to maintain proper shutter speed relative to frame rate.
Conclusion
Learning how to get the classic top-down drone shot right comes down to a handful of repeatable fundamentals. Lock your gimbal at negative 90 degrees, shoot RAW at ISO 100 with a fast shutter, let the drone settle into a stable hover before you fire, and compose for pattern rather than perspective. Stabilization, lighting, and altitude are the variables that separate good from great, and now you have a checklist for each.
The top-down drone shot is the most distinctive perspective your drone can offer, and once you train your eye for the patterns and geometry it reveals, every flight becomes a chance to capture something most people never get to see. Pack your gear, wait for a calm morning, and start practicing. Your portfolio will thank you.