
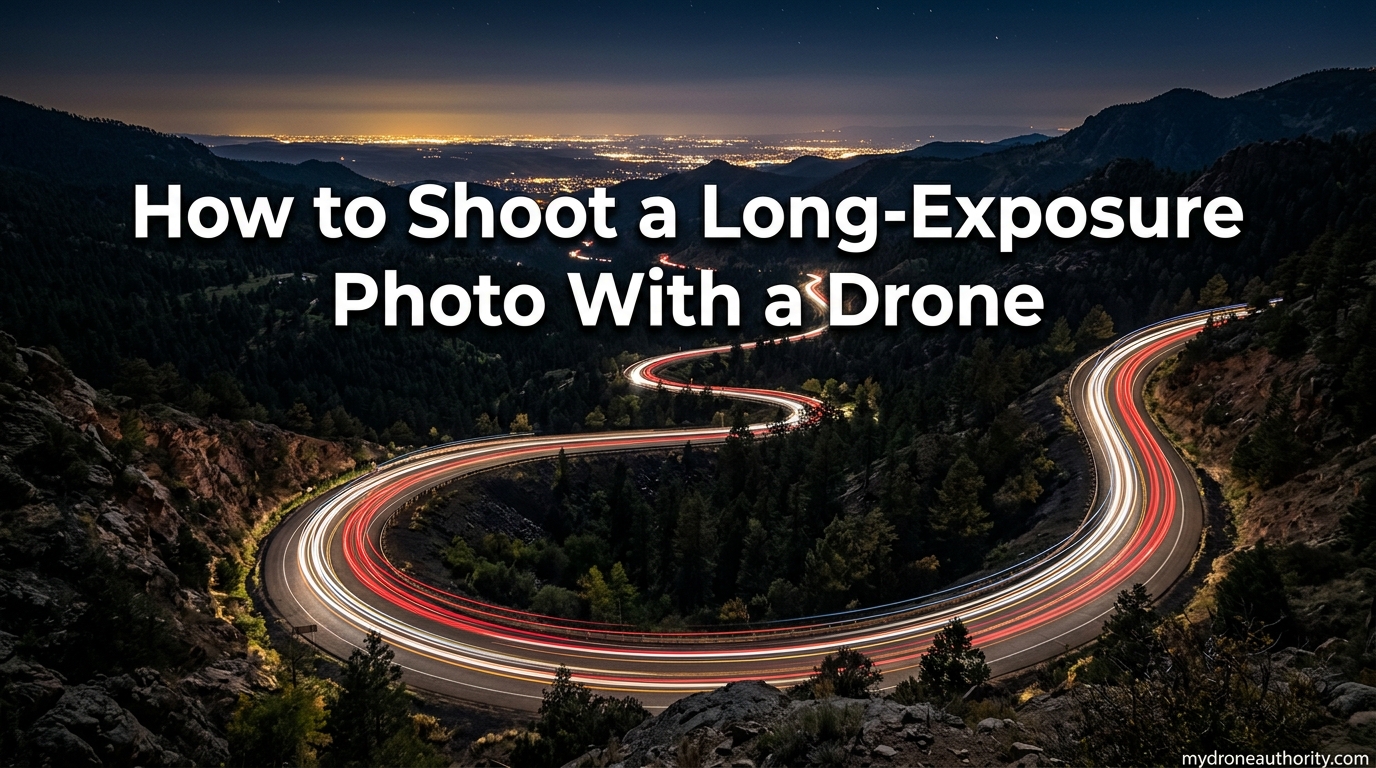
If you have ever wondered how photographers capture silky-smooth waterfalls from above or glowing ribbons of traffic lights from the sky, you are looking at long exposure drone photography. Learning how to shoot a long-exposure photo with a drone opens up an entirely new creative direction that most pilots never explore. In this guide, I will walk you through every setting, piece of gear, and field technique you need to get sharp, dramatic long exposures from a hovering camera.
Long exposure work is one of the more challenging skills in aerial photography, but it is also one of the most rewarding. Once you understand how neutral density filters, shutter speed, and drone stability interact, the results can rival anything shot from a tripod on the ground.
Table of Contents
What Is Long Exposure Drone Photography?
Long exposure photography uses an extended shutter speed, typically anywhere from 1/2 second up to 8 seconds, to capture motion as a soft blur. On a drone, this means freezing the camera in a hover while moving elements below, like water, clouds, or headlights, smear across the frame.
The effect is what turns choppy ocean waves into glassy mist, converts highway traffic into glowing light trails, and smooths rushing rivers into white ribbons. None of this is possible at the fast shutter speeds most pilots fly with by default.
Why Drones Are Tricky for Long Exposures
A drone is not a stable tripod. Even with a three-axis gimbal, the airframe itself is constantly making micro-adjustments to hold position. Motors pulse, GPS drifts, and wind nudges the body in every direction. Any of these tiny movements during a multi-second exposure will smear the entire frame.
This is why most experienced aerial photographers treat anything beyond about 2 to 3 seconds as the practical limit for a clean single exposure. Push past that, and you are usually better off stacking shorter exposures in post.
How It Differs From Ground-Based Long Exposure
On the ground, you can slap a heavy tripod down, mount a 10-stop ND filter, and run a 30-second exposure without a single pixel of blur. A drone simply cannot match that kind of stillness. The trade-off is that the unique aerial perspective gives you compositions no tripod can reach, so the technique is absolutely worth learning despite the limitations.
Equipment You Need to Shoot Long Exposures With a Drone
You do not need a massive kit, but you do need the right tools. The two non-negotiables are a drone with full manual camera control and at least one neutral density filter.
The Right Drone
Any DJI drone that supports full manual mode in the camera app will work. The Mavic 3 series, Air 2S, Air 3, Mini 3 Pro, and Mini 4 Pro all qualify. The larger 1-inch or 4/3 sensors on the Mavic 3 and Air 2S give you cleaner files when light drops, which matters a great deal for this style of shooting.
Neutral Density Filters
A neutral density (ND) filter is essentially sunglasses for your camera lens. It blocks a measured amount of light from reaching the sensor without changing the color of the scene. Without one, even at ISO 100 and a stopped-down aperture, daylight will force your shutter speed too fast to blur motion.
The most common ND filter strengths you will use for drone long exposure work are ND16, ND32, ND64, and ND500. PolarPro and DJI both make solid filter sets, and the PolarPro Cinema Series is widely trusted in the community.
Choosing the Right ND Filter Strength
Here is a quick reference I use to pick a filter based on light conditions:
- ND8 – 3 stops of light reduction. Useful for low-light golden hour when you only need a slight slowdown.
- ND16 – 4 stops. The standard long exposure filter for overcast days or late afternoon.
- ND32 – 5 stops. Ideal for bright daylight when you want a 1 to 2 second exposure.
- ND64 – 6 stops. Strong daylight, midday sun, coastal scenes with lots of reflected light.
- ND500 – 9 stops. The heavy hitter for very long exposures in daylight, like the 1/2 second exposures on the Mini 3 Pro that some Reddit users have had great results with.
If you are just starting out, an ND16/32/64 set will cover roughly 80 percent of the conditions you will shoot in.
Best Camera Settings for Long Exposure Drone Shots
The settings are where most pilots go wrong. You cannot leave the drone in auto and expect a usable long exposure. You need to switch into full manual mode in the DJI Fly or DJI Go app and dial in every value yourself.
Shoot in RAW, Always
Set your camera to capture RAW, or RAW plus JPG if you want quick previews. Long exposure files need heavy noise reduction, white balance tweaks, and shadow recovery in post. A JPG simply does not carry the data you need.
ISO
Keep ISO as low as the drone allows. On most DJI drones that is ISO 100. Every stop of ISO you add also adds noise, and noise is far more visible in long exposures because of the way heat builds up on the sensor during a long exposure. ISO 100 is your baseline.
Shutter Speed
This is your creative control. Start around 1 second and review the result. If motion blur is too soft, lengthen to 2 or 3 seconds. If the image is overexposed even with the lowest ISO and smallest aperture, you need a stronger ND filter rather than a faster shutter.
For light trails on a road, anywhere from 2 to 4 seconds is usually enough to capture a clean streak from a passing car. For waterfalls and surf, 1 to 3 seconds gives that smooth, misty look.
Aperture
Drone lenses have a fixed aperture on most consumer models, so you may not have a choice here. If you do have an adjustable aperture, stop down to around f/5.6 or f/8 for the sharpest image across the frame. Avoid the extreme ends of the range.
Read the Histogram
The histogram is the single most underused tool in drone photography. Turn it on in the DJI app and learn to read it. You want the data clustered in the middle of the graph without spiking hard against either edge. A spike pinned to the right wall means blown highlights, which is unrecoverable in post.
Turn Off Auto Exposure
In manual mode, confirm the exposure value indicator is centered or slightly to the left for safety. Disabling auto exposure lock (AEL) prevents the drone from shifting exposure between frames if you shoot a burst for stacking.
How to Shoot a Long-Exposure Photo With a Drone: Step-by-Step
Here is the exact field workflow I follow every time I want a clean long exposure from a drone.
Step 1: Check Conditions
Wind is the single biggest killer of long exposure drone shots. Anything over about 8 to 10 mph will introduce drift that no gimbal can fully cancel. Check a hyperlocal forecast and aim for the calmest window you can find, usually early morning or just after sunset.
Step 2: Pick Your Timing
The best light for long exposures happens during golden hour and blue hour, just before and after the sun crosses the horizon. Lower ambient light means you can run a longer shutter without stacking on heavy ND filters. Civil twilight, the period immediately after sunset, is also when many photographers capture cityscapes with light trails.
Step 3: Mount the ND Filter Before Takeoff
Attach your ND filter on the ground, not in the air. Fumbling with a tiny filter at 200 feet is a recipe for dropping it, and the gimbal calibration can be affected by adding weight mid-flight. Power cycle the drone after mounting so the gimbal recalibrates with the filter in place.
Step 4: Fly to Position and Let It Settle
Fly to your composition and then let the drone hover for at least 2 seconds before you touch the shutter. The MavicPilots community has confirmed this over and over: those first couple seconds after you stop moving are when the drone is still settling on GPS and gimbal. Wait it out.
Step 5: Switch to Manual Mode
Open the camera settings in the DJI app, switch to Pro or Manual mode, and dial in your ISO, shutter speed, and aperture. Take a quick test shot at a fast shutter to confirm exposure and composition before committing to a longer exposure.
Step 6: Trigger With a 2-Second Timer
Even tapping the screen can introduce a tiny vibration that ruins a multi-second exposure. Set a 2-second self-timer so the drone is perfectly still by the time the shutter actually opens. Alternatively, use the controller’s physical shutter button with a very light touch, or trigger remotely from your phone with no contact on the sticks.
Step 7: Do Not Touch the Sticks During the Exposure
This sounds obvious, but it is the most common failure mode. Any joystick input during the exposure will move the airframe and smear the shot. Hover hands off the controller for the entire duration of the shutter.
Step 8: Shoot in Bursts for Stacking
If you plan to stack images for noise reduction, shoot a burst of 5 to 10 identical exposures back to back. Keep the drone as still as possible between frames. You will combine these later in Photoshop.
Step 9: Check the Histogram and Adjust
After your first real exposure, look at the histogram. If the data is bunched against the right wall, dial back the shutter speed or add a stronger ND filter. If everything is crushed to the left, lengthen the exposure or swap to a lighter filter.
High ISO Stacking: An Alternative Approach
Not every situation gives you the option to run a single multi-second exposure. When wind picks up, or when you are shooting at blue hour with moving subjects, single long exposures become a blurfest. This is where High ISO image stacking comes in.
The idea is simple. Instead of one 4-second exposure at ISO 100, you shoot 10 short exposures at ISO 800 or 1600 with a fast shutter, then average them together in Photoshop. Each individual frame is sharp because the shutter was fast, but when you combine them, the random noise averages out and the static parts of the scene stay clean.
Why Stacking Works
Camera noise is largely random. It changes from frame to frame. Signal, which is the actual image data, stays the same. When you average multiple frames, the signal stays constant while the random noise partially cancels out. The result is a final image with the noise profile of a much lower ISO than any single frame was shot at.
When to Choose Stacking Over a Single Long Exposure
Reach for stacking when wind makes long single exposures impossible, when light is so low that even wide open and at high ISO you cannot get a usable single frame, or when you want maximum detail and clean shadows. A single long exposure with an ND filter is faster and simpler, so default to that whenever conditions allow.
Post-Processing Your Long Exposure Drone Shots
Post-processing is where the magic happens, especially for stacked images. Here is the basic workflow I use.
Single Exposure Workflow in Lightroom
Start in Lightroom or Adobe Camera Raw. Pull the exposure into range, lift shadows slightly, and apply gentle noise reduction. Long exposures tend to have more noise than a typical daylight shot, so do not be afraid to push the luminance slider to 30 or 40. Add clarity and dehaze sparingly, since both can amplify noise.
Stacking Workflow in Photoshop
If you shot a burst for stacking, here is the workflow:
- Open Lightroom, select your burst of images, right-click, and choose Edit In, then Load Files into Photoshop Layers.
- In Photoshop, select all the layers in the Layers panel.
- Go to Edit, Auto-Align Layers. Even on a stable hover, there will be tiny drift between frames.
- With all layers still selected, go to Layer, Smart Objects, Convert to Smart Object.
- Then Layer, Smart Objects, Stack Mode, Mean. This averages every frame together.
The result is a single image with dramatically reduced noise compared to any individual frame. You can then take this back into Lightroom for final toning.
Tips for Better Long Exposure Drone Photos
Here are six practical rules I have learned the hard way.
- Wait for calm air. Wind above 10 mph will almost always ruin a multi-second exposure. Reschedule rather than fight the conditions.
- Hover and wait. Give the drone 2 full seconds after you stop moving before you trigger the shutter. Patience wins shots.
- Use a 2-second timer. Eliminate every possible source of vibration, including your own finger on the screen.
- Keep ISO at 100. Pushing ISO is rarely worth the noise penalty on the small sensors in consumer drones.
- Shoot RAW bursts. Even if you only plan to use one frame, having extras gives you stacking options later.
- Check the histogram, not the screen. The rear screen lies in bright daylight. The histogram never does.
FAQs
What ND filter do I need for long exposure drone photography?
For most conditions, an ND16 or ND32 filter is the right starting point for drone long exposures. Move up to ND64 in bright daylight and reserve ND500 for very long exposures in full sun. If you shoot mostly during golden or blue hour, an ND8 will often be enough.
Can drones actually take long exposures at low ISO?
Yes, but only with a neutral density filter attached. Without an ND filter, even at ISO 100 and a stopped-down aperture, daylight will force your shutter speed too fast to blur motion. With an ND16 or stronger, you can comfortably run 1 to 3 second exposures at ISO 100.
What is the maximum exposure time for drone photography?
Most experienced drone photographers treat 2 to 3 seconds as the practical limit for a clean single exposure. Beyond that, GPS drift, motor vibration, and wind movement introduce blur that no gimbal can fully cancel. For longer effective exposures, use High ISO stacking in post.
Why are my drone long exposure photos blurry?
The most common causes are wind drift, touching the controller sticks during the exposure, not letting the drone settle after moving, and tapping the screen to trigger the shutter. Use a 2-second timer, hover hands-off the sticks, wait 2 seconds after stopping, and only shoot in calm air.
What are the best camera settings for drone photography?
For long exposures specifically, use manual mode, ISO 100, RAW capture, shutter speed between 1 and 3 seconds as a starting point, aperture around f/5.6 to f/8 if adjustable, and an ND filter matched to the ambient light. Always verify exposure with the histogram rather than the screen.
How do I get light trail effects with my drone?
Position the drone above a road with steady traffic at dusk or after dark. Use a 2 to 4 second exposure at ISO 100 with an ND8 or no filter, depending on ambient light. Trigger with a 2-second timer and keep your hands off the sticks for the entire exposure to keep the road and surrounding buildings sharp while car headlights smear into trails.
Conclusion
Learning how to shoot a long-exposure photo with a drone comes down to four things: calm air, the right ND filter, full manual control, and patience in the field. Master the basics of ISO, shutter speed, and drone stability first, then layer in High ISO stacking for the situations where a single exposure will not cut it.
The first few attempts will probably be blurry, overexposed, or noisy. Stick with it. Once everything clicks and you see your first clean light trail or silky waterfall from above, you will understand why this technique is worth the effort. Grab an ND filter set, wait for a calm evening, and start shooting.