
You launch your drone on a clear morning, frame a shot you are certain will be stunning, and then open the gallery back home only to find a mushy, soft image staring back at you. If your drone photos look soft even when the sky is clear and the gimbal seems steady, you are not alone. This is one of the most common complaints we hear from new pilots on Reddit, in DJI forums, and from our own readers who are trying to figure out why their aerial shots lack the crisp detail they see in pro galleries.
The good news is that soft drone photos almost always trace back to a short list of fixable causes. Shutter speed that is too slow, a tiny sensor pushed to high ISO, a dirty lens, a forgotten protective film, or even saving images to your phone instead of the SD card can all rob your photos of sharpness. Once you understand why drone photos look soft and how to fix them, the results improve almost overnight.
This guide walks through every common cause of soft drone photos, the exact camera settings that solve them, the hardware checks most pilots skip, and the post-processing techniques that rescue images you thought were ruined. By the end, you will have a clear checklist you can run through before every shoot.
Table of Contents
Why Do Drone Photos Look Soft?
Drone photos look soft when the camera captures motion blur, misfocuses, or loses detail due to small-sensor noise reduction. Unlike a DSLR with a large sensor and a fast lens, a consumer drone like a DJI Mini or Air series relies on a small sensor and a fixed-aperture lens, which means sharpness depends almost entirely on settings, stability, and clean optics.
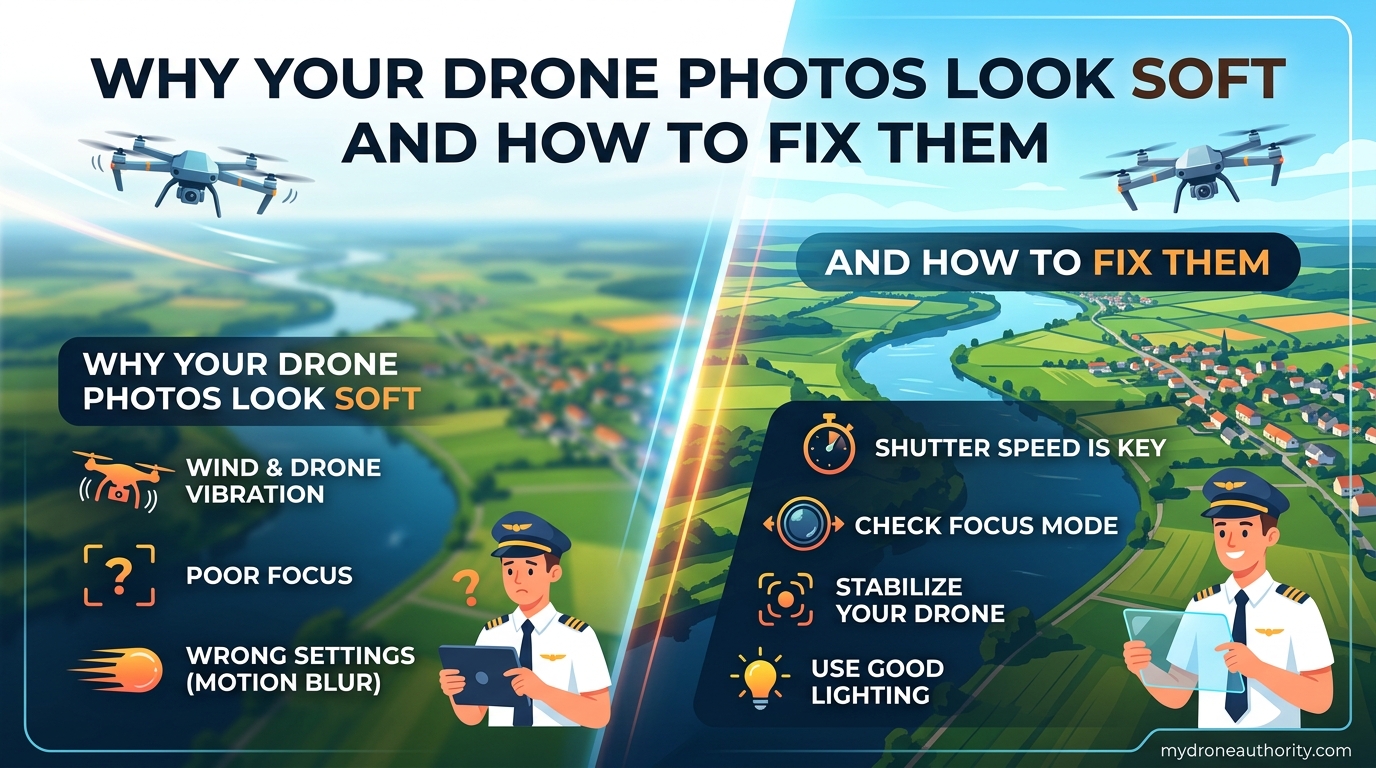
Here are the six most common reasons your drone photos come out soft, based on the issues we see repeatedly in pilot forums and field testing:
- Shutter speed too slow — At 1/20s, even tiny drone movement smears detail. One DJI user on r/dji discovered their drone had dropped to 1/20 second automatically, producing slight motion blur on every shot.
- High ISO noise reduction — Small drone sensors get noisy fast. When ISO climbs, the camera applies noise reduction that smooths away fine detail.
- Lens contamination — Fingerprints, dust, condensation, or the factory protective film still on the lens.
- Saving to phone, not SD card — Without an SD card, many drones save a compressed, low-resolution preview to your phone that looks soft by design.
- Autofocus miss — Drones focus at the center of the frame. If your subject is off-center or close, focus can lock at the wrong distance.
- Gimbal drift or vibration — An uncalibrated gimbal introduces micro-jitter that looks like softness even when settings are correct.
Most soft drone photos trace back to one or two of these, not all of them at once. That is why a simple settings change can transform an entire shoot.
How to Fix Drone Camera Settings for Sharp Photos
Camera settings are the single biggest factor in drone photo sharpness. The small sensors in consumer drones have a narrow margin for error, so dialing in the right shutter speed, ISO, and focus mode matters more than it does on a full-frame camera.
Shutter Speed: The Number One Culprit
Slow shutter speed is the leading cause of soft drone photos. Because a drone is always moving slightly even in a hover, any shutter speed below roughly 1/100s risks visible motion blur. When the drone automatically drops to 1/20s in auto mode (as one DJI pilot reported on Reddit), every photo ends up subtly smeared.
Switch to Pro or Manual mode and lock your shutter speed to at least 1/200s for still subjects. For moving subjects like cars or waves, go faster — 1/500s or higher. If the scene is too bright at 1/200s and your lowest ISO, add an ND filter rather than raising shutter speed beyond useful range.
If you are flying in low light and cannot maintain 1/200s without pushing ISO too high, take multiple shots and use image averaging in post to recover detail.
ISO: Keep It Low
Drone sensors are tiny compared to even an entry-level mirrorless camera. A DJI Mini 4 Pro uses a 1/1.3-inch sensor, and older Minis use 1/2.3-inch sensors. At ISO 100 these cameras produce clean files, but push past ISO 400 and noise reduction kicks in hard, smoothing detail until the image looks soft.
Keep ISO at 100 whenever possible. Only raise it when the alternative is a shutter speed too slow to freeze motion. In our experience, ISO 200 is the practical ceiling for sharp aerial photos on most consumer drones, and ISO 800 should be reserved for emergency low-light grabs you plan to heavily downscale.
Avoid Auto ISO. It tends to spike in changing light and undo the shutter speed you carefully set.
Aperture and Diffraction
Most consumer drones have a fixed aperture — for example, f/2.8 on a DJI Mavic 3 or f/1.7 on a Mini 3 Pro. You cannot change it, which means diffraction is rarely the issue on these models. The trade-off is that you also cannot stop down for deeper depth of field, so focus distance matters more than on a DSLR.
If you fly a drone with an adjustable aperture (like the Mavic 3 Pro or Air 3S), avoid stopping down past f/5.6. Small sensors hit diffraction softening earlier than full-frame cameras, and f/8 on a drone often looks softer than f/4 due to diffraction, not sharper from added depth of field.
Autofocus vs Manual Focus
Drone autofocus systems lock onto the center of the frame by default. If your subject sits at the edge or you are shooting something close to the camera, focus can land at the wrong distance. This is a common reason photos look sharp in the middle but soft everywhere else.
Tap to focus on your subject before each shot. For landscape work where the subject is effectively at infinity, switch to manual focus and set it to infinity, then take a test shot at full zoom on your phone to confirm crispness. Manual focus eliminates focus hunt during burst shooting or bracketing.
Lens and Hardware Fixes for Soft Drone Photos
Camera settings get most of the attention, but a surprising number of soft drone photos come from dirty optics or hardware issues that take two minutes to fix. We have seen pilots chase settings for weeks only to discover a fingerprint on the lens was the actual culprit.
Remove the Protective Film
Many new drones ship with a thin protective film over the lens or gimbal cover. It looks almost invisible, but it turns every photo slightly soft and adds flare in bright light. This is one of the most overlooked beginner mistakes — and one competitor (Ruko) is the only major source mentioning it.
Before your first flight, peel off every protective film: on the lens, on the gimbal cover, and on any sensor windows. If your photos have been consistently soft since day one, this is the first thing to check.
Clean the Lens Properly
Even without the factory film, drone lenses pick up fingerprints during handling, dust during transport, and oily haze from air pollution. A quick wipe on your shirt is not enough — that smears oils around and makes softness worse.
Carry a microfiber cloth and a small bottle of lens cleaning solution. Wipe in a gentle circular motion from the center outward. Inspect the lens under a light before every shoot, because one fingerprint at f/2.8 will visibly soften the entire frame.
Check Your SD Card Resolution
This is the secret fix that forum threads repeat over and over. If your drone photos look soft and you are not using an SD card, the photos you see on your phone are low-resolution cached previews, not the actual camera output. A DJI Mini 2 user on Reddit reported their photos had “never come out this blurry” — and the answer was simply that they had no SD card installed.
Insert a fast microSD card (U3 / V30 rated for most drones, V90 for 4K video). Set the drone to save RAW files to the card, not just to the controller. The difference in sharpness is immediate and dramatic.
Calibrate Your Gimbal
An uncalibrated gimbal introduces micro-vibrations that look exactly like soft photos. If your images are sharp in some frames and soft in others, or if the horizon tilts between shots, the gimbal needs attention.
Run gimbal calibration on a perfectly flat surface (a level table, not the ground) through your drone app. Avoid calibrating near metal objects or reinforced concrete, which can interfere with the compass and accelerometer. Repeat calibration after any hard landing or firmware update.
Environmental Fixes for Soft Drone Photos
Even with perfect settings and clean optics, the environment can soften your photos. Wind, light, and temperature all affect image quality on a drone more than they do on a ground camera.
Wind and Drone Movement
A hovering drone is not truly still. Even in calm air, the drone makes constant micro-corrections to hold position, and in wind those corrections become larger and faster. At 1/100s shutter speed, this motion translates directly into soft images.
Check wind speed before flying. If gusts exceed roughly 12 to 15 mph on a lightweight drone like a Mini, plan for faster shutter speeds (1/500s or higher) or wait for calmer conditions. Wind at altitude is often stronger than at ground level, so a calm launch does not guarantee a stable shoot 200 feet up.
Lighting Conditions
Harsh midday sun is the enemy of drone photography for two reasons. First, the small sensor struggles with the wide dynamic range between bright highlights and deep shadows, and the camera applies heavy noise reduction to the shadows that softens detail. Second, flat overhead light hides texture in landscapes, making everything look mushy even when the photo is technically sharp.
Golden hour — the hour after sunrise and the hour before sunset — gives warmer, lower-angle light that reveals texture and reduces the dynamic range problem. This single change does more for perceived sharpness than any settings tweak.
Temperature and Condensation
Moving a drone from a warm car into cold air causes condensation on the lens within seconds. That mist layer turns sharp photos into hazy ones and is easy to miss until you review images later. One forum thread on blurry drone footage traced the issue entirely to condensation after cold-weather flights.
Let the drone acclimate to outside temperature for five to ten minutes before uncovering the lens. If condensation appears, wait for it to evaporate or gently wipe with a microfiber cloth. Anti-fog wipes designed for camera lenses can help in extreme conditions.
How to Fix Drone Photos in Post-Processing
Post-processing cannot rescue a completely blurred photo, but it can recover a surprising amount of detail from images that look slightly soft straight out of the camera. The key is starting with the right file format and using sharpening without piling on noise reduction that erases the detail you just added.
Shoot RAW, Not JPEG
JPEG is the single biggest limit on drone photo sharpness after camera settings. A JPEG is processed in-camera with sharpening, noise reduction, and compression baked in — and drone JPEG engines are aggressive on noise reduction. A RAW file skips all of that, giving you full control over sharpening and detail recovery later.
RAW files from a DJI Mini 4 Pro, Air 3, or Mavic 3 contain dramatically more detail than the matching JPEG, especially in textured areas like foliage, water, and rock. If you only switch one setting on your drone, make it RAW capture.
Sharpening in Lightroom
In Lightroom or Adobe Camera Raw, the Detail panel is where soft drone photos come back to life. Start with these baseline values for drone RAW files: Amount 40 to 50, Radius 1.0, Detail 25 to 35, and Masking around 40 (hold Alt while dragging the Masking slider to see what gets sharpened).
Avoid pushing Amount above 60 — that introduces halos around high-contrast edges like horizons and rooftops. Use the Masking slider to limit sharpening to edges, leaving smooth areas like sky untouched so you do not amplify noise.
For extra detail recovery, try the Enhance tool (Super Resolution) in Lightroom or run the file through DxO PureRAW before editing. Both apply better demosaicing than the in-camera engine and often pull detail out of files that looked soft.
Noise Reduction Without Softness
The catch with noise reduction is that aggressive settings undo sharpening. Luminance noise reduction in Lightroom set above 30 starts to smear fine detail, which puts you back where you started. Keep luminance NR under 25 for most drone shots, and use color noise reduction (which does not soften detail) more aggressively.
For high-ISO drone shots, try AI-based denoisers like DxO PureRAW, Topaz DeNoise, or Lightroom’s built-in Denoise AI. These tools reduce noise while preserving edges, which keeps the photo sharp without the mushy look of traditional noise reduction.
Image Averaging Technique
Image averaging is an advanced technique that almost no competitor covers in detail, but it is one of the most powerful tools for drone photography. The idea is to shoot several identical frames (5 to 10) from a hovering drone and stack them in Photoshop or Photoshop Elements. The stack averages out random noise, producing a final image with the noise of a single ISO 12 shot taken at ISO 100.
Image averaging works best on static scenes — landscapes, architecture, anything that does not move between frames. It does not work on waves, traffic, or anything dynamic. Use a tripod-mode hover or GPS lock, shoot RAW, and align the frames in Photoshop using File > Scripts > Load Files into Stack with “Attempt to Automatically Align Source Images” checked.
ND Filters for Drone Photography
ND (neutral density) filters are essentially sunglasses for your drone camera. No competitor in our SERP analysis covers them, which is a major gap because they solve one of the most common causes of soft drone photos: too much light forcing a fast shutter speed that still clips highlights.
Without an ND filter in bright daylight, your drone may shoot at 1/2000s and ISO 100, which sounds ideal but pushes highlight detail into clipping on bright surfaces like snow, sand, or white buildings. An ND8 or ND16 filter lets you drop shutter speed to a more controlled 1/200s or 1/400s in the same light, giving you room for cleaner exposure and better highlight recovery.
For video, ND filters are mandatory for the cinematic 180-degree shutter rule. For stills, they help most in bright conditions where highlight clipping is destroying apparent sharpness in the brightest parts of the frame.
Quick Checklist: How to Fix Soft Drone Photos
Run through this checklist before every shoot. These are the settings and checks that forum pilots and our team have confirmed make the largest difference in drone photo sharpness.
- Insert a fast SD card and set the drone to save RAW to the card.
- Remove every protective film from the lens and gimbal cover.
- Clean the lens with a microfiber cloth and inspect under light.
- Switch to Pro / Manual mode.
- Set ISO to 100, shutter speed to 1/200s or faster.
- Tap to focus on your subject, or switch to manual focus at infinity for landscapes.
- Shoot during golden hour whenever possible.
- Wait for calm wind, or use 1/500s+ if wind is unavoidable.
- Let the drone acclimate to temperature before uncovering the lens.
- In Lightroom, apply modest sharpening (Amount 40 to 50) with Masking at 40.
- For high-ISO shots, use AI denoising instead of traditional noise reduction.
- For static scenes, try image averaging to dramatically reduce noise.
If you only take one tip from this list, make it shooting RAW with a fast shutter speed on an SD card. Those three changes alone fix the majority of soft drone photos we see.
FAQs
How to improve drone camera quality?
To improve drone camera quality, shoot in RAW on a fast SD card, lock ISO at 100, set shutter speed to at least 1/200s, clean the lens before every shoot, remove any protective film, shoot during golden hour, and apply targeted sharpening with masking in Lightroom. Shooting in calm conditions and using ND filters in bright light also boosts perceived sharpness.
Why are my photos coming out soft?
Photos come out soft most often because shutter speed is too slow, ISO is too high, the lens is dirty or still has protective film on it, or images are being saved as compressed previews to your phone instead of full-resolution files to an SD card. Less commonly, autofocus is locking at the wrong distance or the gimbal needs calibration.
Why is my drone camera blurry?
A drone camera looks blurry when the shutter speed drops below roughly 1/100s and the hovering drone introduces motion blur, when condensation forms on the lens after a temperature change, when the gimbal is uncalibrated and vibrating, or when the lens has a fingerprint or dust on it. Check each of these in order before assuming the camera is defective.
How to make your drone shots look professional?
Shoot in RAW during golden hour, lock ISO at 100 with shutter speed at 1/200s or faster, tap to focus on your subject, use ND filters in bright light, and process in Lightroom with modest sharpening, careful noise reduction, and color correction. Composition also matters — vary altitude, shoot at an angle rather than straight down, and avoid harsh midday light.
Conclusion
Soft drone photos are almost never a sign of a defective camera. They are a sign that one of a small set of common issues is at play — slow shutter speed, high ISO, dirty or filmed-over lens, phone-only previews, focus misses, or environmental factors like wind and condensation. Work through the checklist above before each shoot and the majority of softness problems disappear.
The three changes with the biggest immediate impact are switching to RAW, locking shutter speed at 1/200s or faster, and saving to a fast SD card. Add golden-hour shooting and a clean lens, and you will have mastered why drone photos look soft and how to fix them before your next flight.
Keep this checklist on your phone, walk through it before every session, and your aerial photos will look noticeably sharper on the very next shoot.