
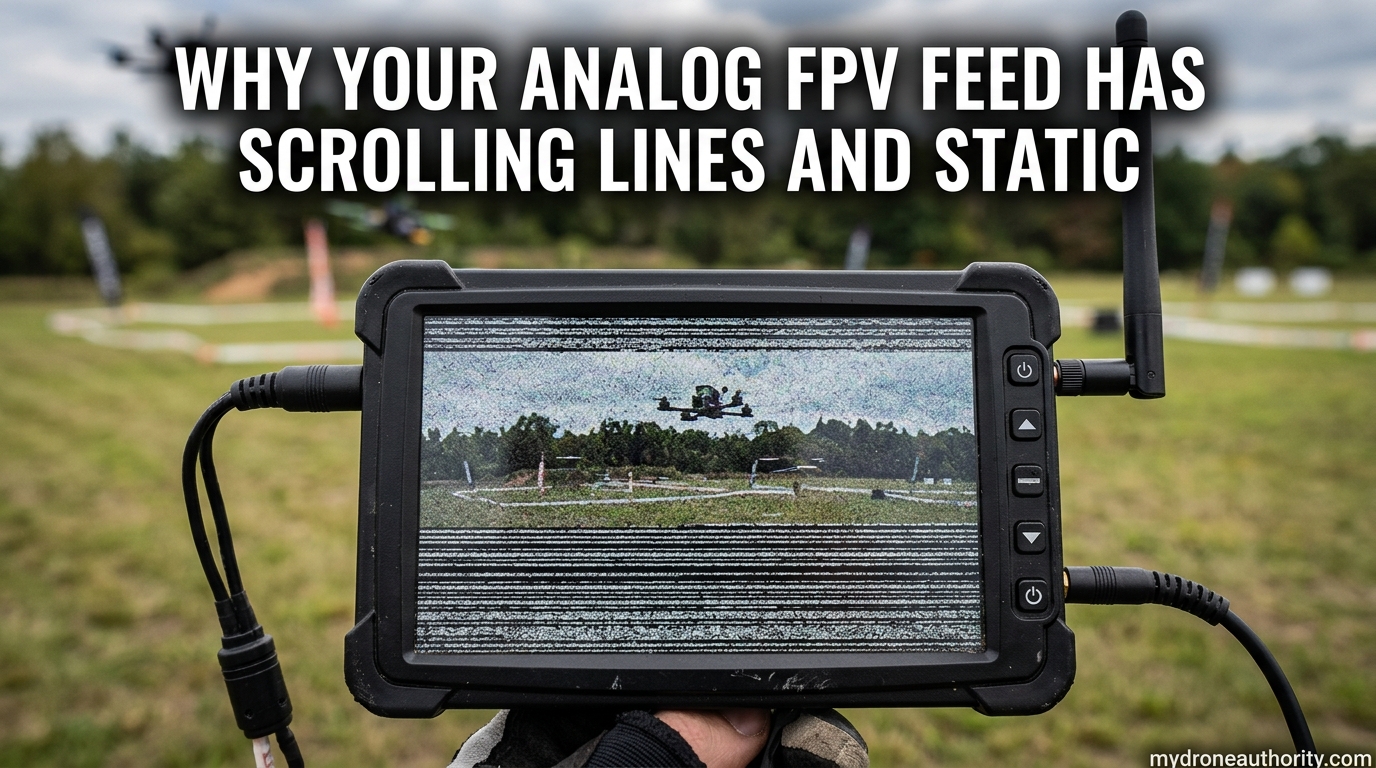
There is nothing more frustrating than arming your quad, pushing the throttle, and watching your goggles fill with horizontal lines, scrolling bands, or a wall of static. If you are dealing with an analog FPV feed with scrolling lines and static, you are not alone. This is one of the most common complaints in the FPV hobby, and the good news is that almost every case is fixable.
In nearly every build I have troubleshooted, the noise traces back to electrical interference, a power delivery problem, or a wiring mistake, not a defective camera or VTX. The trick is knowing which symptom points to which cause. I have spent hundreds of hours building, crashing, and repairing analog quads, and the diagnostic process below is the same one I use on my own builds.
Analog FPV still has a loyal following in 2026 because of its near-zero latency, low cost, and the forgiving way it degrades. Where a digital link simply drops, an analog feed shows static first, giving you a warning before you lose video entirely. That same “soft” degradation is why understanding video noise is so useful. Once you can read what your goggles are telling you, you can fix the underlying problem in minutes instead of swapping parts blindly.
By the end of this guide you will understand why your analog FPV feed has scrolling lines and static, how to identify the exact cause from the visual symptoms, and what to do about it. We will cover power, grounding, EMI, sync pulse issues, antennas, mechanical causes, and a few edge cases most guides skip.
Table of Contents
What Causes Scrolling Lines and Static in an Analog FPV Feed
Scrolling lines and static in an analog FPV feed are almost always caused by electrical noise leaking into the video signal path. The four most common sources are voltage fluctuations from the ESCs, poor power filtering through the BEC, grounding problems like ground loops, and electromagnetic interference from high-current wiring running too close to sensitive video wires.
When the motors draw current, the ESCs switch that current on and off thousands of times per second. Each switching event creates a tiny voltage spike. Those spikes travel through your flight controller, into the VTX, and straight into the video signal your camera is producing. The result shows up in your goggles as horizontal lines, scrolling bands, or general static that gets noticeably worse the moment you throttle up.
A smaller but equally important cause is sync pulse interference. Analog video relies on precise timing pulses to tell the receiver where each line and frame begins. If those pulses get distorted, the receiver loses lock and the image rolls vertically, scrolls sideways, or tears apart. We will cover this separately because the fix is different from the standard noise solutions.
Here is the short version: white lines mean electrical interference, black lines mean power starvation, vertical rolling means sync issues, and static that worsens with throttle points to ESC noise. Everything else in this guide is just expanding on those four ideas.
The Symptom-to-Cause Cheat Sheet for Diagnosing Video Noise
The fastest way to fix video noise is to look at exactly what you are seeing in your goggles. Each visual symptom maps to a specific root cause, and once you know the pattern, the fix is usually obvious. I keep this cheat sheet on my bench because it cuts hours out of troubleshooting.
Use this list to match what you see to the most likely cause, then jump to the relevant section of this guide for the fix.
- White horizontal lines that worsen with throttle: ESC electrical noise on the power line. Add a low-ESR capacitor, power the VTX from a clean BEC, and verify your ground path.
- Solid black horizontal bars: The camera or VTX is not getting enough voltage under load. Usually a sagging BEC, a bad solder joint, or undersized wiring.
- Faint black bars scrolling up from the bottom: Often a goggle or receiver issue rather than the quad, especially if multiple quads show the same pattern on the same goggles.
- Vertical rolling (image moves up or down continuously): The receiver cannot lock onto the vertical sync pulse. Check NTSC vs PAL mismatch between camera and VRX, or enable sync pulse reconstruction on receivers like Rapidfire or Fusion.
- Sideways scrolling (image slides left or right): Horizontal sync problem, almost always a format mismatch or a cheap camera that ignores NTSC/PAL timing standards.
- Snowy static that gets worse with distance: Antenna or channel issue. Check for RHCP/LHCP mismatches, damaged antennas, or congested channels.
- Rainbow bands or color shifting, especially on red objects: Camera or VTX damage, often after a crash. Could also be a U.FL connector that has partially lifted off the board.
- Random full-screen static bursts: External RF interference, intermittent solder joint, or another pilot on your channel.
- Static that clears up when you switch to a different channel (for example R1): Interference from another source on that frequency, not a quad-side problem.
- Complete signal loss at very short range (under 10 meters): Almost always an antenna problem, a damaged U.FL, or a VTX that is not actually transmitting.
Most builds show more than one symptom at once, so work through them in the order listed above. Fixing the white-line noise usually clears up half the other issues at the same time.
Why Throttle Makes the Noise Worse: ESC Noise Explained
If your feed looks clean on the bench but turns to static the moment you punch throttle, you are dealing with ESC noise. This is the single most common cause of FPV video issues, and understanding why it happens makes the fix obvious.
Modern ESCs use a technique called damped light (or active freewheeling) to switch motor current on and off thousands of times per second. Each switching event generates a sharp voltage spike on the battery line. At low throttle those spikes are small, but at full throttle the current jumps from a few amps to thirty or more, and the spikes become huge.
Those spikes do not stay on the battery line. They propagate through every component connected to the same power rail, including your VTX and camera. The video signal coming out of your camera is measured in millivolts, so even a tiny amount of that switching noise is enough to corrupt it completely. That is why the lines get thicker and the static gets denser as throttle increases.
The fix is to either clean the power before it reaches the video gear (low-ESR capacitor, LC filter, dedicated BEC) or stop the noise at the source by shielding and rerouting wires. We will cover both approaches below.
Powering Your VTX and Camera the Right Way
Power delivery is where most FPV noise problems start. The rule is simple: never power a sensitive video component from the raw battery line on a 4S or 6S build, and never share an unfiltered power rail with the ESCs. Your VTX and camera need clean, regulated voltage.
Most modern flight controllers include a dedicated BEC for the VTX, typically a 9V or 5V regulated output that is filtered separately from the rest of the board. This should be your first choice. Wire the VTX to that pad, not to the battery voltage pad, and you eliminate a huge chunk of potential noise before it ever reaches the video signal.
If your FC does not have a clean VTX BEC, or if you are running a high-power VTX that pulls more current than the FC can supply, use a standalone LC filter or a dedicated switching BEC. An LC filter uses an inductor and capacitor to block high-frequency noise, and it is one of the most effective fixes for stubborn throttle-related static.
One trick that consistently shows up in FPV forums is powering the camera from the VTX’s own 5V output instead of the flight controller’s 5V rail. The VTX regulator is typically cleaner than the FC’s main 5V line, and many pilots report immediately cleaner video after making this swap. Try it if your camera supports 5V input.
Avoid daisy-chaining power through the camera to the VTX or vice versa unless the manual specifically supports it. Each hop adds resistance and noise. Run dedicated power wires from the BEC to each component whenever possible.
The Low-ESR Capacitor: Your First Line of Defense
If you only do one thing after reading this guide, solder a low-ESR capacitor across your main battery pads. This single component solves more video noise issues than every other fix combined, and it costs less than a pack of props.
A low-ESR (equivalent series resistance) capacitor sits across the battery voltage and acts as a tiny reservoir of charge. When the ESCs create a voltage spike, the capacitor absorbs it instead of letting it propagate to the rest of the system. The “low-ESR” part matters because a standard electrolytic capacitor cannot respond fast enough to swallow the high-frequency switching noise; you need a capacitor designed for low impedance at high frequencies.
The standard installation is to solder the capacitor directly across the XT60 pads on your ESC or PDB, as close to the connectors as possible. The shorter the leads, the better it works. Most pilots use a 35V or 50V capacitor in the 470uF to 1000uF range for 4S builds, and a 63V rated capacitor for 6S.
Avoid generic capacitors from unknown brands. The cheap ones often have much higher actual ESR than the label suggests, and they do nothing for ESC noise. Stick with reputable FPV brands or name-brand electronics manufacturers. If your capacitor ever bulges or leaks, replace it immediately, since a failed cap can short your battery pads.
Proper Grounding: The Most Overlooked Fix
After capacitors, grounding is the next biggest cause of stubborn video noise, and it is the one most pilots get wrong. A bad ground path can introduce noise even when your power filtering is perfect, because the video signal references ground to determine its voltage levels.
The core idea is the star ground topology. Every component, the camera, VTX, FC, and ESCs, should reference a single common ground point. When you ground different components at different points along the frame, current flowing through the frame or wiring creates small voltage differences between those points. Those differences show up in your video as noise. This is what pilots mean when they talk about a ground loop.
The most common grounding mistake is grounding the camera at one point and the VTX at another, especially on carbon frames with separate PDBs. Always run a dedicated ground wire between the camera and the VTX, or ground both at the same pad on the flight controller.
One more tip from the FPV forums: twist your video signal and ground wires around each other. This creates a crude balanced pair that rejects electromagnetic interference. It costs nothing, takes ten seconds, and consistently improves video on long wire runs. If you have a camera with a long cable run to the VTX, this is one of the easiest wins in FPV.
Beating EMI: Wire Routing, Shielding, and Copper Tape
Electromagnetic interference is a sneaky cause of video noise because it does not show up on a multimeter. Any wire carrying rapidly changing current acts like a tiny antenna, broadcasting noise that nearby video wires pick up. The fix is physical separation and shielding.
The first rule of wire routing is to keep ESC signal wires, motor wires, and battery leads as far away from your camera and VTX wires as physically possible. On a tight frame this is hard, but even a centimeter of separation makes a measurable difference. Run video wires along the opposite side of the stack from the battery leads.
If separation is not enough, wrap the ESC signal wires and the underside of the flight controller in copper tape. Copper tape acts as a Faraday cage, blocking the electric field component of EMI. Multiple pilots, including Oscar Liang, have documented measurable improvements from this simple mod. Make sure the copper tape is grounded, or it can actually make things worse by acting as an antenna itself.
One specific EMI source that catches pilots off guard is the FrSky R-XSR and similar telemetry receivers. When the receiver’s antenna runs close to your video wires, the telemetry transmissions bleed into the video signal and show up as scrolling bands or static bursts. Route the receiver antenna away from video wires, and if the problem persists, try disabling telemetry temporarily to confirm it is the source.
Fixing Sideways Scrolling: Sync Pulse and NTSC/PAL Mismatches
Sideways scrolling and vertical rolling are different problems from the throttle-related static we have been covering, and they need a different fix. These symptoms point to a sync issue, where the receiver cannot lock onto the timing pulses the camera embeds in the video signal.
Analog video uses two sync pulses, one horizontal and one vertical, to tell the receiver where each line and frame starts. If the receiver cannot detect those pulses, the image tears, rolls, or scrolls. The most common cause is a mismatch between the camera’s video format (NTSC or PAL) and what the receiver expects.
Most FPV cameras are factory-set to NTSC, but some are PAL by default. If your camera is PAL and your receiver or goggles are locked to NTSC, you get rolling or scrolling. Check your camera’s manual, set the format correctly, and make sure every camera and receiver in your kit uses the same standard.
The other common cause is a cheap camera that does not produce clean sync pulses at all. Some budget cameras cut corners on timing, and even high-end receivers cannot lock onto the signal. If you have tried everything else and the image still scrolls sideways, suspect the camera. Replacing it with a name-brand camera usually fixes the issue immediately.
If you are using a diversity receiver module like the Rapidfire, Fusion, or SteadyView, make sure sync pulse reconstruction is enabled. This feature regenerates the sync pulses from the received signal, dramatically improving roll and scroll issues at range. It is one of the biggest upgrades you can make for analog video reliability.
Antennas, Channels, and External Interference
Not all video noise comes from your quad. Antenna problems and channel congestion are a major cause of static, dropouts, and short-range signal loss, and they are easy to misdiagnose as electrical issues. Run through this checklist before you blame your wiring.
First, verify antenna polarity. RHCP (right-hand circular polarized) antennas only work with other RHCP antennas, and LHCP only works with LHCP. Mixing the two gives you massive signal loss, even at close range. Check the markings on every antenna on your VTX and goggles, and make sure they match.
Second, check connector types. SMA and RP-SMA (reverse polarity SMA) look almost identical but are not compatible. If you screw an SMA antenna onto an RP-SMA connector, you will damage the connector and get terrible signal. Read the labels carefully before forcing anything together.
Third, inspect the U.FL connector on your VTX. U.FL connectors are tiny snap-on parts that lift off the board easily in a crash. A partially-detached U.FL looks fine but creates intermittent signal loss at short range. If your range suddenly drops to a few meters, suspect the U.FL before anything else.
Finally, check for channel congestion. The 5.8 GHz band used by analog FPV is crowded, especially at flying events. If you are on a popular channel like E (5885 MHz) and another pilot is nearby, you will see static and interference. Switching to a less-used channel like R1 (5658 MHz) often clears the issue immediately.
Mechanical Causes: Jello, Vibrations, and Props
Not all video noise is electrical. Mechanical vibration from motors and props can cause visible distortion in your feed, most commonly the wobbly “jello” effect where straight lines appear to wave. Jello is a physical phenomenon, not an electrical one, and the fix is mechanical.
Jello appears when high-frequency motor vibration reaches the camera sensor. Most FPV cameras include a physical mount with soft foam or TPU isolation, but those mounts wear out, compress, or get overtightened. If your jello suddenly gets worse, check the camera mount first.
Prop imbalance is another common cause. A chipped or unbalanced prop creates vibration that translates directly into video wobble. Always inspect props after a crash, and consider balancing them on higher-end builds. A simple prop balancer costs a few dollars and pays for itself in cleaner video.
PID tuning also plays a role. If your quad is oscillating because the PIDs are too aggressive, those oscillations show up as high-frequency vibration in the video. If you see jello that gets worse at specific throttle positions or during fast turns, check your Blackbox logs for oscillation and retune the PIDs.
Unusual Causes: VTX Overheating, Motor Screw Shorts, and Telemetry
Some causes of FPV video noise are rare enough that most guides skip them entirely. But if you have tried every standard fix and the problem persists, one of these edge cases is probably the culprit.
VTX overheating is a real issue on high-power VTXs, especially 800mW and above. When a VTX gets too hot, its output stage can become unstable and the video signal degrades. Make sure your VTX has airflow, consider a small heatsink, and never fly a high-power VTX without an antenna attached, since the reflected power will overheat and kill the amplifier in seconds.
Motor screw shorts are an oddball cause that Oscar Liang documented. If the screws holding your motors to the frame are too long, they can press against the motor windings and create a partial short. This introduces noise into the ESC and from there into your video. If your noise started after a rebuild, check screw length on every motor.
Telemetry interference, particularly from FrSky receivers like the R-XSR, was mentioned earlier in the EMI section but deserves a repeat mention here. The telemetry burst from these receivers is strong enough to show up as scrolling bands in your video, even with good power filtering. The fix is physical separation of the receiver antenna from video wires, or disabling telemetry if you do not need it.
A Step-by-Step Troubleshooting Checklist
When you are staring at a noisy feed and do not know where to start, work through this checklist in order. Each step takes only a few minutes, and you will usually find the cause before you reach the end.
- Add a low-ESR capacitor across the XT60 pads on your ESC or PDB. This is the single most effective fix and should always be your first step.
- Verify your power source. Confirm the VTX is powered from a dedicated BEC output, not the raw battery line. If your FC has a 9V VTX pad, use it.
- Check all ground connections. Make sure the camera, VTX, and FC all share a common ground point. Resolder any suspicious joints.
- Twist your video signal and ground wires. This free fix takes seconds and reduces EMI on long wire runs.
- Confirm NTSC or PAL format. Check your camera manual and make sure your receiver or goggles are set to match.
- Test a different channel. If the noise clears up on another channel, you are dealing with external interference, not a quad-side problem.
- Inspect your antennas. Verify polarity (RHCP/LHCP), connector type (SMA/RP-SMA), and check the U.FL connector on the VTX for damage.
- Shield EMI sources. Wrap ESC signal wires and the underside of the FC in grounded copper tape if noise persists.
- Check for mechanical causes. Inspect props for damage, verify the camera mount is not compressed, and check Blackbox logs for PID oscillation.
- Investigate edge cases. If nothing else works, look at VTX overheating, motor screw shorts, and telemetry receiver interference.
If you complete this checklist and the noise is still there, the most likely culprit is a defective component. Swap the camera, VTX, and receiver one at a time, starting with whichever is cheapest to replace, until the noise disappears.
What are the horizontal lines in my FPV feed?
Horizontal lines in an analog FPV feed are almost always caused by electrical noise. White lines indicate interference from ESC switching noise on the power line, while black lines usually point to power starvation where the camera or VTX is not getting enough voltage under load. The fix is a low-ESR capacitor on the battery pads, clean power from a dedicated BEC, and verified grounding between all components.
Why is my analog FPV feed scrolling?
A scrolling analog FPV feed usually means the receiver cannot lock onto the sync pulses in the video signal. The most common cause is a mismatch between the camera’s video format (NTSC or PAL) and what the receiver expects. Sideways scrolling can also come from cheap cameras that do not follow timing standards. Enable sync pulse reconstruction on receivers like Rapidfire or Fusion, or replace the camera with a name-brand model.
How do I fix FPV video static?
Start by adding a low-ESR capacitor across the battery pads, then power the VTX from a dedicated BEC output instead of the raw battery line. Verify all components share a common ground, twist the video signal and ground wires together, and check for antenna polarity and connector mismatches. If static worsens with throttle, the cause is ESC noise and the capacitor and BEC fixes will resolve most of it.
Is analog or digital better for FPV?
Analog FPV offers near-zero latency, lower cost, and a softer signal degradation that warns you before total loss, while digital FPV provides a sharper image, better range in clean environments, and features like DVR and multiple receivers. For racing and acro where latency matters most, analog is still preferred in many circles. For cinematic flying and freestyle where image quality matters more, digital is usually the better choice in 2026.
What is the average analog latency of FPV?
Analog FPV typically has end-to-end latency between 5 and 15 milliseconds, measured from camera capture to goggle display. This is significantly lower than digital systems, which usually range from 20 to 40 milliseconds even on the fastest current systems. The low latency is one of the main reasons analog remains popular for racing and aggressive freestyle flying.
Conclusion
Most cases of an analog FPV feed with scrolling lines and static come down to a small number of root causes: electrical noise from the ESCs, a power delivery problem, a grounding mistake, or a sync pulse issue. Once you can read the symptoms in your goggles, the fix is usually straightforward.
Start with the low-ESR capacitor, verify your power source, check your grounds, and work through the troubleshooting checklist in order. Most pilots solve their video noise in the first three steps. If you have completed the full checklist and the noise persists, suspect a defective component or one of the edge cases like VTX overheating or motor screw shorts.
Clean analog video is achievable on almost any build. It just takes a methodical approach, and the payoff is a feed you can trust at every throttle position and every range. Safe flying.