
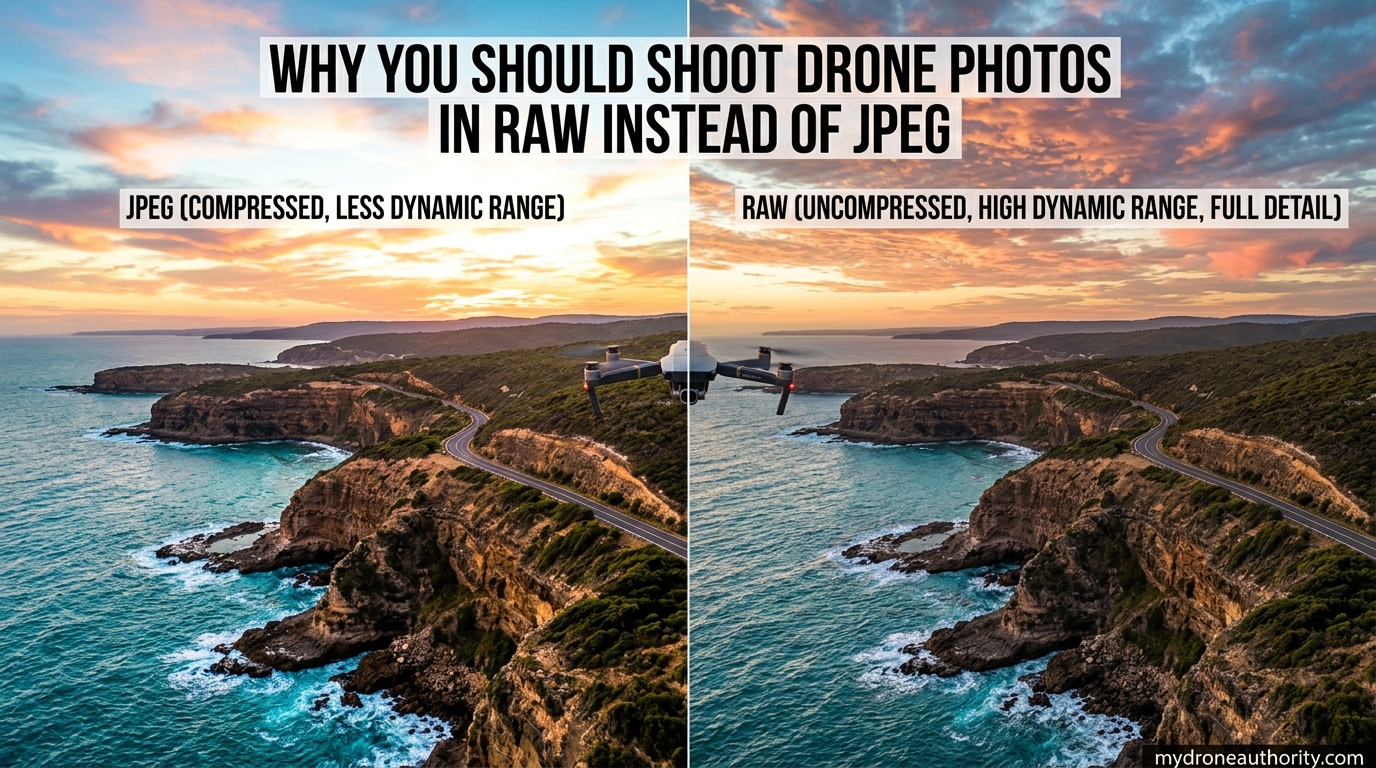
If you have ever looked at a drone shot on your phone and wondered why the sky looks blown out while the ground sits in shadow, the file format you chose probably has a lot to do with it. Shooting drone photos in RAW instead of JPEG is one of the easiest upgrades you can make to your aerial photography, and it does not cost you a single dollar. The difference shows up the moment you start editing.
I remember the first time I switched my DJI Mavic from JPEG to RAW. A sunset shot that looked unrecoverable in JPEG suddenly had clean detail in both the clouds and the tree line below. That one change completely rewired how I think about every flight I take.
In this guide, I will break down exactly why you should shoot drone photos in RAW instead of JPEG, what each format actually does, and the situations where JPEG still makes sense. By the end, you will know which setting to flip on before your next flight.
We will cover what RAW and JPEG really are, the practical benefits that matter most for aerial photography, drone-specific quirks involving DNG files and DJI settings, storage and workflow tips, and an honest look at when JPEG is the smarter call.
Table of Contents
What Is RAW Format?
RAW is exactly what it sounds like: raw, unprocessed data straight from your drone’s camera sensor. When you press the shutter in RAW mode, the camera saves every bit of light and color information it captured, without compressing or throwing anything away.
Think of a RAW file as a digital negative. Nothing has been baked in yet. The white balance, sharpness, contrast, and color profile are all still soft decisions waiting for you to make them in editing software like Adobe Lightroom, Camera RAW, or Capture One.
Most DJI drones save RAW files in the DNG format, which is Adobe’s open-standard digital negative. DNG is widely supported, which means you are not locked into one piece of software and your files will still open on editors a decade from now.
The trade-off is size. A single RAW drone photo can run anywhere from 20 MB to 60 MB depending on the sensor. That is roughly 4 to 6 times larger than the JPEG the same drone would produce, which is something we will dig into when we talk storage.
RAW also preserves much more color depth than JPEG. While a JPEG tops out at 8 bits per channel, drone RAW files typically carry 12 bits or more. That is not a small technical detail. It is the reason a RAW photo can survive aggressive edits without ugly banding in skies or posterization in smooth gradients.
What Is JPEG Format?
JPEG is the universal image format that almost every device on the planet can open. When your drone shoots a JPEG, the camera does all the cooking for you inside the drone. It takes the raw sensor data, applies a color profile, sets white balance, sharpens the image, and then compresses the result down to a small file.
That compression is lossy. To get that file size down to 3 to 8 MB, JPEG throws away image information that it does not think your eye will notice. Once that data is gone, it is gone for good. You cannot get it back later no matter how clever your editing software is.
The upside is convenience. A JPEG looks good straight out of the camera, ready to post or share without any work. You can open it on a phone, a tablet, a cheap laptop, or a web browser with zero extra software.
For drone pilots specifically, JPEG is also what you see when you quickly review a shot on your controller or phone. It loads fast, transfers fast over a wireless link, and does not eat through your SD card in an afternoon.
The downside is that JPEG locks in the decisions the camera made at the moment of capture. If the drone got the white balance slightly wrong, the highlights are clipped, or the shadows are crushed, you only have a narrow band of data to work with when you try to fix it.
Why You Should Shoot Drone Photos in RAW Instead of JPEG: The Core Benefits
Here is where the question most drone pilots actually ask gets answered. The benefits of RAW for aerial photography are not subtle, and they tend to matter more for drones than for a typical ground-level camera. Let’s walk through the five biggest reasons RAW wins.
1. Massive Dynamic Range Recovery
Aerial scenes are brutal for exposure. You are almost always shooting a bright sky against a darker ground, and that contrast is exactly where JPEG falls apart. RAW stores so much more tonal information that you can pull detail back into blown highlights and lift detail out of crushed shadows that simply do not exist in the JPEG version.
I have recovered entire cloud structures from what looked like a pure white sky in the JPEG preview, all because the RAW file had quietly held onto that data. With JPEG, those highlights are gone the moment the shutter closes.
2. Total White Balance Control
White balance in a JPEG is baked in permanently. You can shift it a little in editing, but push too hard and you introduce color casts and artifacts. With RAW, white balance is just metadata. You can move the temperature from cool blue to warm gold with zero quality loss, because the original color data is still sitting there intact.
This is huge for drone flights near golden hour, where the light changes minute by minute and your drone’s auto white balance can easily guess wrong.
3. Non-Destructive Editing
Every edit you make to a RAW file is non-destructive. The software keeps a list of your adjustments and applies them on the fly, but your original sensor data never changes. You can always reset back to zero, or try a completely different edit months later.
JPEG editing is destructive by nature. Each time you open, tweak, and re-save a JPEG, you lose a little more quality. That is a slow death for any photo you care about.
4. Better Detail and Sharpness
Because RAW keeps all the original data and lets you control sharpening yourself, you can pull out noticeably more detail than the in-camera JPEG sharpening allows. Drone sensors are small, and the in-camera processing can be a bit heavy-handed, sometimes adding halos or crunchy artifacts around edges. RAW puts you in charge of how that sharpening is applied.
5. Cleaner Noise Reduction
This is a point that confuses many beginners. RAW files often look noisier straight out of the camera than JPEGs, because the JPEG has already had noise reduction applied. But once you run your own noise reduction on the RAW file in Lightroom or similar software, you almost always end up with cleaner detail than the JPEG version ever had.
You are making the noise reduction decisions instead of a generic in-camera algorithm, and that is a battle the algorithm usually loses.
Quick Comparison at a Glance
To put it side by side, here is how the two formats stack up for drone work.
- Dynamic range: RAW captures far more, JPEG clips highlights and shadows permanently.
- White balance: RAW is fully adjustable, JPEG is locked in.
- Editing: RAW is non-destructive, JPEG degrades with every save.
- File size: JPEG wins at 3 to 8 MB, RAW runs 20 to 60 MB per shot.
- Convenience: JPEG is share-ready instantly, RAW requires editing software.
- Color depth: RAW holds 12 bits or more, JPEG tops out at 8 bits.
Drone-Specific Considerations
Drone photography has its own quirks, and the RAW conversation gets more interesting when you narrow it down to actual aircraft and the DNG files they produce.
Can DJI Drones Take RAW Photos?
Yes. Nearly every modern DJI drone in the Mavic, Air, and Mini lines can shoot RAW photos in the DNG format. That includes the DJI Mini 3 Pro, Mini 4 Pro, Air 2S, Air 3, Mavic 3 series, and the newer Mavic 4 lineup. The option lives in the camera settings inside the DJI Fly app, usually labeled as RAW or simply referred to when you switch the photo format away from JPEG.
How to Enable RAW on a DJI Drone
The exact steps vary slightly by model, but the workflow is the same across most of the DJI Fly app. Open the camera settings panel, look for the format or image quality option, and switch from JPEG to RAW. On higher-end models like the Mavic 3, you can also shoot RAW plus JPEG simultaneously, which gives you a finished JPEG for quick sharing plus the RAW for serious editing.
One quick tip: enable RAW before you take off, not after. Switching formats mid-flight burns battery and attention you should be spending on flying.
What About DJI Mini Models?
The DJI Mini series is where this question comes up most often, and the answer depends on the exact model. The Mini 3 Pro and Mini 4 Pro both support RAW DNG capture and the quality is genuinely good for a drone this small. The older Mini 2 also shoots RAW, though the smaller sensor means you will see more noise and less dynamic range than on the Air or Mavic series.
For the original Mini and Mini SE, RAW support is more limited or absent, so check your specific model before assuming the option is there.
Storage Tips for RAW Drone Photography
Because RAW files run 5 to 6 times larger than JPEG, storage becomes a real consideration. Here are the rules I follow on every shoot.
- Use a fast UHS-I or UHS-II SD card rated for 4K video, because slow cards choke on burst RAW shooting.
- Carry at least 128 GB of card space for a half-day shoot in RAW.
- Offload to a laptop or external SSD between locations instead of deleting in the field.
- Keep your edited exports as JPEGs for sharing, but archive the RAW files separately for future re-edits.
A little planning goes a long way. Running out of card space halfway through a sunset is a mistake you only make once.
Editing Software You Will Need
RAW files do not open by default on every device. To edit drone RAW photos you will want software like Adobe Lightroom, Adobe Camera RAW through Photoshop, Capture One, DxO PhotoLab, or one of the free options like RawTherapee and Darktable. Pick whichever fits your budget, because all of them handle DNG files from DJI drones without issue.
If your computer is older or low on RAM, expect RAW editing to feel slower than JPEG. The payoff in image quality is usually worth the wait.
When JPEG Might Be the Better Choice
RAW is not always the right answer, and pretending otherwise does not help anyone. There are real situations where JPEG is the smarter choice for a drone pilot.
If you are flying for quick real estate preview shots, construction progress photos, or anything that needs to be emailed or uploaded within minutes of landing, JPEG is the right tool. You skip the editing step entirely and the photos look good enough for that purpose.
If storage is tight and you are on a long trip without a way to offload files, switching to JPEG can buy you hundreds of extra shots on the same SD card. A 128 GB card that holds about 2,500 RAW files from an Air 2S will hold closer to 12,000 JPEGs.
If you are shooting rapid bursts for stitching a panorama or building a timelapse, the smaller JPEG file size can make the workflow manageable. Many pilots shoot the source frames in JPEG and the hero shots in RAW.
If you do not own and do not want to learn editing software, JPEG will look better straight out of the camera. RAW files opened without any adjustments usually look flat and dull, because they are waiting for you to make creative decisions that JPEG makes for you automatically.
Is RAW+JPEG the Best of Both Worlds?
For a lot of pilots, yes. Shooting RAW plus JPEG at the same time gives you a finished JPEG for instant sharing and a RAW file for when you want to do real work. The cost is storage and write speed, because the drone is recording two files every time the shutter clicks. On drones like the Mavic 3 this works beautifully. On smaller consumer drones it can slow down burst shooting noticeably.
My recommendation is to use RAW+JPEG on paid shoots and trips you cannot redo, and shoot RAW only for everyday practice flights where storage matters more than having an instant preview.
FAQs
Can DJI drones take RAW photos?
Yes. Most modern DJI drones including the Mini 3 Pro, Mini 4 Pro, Air 2S, Air 3, and the Mavic 3 series can shoot RAW photos in the DNG format. You enable it inside the DJI Fly app by switching the photo format from JPEG to RAW in the camera settings.
What is better on the DJI Mini 2 the RAW or the JPEG?
RAW is better on the DJI Mini 2 if you plan to edit your photos, because it gives you far more dynamic range, white balance control, and shadow and highlight recovery than JPEG. JPEG is better if you want share-ready files with no editing, since the smaller sensor on the Mini 2 means RAW files will need more work to look their best.
What are the differences between JPEG and RAW?
The main differences are that RAW stores all uncompressed sensor data with 12 bits or more of color depth and full white balance flexibility, while JPEG applies in-camera processing and uses lossy compression to produce an 8-bit file roughly 5 to 6 times smaller. RAW allows non-destructive editing and aggressive recovery of highlights and shadows, while JPEG locks in the camera’s decisions at the moment of capture.
Is Shooting RAW+JPEG the Best of Both Worlds?
For many drone pilots yes. RAW+JPEG mode records both files every time you shoot, giving you an instant JPEG for sharing plus a RAW file for serious editing. The trade-offs are faster storage consumption and slower burst shooting, so it works best on higher-end drones like the Mavic 3 and on shoots where you cannot afford to redo the shot.
Conclusion
Switching from JPEG to RAW is the single highest-impact change you can make to your drone photography without spending money on new gear. It gives you back blown highlights, crushed shadows, and full control over white balance, all while keeping your editing non-destructive and your options open for years to come.
The reasons why you should shoot drone photos in RAW instead of JPEG come down to one core idea: aerial scenes have extreme lighting that JPEG simply cannot handle gracefully. RAW gives your editing software the raw material it needs to recover detail that JPEG throws away the moment you press the shutter.
The honest caveat is that RAW demands more storage, editing software, and a few extra minutes per shot. For most pilots who care about image quality, that trade is well worth it. For quick share-and-go situations, JPEG still earns its place.
Next time you head out to fly, flip your drone into RAW mode and shoot the same scene both ways. Edit the RAW file, look at the JPEG straight out of the camera, and decide for yourself. Most pilots never go back.