
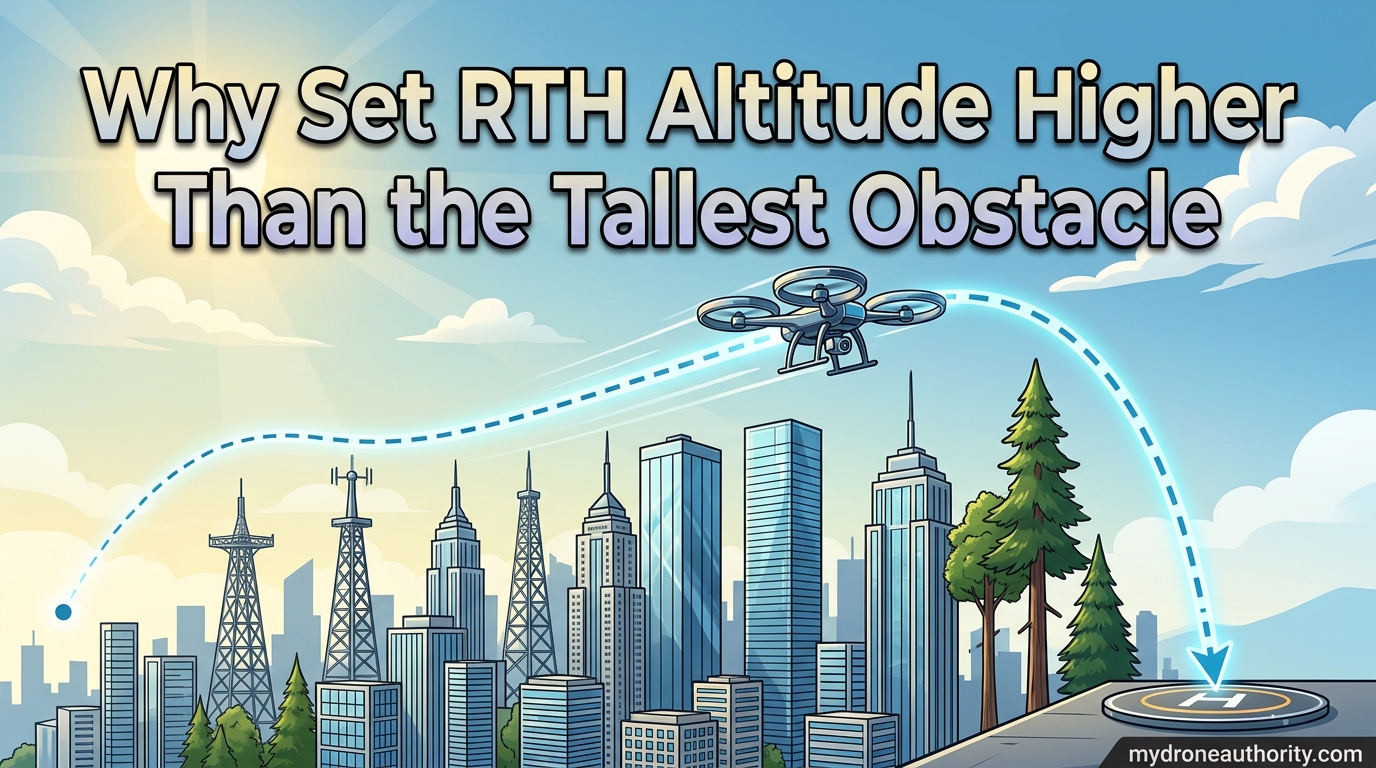
I watched a Mini 4 Pro hit a 50m tower last summer because the pilot left RTH altitude at the default 30m and flew behind a building. The drone was 200 feet up, perfectly fine in the air, but the second signal dropped it tried to come home in a straight line, and the tower was the only thing in the way. The whole flight was over in three seconds. This is the exact reason you set RTH altitude higher than the tallest obstacle nearby, and I am going to walk you through how to do it the right way in 2026.
If you have ever pressed the return to home button and watched your drone rise to a preset height before flying back, that preset height is the most important number in your entire flight plan. It decides whether your drone comes home or comes down in a tree, on a roof, or in a lake. In this guide I will explain how RTH altitude works, why a low setting is the number one cause of return-to-home crashes, and how to calculate the right value for any location using free tools.
Quick Answer (October 2026)
Set your RTH altitude to at least 5 to 10 meters above the tallest obstacle between your drone and the home point. For open areas, 90 to 100 meters is a safe default. For urban or forested areas, measure every structure, tree, and tower within your flight path and add a buffer. Never trust the manufacturer default of 30m in any environment with obstacles.
Table of Contents
What Is RTH Altitude and How Does It Work?
RTH altitude, or return to home altitude, is the pre-set height your drone climbs to before automatically flying back to its takeoff point. It is measured from the home point, not from the drone’s current position. When RTH triggers, the drone compares its current altitude to the RTH altitude. If it is below the RTH altitude, the drone climbs to that height first, then flies a straight line back to the home point, then descends for landing.
This pre-set safety height exists to protect your drone from the most common return flight hazard: obstacles between the drone and home. The system assumes there may be buildings, towers, trees, or terrain in the return path, and it tries to fly over them by climbing to RTH altitude first. If the altitude is set too low, the climb is not enough, and the drone flies into whatever is in the way.
How RTH Triggers in the First Place
There are three main triggers for a return to home event on modern drones. Smart RTH activates when you press the RTH button on the controller or in the app. Failsafe RTH activates automatically when the drone loses the controller signal for more than a few seconds. Low battery RTH activates when the battery drops to a critical threshold, which the drone calculates based on distance from home and current power draw.
All three triggers follow the same flight path. The drone climbs to RTH altitude, flies straight to the home point, and lands. That is why the altitude setting matters in every scenario, not just the ones you plan for. The signal loss case is the one that gets most pilots in trouble, because the drone is on its own and cannot ask for help.
Difference Between RTH Altitude, Max Altitude, and Mission Height
New pilots often confuse RTH altitude with maximum altitude, and they are completely different settings. Maximum altitude is the ceiling the drone will not exceed during normal flight. Mission height is a survey-specific target altitude used in mapping workflows. RTH altitude is a failsafe number used only during the return flight. You can fly your drone at 120m and still set RTH altitude to 60m, although I would not recommend that.
On DJI drones you will find these in the Safety section of the app, on Autel drones in the Flight Control menu, and on Skydio in the RTH settings. Each one serves a different purpose, and you should understand which is which before every flight.
Why You Must Set RTH Altitude Higher Than the Tallest Obstacle
The simple reason is that the drone does not know what is in the way. The return flight is a straight line from current position to home point. If a 60m building sits in that line and your RTH altitude is set to 50m, the drone will fly directly into the side of the building. There is no obstacle avoidance system that will save you here in every case, because obstacle avoidance is designed for forward and downward sensors, not for the long-range lateral return flight path.
DJI’s official RTH guide recommends setting RTH altitude to 100m unless you are flying in a city. Pilot forums consistently recommend adding 5 to 10 meters of buffer above the tallest structure. The Phantom Help community has a step-by-step method using Google Earth that I will walk you through in the next section. All of this advice points in the same direction: when in doubt, go higher.
Real Crash Examples From the Community
I pulled together some of the most common RTH crash stories from pilot forums so you can see exactly what goes wrong. A Mini 4 Pro pilot set RTH to 50m, forgot to check pre-flight, and the drone hit a tower behind a building. The drone was lost. Another pilot flying under a tree canopy had RTH trigger, and the drone rose into the branches and stayed stuck for two days. A third pilot launched from a bridge, RTH activated, and the drone tried to climb into the underside of the bridge deck.
None of these pilots thought RTH would be a problem when they took off. All of them had a setting that was too low for the environment. The fix in every case is the same: measure the tallest obstacle between you and every possible return path, then add 5 to 10 meters on top of that number.
What Happens When RTH Altitude Is Too Low
When RTH altitude is too low, the drone climbs partway, then begins the return flight, and strikes the obstacle. The drone does not stop. It does not try to go around. The vision sensors and obstacle avoidance systems only work in certain directions, and a 60 mph return flight does not give the drone time to detect, classify, and avoid a wall. The crash is almost always fatal for the drone.
The worst part is that the pilot often cannot see the obstacle. The drone is on the other side of a building, the controller signal is lost, and the pilot is standing at the home point waiting for it to come back. By the time they realize something is wrong, the drone has already hit something. This is exactly why the RTH altitude setting is the one number you should never leave on default.
How to Calculate the Right RTH Altitude Using Google Earth
The most reliable way to set RTH altitude is to measure the tallest obstacle in your flight area before you take off. The Phantom Help forum has a great method using Google Earth, and I have used it on hundreds of flights. Here is the step-by-step process I follow.
- Open Google Earth on desktop or the web version at earth.google.com.
- Navigate to your flight location using the search bar.
- Find the tallest structure, tree, tower, or terrain feature within a 1 km radius of your planned takeoff point.
- Right-click on the structure and choose “Show Elevation” to see the elevation in meters above sea level.
- Subtract the elevation of your takeoff point from the elevation of the top of the structure. This gives you the obstacle height above your home point.
- Add a 5 to 10 meter safety buffer to that number. This is your RTH altitude.
For example, if you are taking off at a parking lot at 200m elevation and there is a cell tower nearby whose top is at 280m elevation, the tower is 80m above your home point. Add 10m of buffer, and your RTH altitude should be 90m. This calculation takes about three minutes and is far more accurate than guessing.
What to Do If the Required RTH Altitude Is Above 120m
Sometimes the obstacle is so tall that a safe RTH altitude would push you above the FAA Part 107 limit of 400 feet (about 120m) above ground level. In that case you have two options. First, change your flight location to one with a clear return path. Second, fly only within line of sight and never let the drone go behind the obstacle in the first place. A drone that never loses line of sight is unlikely to need RTH.
If you have a Part 107 waiver for operations above 400 feet, you can fly higher and set RTH altitude above 120m, but you still need to clear all obstacles in the return path. The 400ft rule is a regulatory ceiling for normal flight, not a magic number that protects you from crashes. Your RTH altitude should always be based on obstacles, not regulations.
Quick Reference: RTH Altitude by Environment
Open fields with no obstacles: 60m. Light residential areas with two-story houses: 80m. Urban areas with buildings up to 30m: 100m. Dense urban with mixed high-rises: 120m or higher. Forested areas with tree canopy above 25m: add 5 to 10m above the tallest tree in the area. Water crossings: use the same rule based on the tallest structure on the far shore.
These are starting points. The Google Earth method gives you a more accurate number, and I recommend using it for any environment you have not flown in before. The community consensus is that 90 to 100m is a safe default if you are unsure, but the only way to be certain is to measure.
Special Scenarios: Urban, Forest, Bridge, and Elevated Takeoffs
Different flight environments create different RTH risks. Here are the scenarios I think about before every flight, and how I adjust the RTH altitude for each one.
Flying in Urban Environments
Urban flying is the most common crash scenario for RTH. Buildings, cranes, cell towers, and billboards all sit in the return flight path. In a downtown area I will set RTH altitude to at least 120m, and I will position my home point so the return path goes over the lowest buildings possible. If I cannot find a clear path, I fly only within line of sight and never let the drone go behind a structure.
Flying Under Tree Canopy
Flying under trees is the second most common crash scenario. If RTH triggers while you are under canopy, the drone will rise straight up into the branches. The only safe approach is to set RTH altitude below the canopy level, which means you accept the risk that the drone cannot get high enough to clear obstacles. In this case I recommend turning off RTH entirely and using manual control to fly out from under the trees before triggering return.
Flying Under or Near Bridges
Bridges are a special case. If you fly under a bridge and RTH triggers, the drone will try to climb into the bridge deck. The fix is the same as for tree canopy: set RTH altitude below the bridge, or turn off RTH and fly out manually. The DJI Fly app lets you cancel RTH at any time by pressing the RTH button again, which is the safer move when you are in a constrained space.
Taking Off From Elevated Locations
If you take off from the roof of a 200-foot building, your home point is 200 feet above the ground. The drone will measure RTH altitude from that home point, not from sea level. So if you set RTH altitude to 100m, the drone will climb to 300 feet above the ground, which may or may not be legal. In this case you need to account for both the takeoff elevation and the 400ft AGL rule. The safest approach is to fly only within line of sight and keep the drone below 400 feet above ground level at all times.
Flying Over Water
Water crossings are dangerous because a low battery RTH can land the drone in the water. Set RTH altitude high enough to clear any trees on the far shore, and make sure your battery has enough reserve for the full return distance plus a wind buffer. A headwind on the return leg can drain the battery faster than the drone expects, and low battery RTH over water usually means a water landing.
Best Practices and Pre-Flight Checklist for RTH Altitude
Here is the pre-flight checklist I run through before every flight. It takes 60 seconds and has saved my drones more times than I can count.
- Open Google Earth and check the tallest obstacle within 1 km of the takeoff point.
- Calculate the obstacle height above the home point and add 5 to 10m of buffer.
- Set RTH altitude in the app to that final number.
- Verify the home point is set correctly by checking the GPS coordinates on the map.
- Confirm the drone has at least 12 GPS satellites before takeoff.
- Check wind speed and direction at the planned flight altitude.
- Mentally trace the return flight path and identify any obstacles you might have missed.
Wind and Battery Considerations at Higher Altitudes
Wind speed generally increases with altitude. If you set RTH altitude to 120m, your drone will face stronger winds on the return flight than it did during normal flight at 60m. A strong headwind can drain the battery faster than expected, and if the battery drops to the critical threshold mid-flight, low battery RTH may not have enough power to reach home. The fix is to keep an extra battery reserve in mind when you set RTH altitude, and to fly shorter missions on windy days.
Cold weather reduces battery performance, which compounds the wind problem. In cold conditions I add 20 percent to my battery reserve calculation and keep RTH altitude on the lower end of the safe range. The goal is to get home with battery to spare, not to clear every obstacle by 50 meters.
RTH at Current Altitude vs Preset Altitude
Most modern drones have two RTH modes. Preset altitude mode climbs to your RTH altitude setting before returning. Current altitude mode returns at the drone’s current altitude, regardless of what RTH altitude is set to. Current altitude mode is useful when you are flying under tree canopy or under a bridge, where the drone cannot safely climb to the preset altitude. Preset altitude is the safer default for open areas with obstacles.
I recommend preset altitude mode for 95 percent of flights, and current altitude mode only when you are deliberately flying in a constrained space. Make sure you know which mode your drone is in before every flight, because switching between them by accident is a common cause of RTH crashes.
What to Do When RTH Activates Unexpectedly
If RTH triggers and you want to cancel it, press the RTH button again on the controller or tap the cancel button in the app. The drone will stop the return flight and hover in place, waiting for your next command. From there you can take manual control, fly to a safer location, and either resume RTH or land manually. Never assume RTH will get your drone home safely. Always be ready to take over.
Regulatory Context: The 400ft and 120m Rules
Under FAA Part 107, the maximum altitude for drone operations in the United States is 400 feet above ground level, or 120 meters. This is a hard ceiling for normal flight. Your RTH altitude should be set to clear obstacles, not to push the regulatory limit. In most cases a safe RTH altitude is well below 400 feet, because the tallest obstacle in your flight area is rarely that high. The 400ft rule is there to keep drones away from manned aircraft, and it applies to your RTH altitude just as it applies to your normal flight altitude.
FAQ Section
What does RTH altitude mean on a drone?
RTH altitude is the pre-set height your drone climbs to before automatically returning to its takeoff point. When return to home triggers, the drone ascends to this altitude, flies a straight line back to the home point, and descends for landing. The altitude is measured from the home point, not from the drone’s current position.
What is the 120m rule for drones?
The 120m rule refers to the FAA Part 107 altitude ceiling of 400 feet, which equals about 120 meters above ground level. Drones in the United States are not allowed to fly higher than 400 feet AGL without a waiver, and this limit applies to your RTH altitude as well.
What happens if I fly my drone higher than 400 feet?
Flying above 400 feet AGL without a Part 107 waiver is a violation of FAA regulations and can result in fines or certificate suspension. The 400ft limit exists to keep drones separated from manned aircraft, and pilots should plan their RTH altitude to stay within this limit while still clearing obstacles.
Why can’t drones fly too high?
Drones cannot fly too high because airspace above 400 feet AGL is reserved for manned aircraft under FAA regulations. Drones and manned aircraft operating in the same airspace creates a collision risk, and the 400ft limit is designed to keep them separated. Most countries have similar altitude caps, typically between 120m and 150m.
What is the 1:1 rule for drones?
The 1:1 rule for drones is a visual line of sight guideline that suggests you should keep the drone at a horizontal distance no greater than its altitude. For example, a drone at 60m altitude should be no more than 60m horizontally from the pilot. This is not a legal requirement in all countries, but it is a useful safety guideline for visual contact.
What is the best RTH altitude for urban flying?
For urban flying, set RTH altitude to at least 5 to 10 meters above the tallest building, tower, or crane within your flight path. In most downtown areas this means 100 to 120 meters. Always use Google Earth to measure the tallest structure rather than guessing, and add a safety buffer on top of that measurement.
Can I change RTH altitude while in flight?
Yes, most modern drones let you change RTH altitude in the app while the drone is flying. This is useful if you notice an obstacle you did not account for during pre-flight. Increase the setting immediately and verify the new value is reflected in the app before the drone returns.
Does RTH altitude reset between flights?
RTH altitude can reset between flights on some drone models, particularly older DJI models. Always check the RTH altitude value in the app before takeoff, even if you set it correctly on a previous flight. Make it a habit, and you will never get caught by a default value in a risky environment.
Conclusion
Setting RTH altitude higher than the tallest obstacle nearby is the single most important pre-flight decision you make. The default value of 30m is fine for an open field, but it is a death sentence in any environment with buildings, towers, or tall trees. Spend 60 seconds in Google Earth before every flight, measure the tallest obstacle within 1 km, add 5 to 10m of buffer, and set that as your RTH altitude. This one habit will prevent more crashes than every other safety measure combined. Make it part of your pre-flight routine, and your drone will come home every time.