
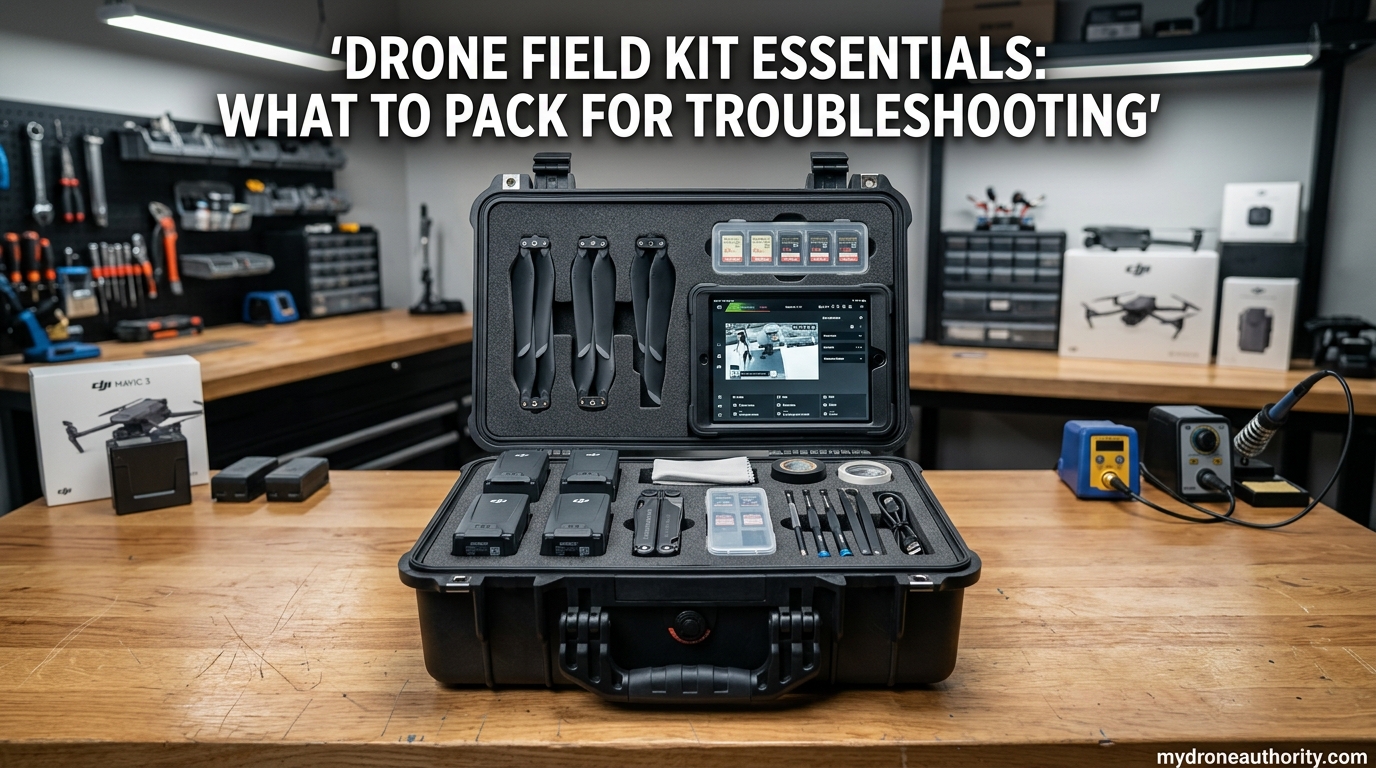
Every drone pilot has been there. You drive an hour to the flying field, charge your batteries, get everything set up, and on the second flight a motor wire snaps or a propeller shreds on a gate. Without a proper drone field kit, that session is over. With the right kit, you are back in the air in five minutes.
A drone field kit is a portable collection of tools, spare parts, and testing gear that lets you diagnose and fix common issues at the flying field without heading back to your workshop. It is the difference between a frustrating drive home and a full afternoon of flying. This guide covers what to carry in a drone field kit for troubleshooting on location, built from real pilot experience and the most common field failures reported across FPV communities.
Whether you fly cinewhoops, long-range rigs, or 5-inch freestyle quads, the essentials stay the same. The goal is a compact, organized kit that handles 90 percent of field problems without weighing you down. Here is exactly what to pack and why.
Table of Contents
Quick-Reference Drone Field Kit Checklist
If you only have time to scan one section, this is it. The following list represents the minimum viable drone field kit for troubleshooting on location. Every item has earned its place through real-world use.
- Tools: Compact USB-C soldering iron, hex driver set (1.5mm, 2mm, 2.5mm, 3mm), precision screwdrivers, wire strippers or scissors, smoke stopper, multimeter
- Consumables: Spare propellers (two full sets), electrical tape, zip ties (multiple sizes), heat shrink, solder and flux, double-sided foam tape
- Hardware: M2 and M3 screws and nuts, spare XT60 and XT30 connectors, spare motor wires, spare battery straps
- Electrical: Two charged radio batteries, two charged goggle batteries, one spare flight battery, USB-C power bank
- Diagnostics: Smoke stopper for each battery connector type you use, smartphone with Betaflight app or speed tester
Print this list, tape it inside your kit lid, and you will never forget an essential again. Now let us break down each category in detail.
Essential Tools for Your Drone Field Kit
The core of any drone field kit is the tools. You do not need a full workshop, but you do need the right tools for the most common field repairs. Here is what to carry and how to choose it.
Soldering Iron
A compact USB-C soldering iron is the single most important tool in your kit. Motor wires snap, ESC pads lift, and connectors fail. Without a soldering iron, you cannot fix any of these on location.
USB-C irons have become popular because they run off the same power banks pilots already carry for charging phones and goggles. Look for one with interchangeable tips and a quick heat-up time under 15 seconds. Pair it with a small tube of rosin-core solder and a tiny jar of flux paste.
Hex Drivers and Screwdrivers
Drones live and die by hex hardware. A quality hex driver set covering 1.5mm, 2mm, 2.5mm, and 3mm will let you remove motors, swap arms, and tighten loose standoffs. Skip the cheap L-keys and invest in proper drivers with ball ends for angled access.
Add a small Phillips and flathead screwdriver for camera mounts, VTX antennas, and receiver cases. A precision set with spinning caps saves your fingers during long repair sessions.
Smoke Stopper
A smoke stopper is a small inline device you plug between your battery and drone on first power-up after a repair. If there is a short circuit, the smoke stopper trips and cuts power before your flight controller or ESC fries.
This ten-dollar part has saved thousands of dollars in equipment. Every experienced pilot has a story about a solder bridge or stray wire that would have destroyed a build without one. Carry one smoke stopper for each battery connector type you use, whether XT60 or XT30.
Multimeter
A compact multimeter lets you check battery voltage, test continuity on solder joints, and diagnose ESC or motor issues at the field. You do not need a full-size bench multimeter. A pocket-sized auto-ranging model handles everything you need between flights.
The most common field use is a continuity test after soldering. Touch the probes across pads that should not be connected. If the meter beeps, you have a short. This thirty-second check prevents most post-repair disasters.
Cutting and Securing Tools
Small scissors or flush cutters handle zip ties, wire trimming, and heat shrink. A roll of electrical tape and an assortment of zip ties can fix almost anything in a pinch. One pilot on a popular FPV forum put it well: zip ties and electrical tape have saved more sessions than every other tool combined.
Spare Parts That Save Sessions
Tools alone do not fix drones. You also need the parts that fail most often. Stock these spares and you will cover the vast majority of field failures.
Spare Propellers
Props are the most frequently damaged part of any drone. Carry at least two full sets of spares per quad you plan to fly. For FPV pilots running different sizes, label spare sets by prop size so you grab the right ones in a hurry.
Props are cheap, light, and easy to pack. There is no excuse for ending a session early because of a broken blade when a full set costs less than a coffee.
Batteries and Power
Dead radio or goggle batteries have grounded more sessions than broken drones. Always carry at least two spare batteries for your radio transmitter and two for your goggles. Add one spare flight battery per quad if your charger can keep up.
A USB-C power bank rated for at least 20,000 mAh keeps your radio, goggles, phone, and soldering iron charged through a long session. Pilots who run ExpressLRS or GPS rescue modes should pay extra attention to radio battery levels, since a dead radio mid-flight triggers failsafe.
Connectors and Adapters
If you fly a mix of quads with different battery connectors, carry adapters. XT60 to XT30 adapters are essential for mixed fleets. A few spare XT60 and XT30 connectors, plus a small piece of pre-tinned wire, let you replace damaged connectors at the field.
Forgetting a specific adapter is one of the most common field frustrations reported by pilots with multiple quads. Build a small connector kit once and never think about it again.
Hardware Assortment
A small compartment box with M2 and M3 screws, nuts, and washers handles motor swaps, arm replacements, and standoff repairs. Add a few spare motor wires pre-stripped and tinned. Five minutes of preparation at home saves an hour of frustration at the field.
Field Troubleshooting Guide: How to Diagnose on Location
Knowing what to carry in a drone field kit is only half the battle. You also need a repeatable troubleshooting process. Here is the step-by-step method experienced pilots use to diagnose issues between flights.
Step 1: Visual inspection. After any crash or unexpected behavior, look at the drone before powering it on. Check for broken props, snapped motor wires, disconnected ESC wires, and damaged antennas. A two-minute visual scan catches most obvious problems.
Step 2: Smoke stopper test. If you made any repair or suspect a short, plug in a smoke stopper before connecting the battery directly. The smoke stopper trips if there is a short, protecting your electronics. This step is non-negotiable after soldering work.
Step 3: Continuity check. Use your multimeter to test continuity across solder joints and check for shorts between pads that should be isolated. A beep where there should not be one means you have more work to do before flying.
Step 4: Voltage check. Measure each battery cell or the overall pack voltage before flying. A pack that reads low or shows imbalance will not perform well and could drop voltage under load, causing brownouts or failsafes.
Step 5: Software check. If hardware checks out, connect your smartphone or laptop running Betaflight, ExpressLRS configurator, or your flight controller software. Verify the receiver is bound, motors arm in the correct direction, and failsafe is configured properly.
Step 6: Hover test. Before committing to a full flight, do a short low-altitude hover. Listen for motor issues, watch for vibration, and confirm the drone responds correctly to inputs. If anything feels off, land and re-diagnose.
This six-step process takes about ten minutes and catches nearly every common field issue. Make it a habit after any crash or repair.
Environment-Specific Kit Customization
The base kit covers most flying conditions, but different environments demand specific additions. Most competitors skip this entirely, which is a missed opportunity. Here is how to adapt your drone field kit for challenging conditions.
Cold Weather Flying
Cold drains lithium batteries fast. Pack extra flight batteries and keep them warm in an insulated pouch against your body. Carry chemical hand warmers to tuck into your battery bag. A small insulating pad to stand on while repairing keeps your knees off frozen ground.
LCD screens on goggles dim in cold weather. Bring spare goggle batteries and consider a backup fan module to prevent fogging. Rubber gimbals on radios can stiffen, so warm your transmitter in your jacket between flights.
Desert and Dusty Conditions
Fine sand and dust destroy motors and bearings. Carry a small brush and a can of compressed air to clear debris from motors after every session. Pack extra motor bearings or pre-built motor assemblies if you fly in dusty conditions regularly.
A microfiber cloth and lens cleaner keep camera lenses and goggle optics clear. Sand gets into everything, so pack spare props in sealed bags rather than loose in your kit.
Marine and Humid Conditions
Salt air corrodes electronics quickly. Carry contact cleaner and a small brush to clean connectors after flying near the ocean. Silica gel packets tucked into your kit case absorb moisture during transport. Conformal coating on your flight controller at home prevents field corrosion issues.
For over-water flying, a flotation system or retrieval pole is worth its weight in gold. Even if you never need it, the peace of mind changes how aggressively you fly.
How to Organize and Pack Your Field Kit
A pile of tools in a backpack is not a drone field kit. Organization is what makes the difference between a five-minute fix and a twenty-minute search for the right screwdriver. Here is how experienced pilots structure their kits.
Start with a hard-shell case or a padded tool roll. Hard cases protect delicate tools like soldering irons and multimeters during transport. Soft rolls are lighter and work well if you carry your kit inside a larger backpack. Either way, choose a container with dedicated compartments or add small parts organizers inside.
Group items by function. Put all soldering gear in one compartment, all hardware in another, and all spare electronics in a third. Clear labels or color-coded bags help you grab the right section without thinking. When you are cold, tired, and frustrated after a crash, fast access matters.
Replenish the kit after every session, not before the next one. The best time to restock spare props, replace used solder, and recharge batteries is the day you get home. This habit ensures your kit is always ready to grab and go without last-minute packing.
Common Field Repairs and How to Do Them
Some repairs happen so often that every pilot should know them cold. Here are the three most common field repairs and the basics of each.
Propeller swap. Remove the four prop nuts or screws, pull off the broken props, install new ones, and torque the hardware correctly. Pay attention to prop direction, since CW and CCW props are not interchangeable. This repair takes under two minutes.
Motor wire resolder. If a motor wire pulls free from the ESC pad, strip a small amount of insulation, tin the wire, apply flux to the pad, and resolder. Use a smoke stopper on first power-up to confirm no short. Five to ten minutes with practice.
Loose connector or antenna. If an XT60 pull tab breaks, an antenna wire loosens, or a camera connector vibrates free, a quick resolder or reconnect gets you back in the air. Always continuity-test after any electrical reconnection.
FAQs
What tools do I need for drone field repairs?
The essential tools are a compact USB-C soldering iron, hex drivers in 1.5mm to 3mm sizes, precision screwdrivers, wire cutters or scissors, a smoke stopper, and a small multimeter. Add electrical tape, zip ties, and flux for fast ad-hoc fixes.
How to fix a drone at the flying field?
Start with a visual inspection, then run a smoke stopper test before powering up. Use a multimeter to check continuity and battery voltage. If hardware checks out, connect to Betaflight or your flight controller software to verify configuration. Finish with a low hover test before full flight.
What to bring to FPV flying field?
Bring your drone field kit with soldering tools, hex drivers, smoke stopper, multimeter, at least two spare prop sets, spare radio and goggle batteries, a USB-C power bank, electrical tape, zip ties, and M2/M3 hardware. Also pack a fully charged flight battery for each quad you plan to fly.
How to troubleshoot drone on location?
Follow a six-step process: visual inspection, smoke stopper test, continuity check with a multimeter, battery voltage check, software check in Betaflight, and a short hover test. This routine catches nearly every common field issue in about ten minutes.
What are common drone repair issues?
The most common field repairs are broken propellers, snapped motor wires, loose connectors, damaged antennas, and loose screws after hard crashes. These account for the vast majority of field failures and can all be handled with a well-stocked drone field kit.
Conclusion
Building the right drone field kit for troubleshooting on location is not about packing everything you own. It is about carrying the specific tools, spare parts, and diagnostic gear that handle the failures most likely to end your session. A USB-C soldering iron, hex drivers, smoke stopper, multimeter, spare props, and a handful of connectors cover roughly 90 percent of field problems.
Start with the checklist in this guide, customize it to your flying style and environment, and commit to restocking after every session. Once your kit is dialed in, you will spend more time flying and less time driving home frustrated. That is the entire point of learning what to carry in a drone field kit for troubleshooting on location.