
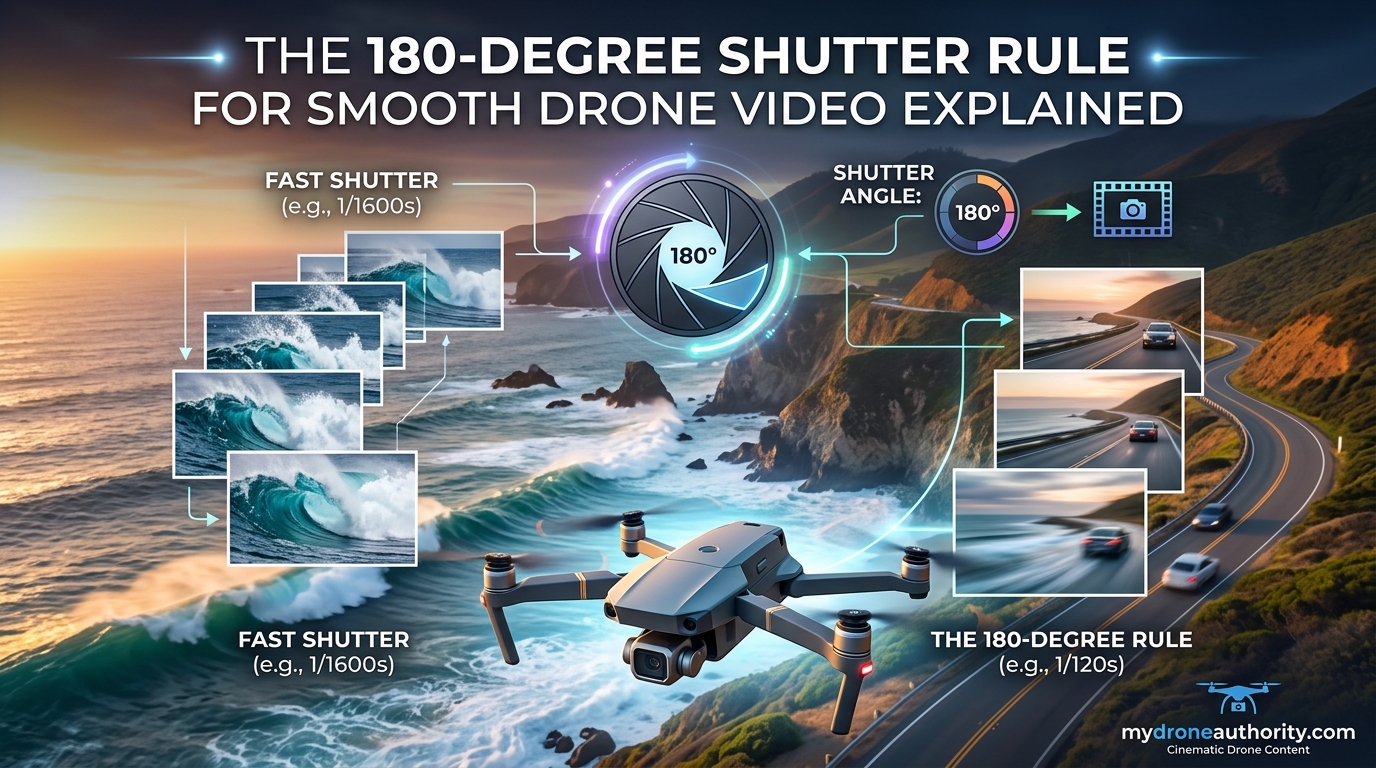
Ever looked at your drone footage and wondered why it looks choppy, jittery, or just not as smooth as the cinematic clips you see online? The fix often comes down to a single concept that professional filmmakers have relied on for nearly a century: the 180-degree shutter rule for drone video. The 180-degree shutter rule states that your shutter speed should be set to roughly twice your frame rate, creating natural-looking motion blur that mimics how the human eye perceives movement. For example, if you are shooting at 24fps, your shutter speed should be around 1/50 of a second.
This article breaks down what the rule is, where it came from, why it produces that buttery smooth cinematic look, and exactly how to apply it the next time you fly your drone. We will also cover when it makes sense to break the rule on purpose, how ND filters make the rule usable outdoors, and the common mistakes that leave beginner pilots frustrated with jittery clips.
Table of Contents
What Is the 180-Degree Shutter Rule?
The 180-degree shutter rule is a fundamental guideline in videography that defines the relationship between your shutter speed and your frame rate. Stated simply, your shutter speed should be set to twice your frame rate.
At 24fps, that means a shutter speed of 1/48 second, which most cameras round to 1/50. At 30fps it becomes 1/60. At 60fps you would aim for 1/125. The formula is consistent regardless of the camera you fly.
The name comes from the mechanical rotary shutters used in classic film cameras. Those shutters were spinning discs with a pie-slice opening, and a 180-degree opening meant the film was exposed for half of each frame cycle. Half of the rotation was exposure, half was blackout as the film advanced, which produced the natural cadence our brains have learned to read as smooth motion.
That mechanical quirk became a creative standard. Even though modern drone cameras like the DJI Mavic, Air, and Mini series use electronic sensors instead of spinning discs, the look we associate with professional video still depends on that same 180-degree relationship.
Shutter Speed Explained for Drone Pilots
Shutter speed is the length of time your camera sensor is exposed to light for each individual frame of video. A shutter speed of 1/50 means the sensor is collecting light for one fiftieth of a second, twenty four times per second if you are shooting at 24fps.
The shorter the exposure, the sharper each frame becomes because moving subjects have less time to blur across the sensor. The longer the exposure, the more motion blur is recorded into each frame as objects travel while the shutter is open.
Most consumer drones from DJI, Autel, and Skydio let you set shutter speed manually in Pro mode. In auto mode, the drone picks whatever shutter speed gives a balanced exposure, which often means a very fast speed on bright days. That is exactly why auto drone footage tends to look jittery and unnatural.
Frame Rate Explained for Drone Pilots
Frame rate, measured in frames per second or fps, is how many individual images your camera captures each second of recording. More frames per second means smoother playback of fast motion and the option to slow footage down in post.
The most common drone frame rates are 24fps for a cinematic film look, 25fps for broadcast in PAL regions, 30fps for broadcast in NTSC regions and general web use, 60fps for smooth motion and light slow motion, and 120fps for true slow motion shots.
The frame rate you choose sets the creative tone of the footage. Twenty four frames per second has been the movie standard since the 1920s, so audiences unconsciously associate that cadence with high-end film. Sixty and 120fps feel more like sports broadcast, news, or hyper-real action.
Why the 180 Rule Creates Natural Motion Blur
The reason the 180-degree shutter rule for drone video works so well is that it produces a specific amount of motion blur per frame, and that amount happens to match what the human eye expects to see when it tracks a moving object.
When you walk past a car on the street, your eye does not freeze every micro-instant in sharp focus. It sees a small smear of motion as objects travel through your field of view. The 180-degree shutter angle replicates that small smear.
If you break the rule and shoot at a much faster shutter speed than 2x your frame rate, each frame freezes motion sharply with almost no blur. Played back at speed, the footage looks choppy, jittery, and slightly strobed, an effect called cadence break or shutter stutter. This is the single most common reason drone footage from new pilots looks amateur.
Shoot at too slow a shutter speed and the opposite problem appears. Each frame carries a long smear of motion blur that looks smeary and soft. Action loses definition and the footage can look muddy.
The 180-degree rule sits in the sweet spot. Just enough blur to suggest motion smoothly, not so much that detail is lost.
Drone Camera Settings Quick Reference
Here is a quick reference you can save or screenshot for your next flight. Each pair below follows the 180-degree shutter rule.
- 24fps and a shutter speed of 1/50 for a cinematic film look
- 25fps and a shutter speed of 1/50 for PAL broadcast regions
- 30fps and a shutter speed of 1/60 for NTSC broadcast and web video
- 60fps and a shutter speed of 1/125 for smooth motion and light slow motion
- 120fps and a shutter speed of 1/250 for slow motion aerial shots
Notice that the shutter speed values are rounded to the nearest step your drone camera actually offers. No DJI drone has a 1/48 setting, so 1/50 is the closest match and works perfectly for 24fps.
For most cinematic aerial work, start at 24fps with a 1/50 shutter. Move to 30fps if you want a slightly more modern broadcast feel. Jump to 60fps or 120fps only when you plan to slow the footage down in post production.
How ND Filters Make the 180 Rule Possible Outdoors
Here is the catch every drone pilot runs into. On a bright sunny day, setting your shutter to 1/50 at 24fps with a low ISO will completely overexpose the image. The drone simply cannot close the aperture small enough or drop ISO low enough to balance the exposure.
This is where ND filters come in. An ND, or neutral density, filter is essentially a pair of sunglasses for your camera. It screws onto the front of the drone camera and reduces the amount of light hitting the sensor without changing the colors.
With the right ND filter mounted, you can hold your shutter at 1/50 outdoors in full sun and still get a balanced, correctly exposed image. The filter gives you back the creative control the rule depends on.
As a general starting point, reach for ND8 in low morning or evening light, ND16 in partial sun, ND32 in bright midday conditions, and ND64 or higher for snow, water, or harsh tropical sun. PolarPro, Freewell, and the official DJI ND filter sets all cover this range. You will quickly learn which strength your local flying conditions call for.
When to Break the 180-Degree Shutter Rule
The 180-degree shutter rule for drone video is a guideline, not a law. There are real situations where breaking it intentionally produces better results or a specific creative look.
FPV drone pilots often break the rule. FPV footage involves extremely fast forward motion, tight gaps, and rapid changes of direction. Many pilots shoot at much higher shutter speeds like 1/500 or 1/1000 to keep each frame crisp during high-speed passes, then accept a slightly choppier cadence in exchange for sharpness.
Documentary and combat footage often break the rule on purpose for a gritty, jittery feel. A famous example is the beach landing sequence in Saving Private Ryan, which used a near-90-degree shutter angle to produce a stuttering, hyper-real effect that intensified the chaos of the scene.
If your scene has almost no motion, such as a hovering drone shooting a still landscape at golden hour, you can push the shutter faster without obvious penalty because there is no movement to blur.
The key is to break the rule intentionally for a reason, not accidentally because you forgot to set your shutter or did not mount an ND filter.
Common Drone Videography Mistakes With Shutter Speed
Most beginner drone videography problems trace back to a handful of the same mistakes. Knowing them in advance will save you hours of frustrating footage review.
The biggest mistake is leaving the camera in full auto mode. Auto will pick whatever shutter speed balances the exposure, which is usually far too fast on a sunny day. The result is jittery, jittery, jittery footage with no motion blur.
The second most common mistake is shooting in bright conditions without an ND filter. Even in manual mode, the camera physically cannot reach 1/50 outdoors without one, so beginners give up and crank the shutter instead.
Mixing frame rates mid-flight is another common slip. If you record some clips at 24fps and others at 30fps in the same project, the different cadences clash visibly when cut together. Pick one frame rate per shoot.
Finally, many pilots forget that slow motion needs different handling. If you plan to slow 60fps footage down to 24fps in post, the 180 rule still applies at the moment of capture, meaning you should still shoot 60fps at 1/125, not 1/60. The motion blur carries through the slowdown naturally.
FAQs
What is the 180-degree rule for videography?
The 180-degree rule states that your shutter speed should be set to twice your frame rate. For example, shooting at 24fps calls for a shutter speed of around 1/50, while 30fps calls for 1/60. This creates the natural motion blur our brains expect from moving video.
Is it okay to break the 180-degree rule while filming?
Yes. The rule is a guideline, not a hard law. FPV drone pilots, documentary shooters, and filmmakers going for a gritty look often use faster shutter speeds intentionally. The key is to break the rule on purpose for a creative reason, not accidentally because of incorrect settings or a missing ND filter.
What is the shutter rule for videography?
The shutter rule in videography is that your shutter speed should equal twice your frame rate. This 2:1 ratio, often called the 180-degree shutter rule, produces motion blur similar to what the human eye perceives, giving footage a smooth, cinematic quality.
What is an example of the 180-degree rule in film?
A classic example is any standard Hollywood movie shot at 24fps with a shutter speed of 1/48 or 1/50. For drone footage specifically, shooting a cinematic landscape flyover at 24fps with the shutter locked at 1/50, balanced with an ND filter on a sunny day, follows the rule exactly.
Why does my drone footage look jittery?
Jittery drone footage is usually caused by a shutter speed much faster than twice the frame rate. On bright days in auto mode, the drone sets a very high shutter speed, which freezes motion in each frame and removes the natural blur our eyes expect. Switch to manual, set the shutter to 2x your frame rate, and add an ND filter if needed.
Conclusion
The 180-degree shutter rule for drone video is the single biggest difference between amateur-looking clips and footage that feels professional and cinematic. The rule is simple: set your shutter speed to twice your frame rate, so 24fps pairs with 1/50, 30fps with 1/60, and 60fps with 1/125.
Start with the rule every time you fly. Mount the right ND filter so you can hold that shutter speed in bright conditions, switch out of auto mode, and you will instantly see the difference in playback smoothness. Once the rule becomes second nature, you can break it intentionally for FPV passes, documentary style, or any creative look you want to chase.
Grab your drone, dial in 24fps and 1/50, slap on an ND filter, and the next clip you shoot will look like it came off a film set.