
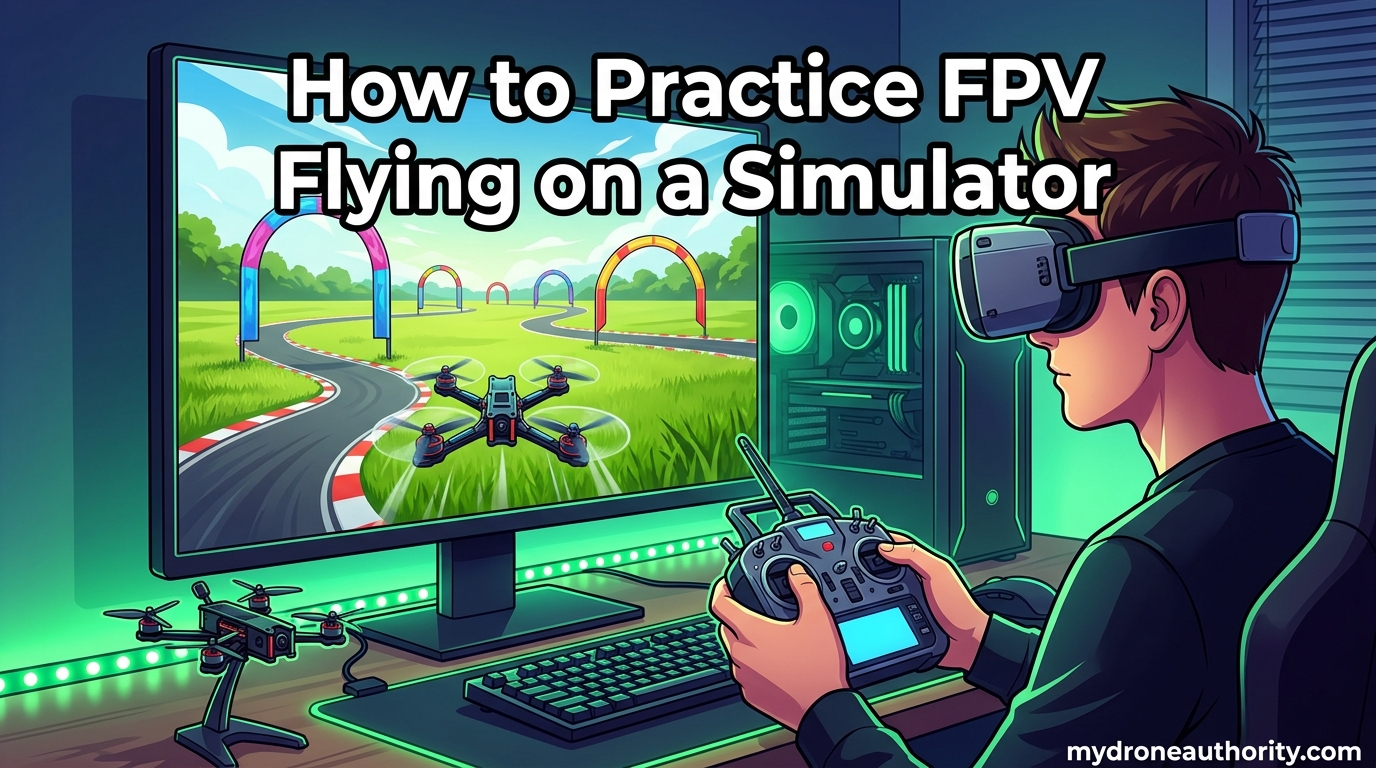
Learning to fly FPV drones the hard way usually means watching a $300 quad shatter against a tree on your second flight. That is exactly why so many new pilots skip straight past the crashes and start in an FPV simulator. If you want to know how to practice FPV flying on a simulator before you crash, the answer comes down to three things: get a real radio transmitter, pick the right simulator, and follow a structured practice progression.
I have spent hundreds of hours in simulators like Liftoff, VelociDrone, and Uncrashed, and I can tell you that the pilots who treat the simulator like training (not a video game) are the ones who avoid expensive mistakes. The muscle memory you build on a virtual quad transfers directly to real flight in ways that surprise most beginners.
This guide walks you through everything: the equipment you need, the connection process, the best simulators, a step-by-step skill progression, and the psychological jump from virtual to real flight. By the end, you will have a clear roadmap to crash-free learning.
Table of Contents
What Is an FPV Simulator and Why Use One
An FPV simulator is a computer application that mimics real drone flight using a physics engine, letting you practice with a radio controller while looking at a screen (or through goggles) exactly like you would in real life. Popular options include Liftoff, VelociDrone, Uncrashed, TRYP FPV, and the free FPV.SkyDive. These are not arcade games. They are sophisticated training tools designed to closely mimic the experience of flying a real FPV drone.
The biggest reason to use one is simple: crash-free learning. Every virtual crash costs nothing, but every real-world crash costs money, time, and confidence. Most new pilots crash dozens of times in their first week of simulator practice. Imagine doing that with a real 5-inch quad at $50 per propeller-and-arm repair.
Beyond saving money, simulators build the muscle memory your thumbs need to react without thinking. FPV flying happens fast, often 40-60 mph through tight gaps, and you do not have time to consciously decide which stick to move. Repetition in a simulator hardwires those reflexes safely.
Simulators also remove weather, location, and legal barriers. You can fly at 2 a.m. in a thunderstorm without leaving your desk. That consistency is what turns 30 hours of practice into real skill instead of 30 hours spread across a year of good-weather weekends.
What You Need to Start FPV Simulator Practice
The single most important piece of equipment is a real radio transmitter. Do not try to learn FPV with a keyboard, an Xbox controller, or a phone touchscreen. The whole point of simulator practice is building muscle memory on the same sticks you will use in real flight. If you train with a gamepad, you are wasting your time.
Recommended beginner radios include the Radiomaster Boxer, Radiomaster TX12 MKII, Jumper T-Lite, and BetaFPV LiteRadio 3. Any of these will run you roughly $50 to $130 and will work for both simulator practice and flying real drones later. Most modern radios come with EdgeTX or OpenTX firmware, both of which connect to simulators without issue.
For the computer, you do not need a high-end gaming rig, but FPV simulators are surprisingly demanding on the GPU because the physics engine runs at high frame rates. A machine with a dedicated graphics card (GTX 1060 or better), 8 GB of RAM, and a quad-core processor will handle most simulators comfortably. Integrated graphics can struggle, especially with VelociDrone at high settings.
You will also want a decent monitor with low latency, or better yet, a way to wear your FPV goggles for practice. More on that in the goggles section below.
Optional but Worthwhile: FPV Goggles
Flying with FPV goggles in the simulator trains your brain for the actual first-person experience. Some pilots argue it is the single biggest factor in making simulator practice transfer to real flight. If you already own analog goggles like the Eachine EV800D or a digital set like DJI Goggles 2, connect them via HDMI from your computer. The immersion makes a real difference.
Why Posture and Ergonomics Matter
One thing almost no guide mentions is posture. Sit the same way every session. Hold the radio at the same height, with your elbows supported. Bad habits in the simulator become bad habits in real flight. I see pilots who slouch on the couch with the radio in their lap, then wonder why their thumbs behave differently when they stand up to fly for real. Treat simulator time like real flight time.
How to Connect Your Radio to an FPV Simulator
Connecting your radio is the step that trips up the most beginners, but it is straightforward once you know the process. Most modern radios connect via USB and show up as a standard game controller.
Step 1: Put Your Radio in USB Joystick Mode
On a Radiomaster or Jumper radio running EdgeTX, power on while holding the throttle stick down and to the left, or use the USB menu to select “Joystick” (also called “HID” on some radios). On older OpenTX radios, you may need to navigate to the USB menu after plugging in. This makes your radio appear to your computer as a generic gamepad.
Step 2: Plug In and Verify
Plug a USB-C or Micro-USB cable into the radio and your computer. On Windows, you should hear the device-connect sound and the radio should appear in “Game Controllers” under Settings. On macOS, it should appear in System Information under USB. If nothing happens, try a different cable. Many USB cables that come with radios are power-only and will not transmit data.
Step 3: Calibrate in the Simulator
Launch your simulator (Liftoff, VelociDrone, Uncrashed, or whichever you chose) and open the controller settings. Calibrate the sticks so all four channels (throttle, yaw, pitch, roll) hit 100 percent in every direction. Make sure the channels are mapped correctly. If your throttle is on the wrong stick or your yaw is reversed, fix it in the simulator settings before you fly.
Step 4: Match Your Rates and Expo
This is the secret most beginners skip. Set your simulator rates, expo, and throttle curve to match what you plan to fly in real life. If you are going to fly Betaflight with 700 degrees per second on pitch and 0.4 expo, put those numbers in the simulator too. Otherwise you build reflexes for one set of controls and then have to relearn everything on a real quad.
Common Connection Problems
If your radio will not connect on Windows, try a different USB port (avoid hubs) and reinstall the radio’s USB driver. On macOS, especially macOS Sonoma and later, you may need to grant Input Monitoring permission to the simulator in System Settings under Privacy and Security. Some EdgeTX versions have a known macOS bug where the radio disconnects every 30 seconds; updating to the latest EdgeTX nightly usually fixes it.
If your sticks feel jittery or drift in the simulator, recalibrate in EdgeTX first, then in the simulator. Dead zones in the simulator settings can mask small hardware issues, but ideally you fix the radio, not hide the problem.
Best FPV Simulators for Beginners in 2026
There is no single “best” FPV simulator because each one is built for a slightly different purpose. The right choice depends on whether you want realistic physics, structured training, multiplayer racing, or just a free way to start.
Liftoff: Best for Beginners
Liftoff is the simulator I recommend most often to brand-new pilots. It has structured challenges, a gentle learning curve, and decent physics that get better with each update. It runs on lower-end hardware than most competitors and includes tiny whoop models alongside 5-inch quads. Liftoff also features a track editor and an active multiplayer community.
VelociDrone: Best Physics Realism
Experienced pilots consistently name VelociDrone as the most realistic simulator on the market. The physics feel tight, the latency is low, and the quad responds like a real build. It is the go-to for racers who want their simulator practice to translate directly to race day. The downside is that it demands a more powerful GPU and the user interface is less beginner-friendly than Liftoff.
Uncrashed: Best Value
Uncrashed costs less than most competitors and runs surprisingly well on modest hardware. The physics are noticeably improved from launch, and the maps are genuinely beautiful. Many pilots on r/fpv call Uncrashed the best budget option. It does not have the depth of Liftoff’s training modes, but for free-flying practice it is excellent.
TRYP FPV: Best for Freestyle
TRYP FPV leans hard into freestyle flying with huge open maps, smooth physics, and a focus on flow-style flying. It is the simulator of choice for pilots who want to learn tricks and power loops rather than racing gates. The community is smaller than Liftoff’s but very active.
FPV.SkyDive: Best Free Option
If you want to test the waters without spending money, FPV.SkyDive is a free simulator available on Steam. It has surprisingly polished physics, a solid training mode, and a real multiplayer scene. Free is not a gimmick here. Many pilots log 20+ hours in SkyDive before buying anything else.
The Drone Racing League Simulator (DRL)
DRL Sim is built around racing, with official DRL tracks and a polished arcade-style presentation. It is great if your goal is racing, though the physics are slightly more forgiving than VelociDrone. DRL is available on console as well as PC, which makes it accessible to pilots without a gaming computer.
For most beginners, my recommendation is to start with the free FPV.SkyDive or pick up Liftoff on Steam. Both give you a structured path forward without overwhelming you with tuning options.
Top Practice Exercises for FPV Simulator Beginners
This is where simulator practice becomes real training. Do not jump into freestyle tricks on day one. Follow this progression and you will build skills that stick.
Exercise 1: Hovering (First 2-5 Hours)
Hover in place at a fixed altitude for as long as you can without drifting. This sounds boring, but it is the single most important skill in FPV. If you cannot hold a hover, you cannot do anything else. Start in “Angle mode” (self-leveling) if your simulator supports it, then switch to “Acro mode” (full manual rate mode) as soon as possible.
Acro mode is the real FPV experience. The quad does not auto-level. You are responsible for every correction. Once you can hold a 30-second hover in Acro without major drift, you have passed the first milestone.
Exercise 2: Forward Flight and Orientation (Hours 5-10)
Once hovering is reliable, practice flying forward at a steady altitude, doing wide figure-eight patterns. This teaches orientation: which way the nose is pointing, how yaw differs from roll, and how to coordinate turns. Most crashes in this phase come from pulling the wrong stick when the quad is facing you.
Exercise 3: Throttle Management and Altitude Holds (Hours 10-15)
Fly through a series of gates or markers at the same altitude. Do not touch the ceiling or the floor. This builds throttle precision, which is what separates pilots who fly smoothly from pilots who bounce up and down the field. Set a goal of 10 gates in a row without altitude errors.
Exercise 4: Tight Turns and Coordination (Hours 15-25)
Practice sharp 90-degree and 180-degree turns while maintaining speed. Combine yaw, pitch, and roll into one fluid motion. This is where the muscle memory for racing lines and freestyle carves starts to click.
Exercise 5: Racing Gates (Hours 25-40)
Load a race track in your simulator and run it repeatedly. Time yourself. Your goal is not to win, it is to finish cleanly. Crashing in a race usually means you went too fast for your skill. Slow down until you finish 10 laps without a single crash, then start pushing for speed.
Exercise 6: Basic Freestyle (Hours 40+)
Once racing lines feel comfortable, start experimenting with flips, rolls, power loops, and split-S turns. This is where FPV starts to feel like art. Save replays, watch them, and identify what looks clean versus what looks panicked.
Beginner Milestone Checklist
Before you fly a real FPV quad, you should be able to do all of the following in the simulator:
- Hover in Acro mode for 60 seconds with no major drift.
- Fly a controlled figure-eight without losing altitude.
- Complete a 10-gate race track cleanly at moderate speed.
- Recover from a sudden altitude loss or nose-drop without panicking.
- Fly toward yourself and back without pulling the wrong stick.
- Land softly in a designated spot at least 8 times out of 10.
If you cannot do all six, you are not ready for a real quad yet. Keep practicing. There is no penalty for an extra 10 hours in the simulator, and there is a real penalty for smashing your first real build into a fence.
How Long Should You Practice in an FPV Simulator
This is one of the most common questions on r/fpv, and the honest answer is “longer than you think.” The community consensus, and my own experience, lands at a minimum of 10 hours before your first real flight, with 30 to 50 hours being a much safer benchmark.
Raw hours are not the whole story. What matters is whether you can hit the milestone checklist above. I have seen pilots with 20 simulator hours who fly better than pilots with 60, because the 20-hour pilot practiced deliberately while the 60-hour pilot just crashed randomly and called it training.
Quality matters more than quantity. A focused 30-minute session where you concentrate on one skill beats a three-hour session where you zone out chasing gates. Set a goal for each session. Examples: “Today I will only work on figure-eights,” or “Today I will land softly 20 times in a row.”
Practice Schedule by Skill Level
Complete beginner (0-10 hours): focus on hovering and orientation. Two to three sessions per week, 30-45 minutes each.
Advanced beginner (10-25 hours): focus on throttle management, gates, and basic turns. Three to four sessions per week, 45-60 minutes each.
Pre-real-flight (25-50 hours): focus on racing lines, freestyle basics, and recovery from mistakes. Daily 30-minute sessions work better than long weekend marathons.
The reason frequent short sessions work better than occasional long ones is muscle memory. Your brain consolidates motor learning during sleep. Five 30-minute sessions across a week will beat one three-hour session every time.
Simulator to Real Flight Transition Tips
Here is the part most guides skip: simulator flying and real flying are not the same thing, and the transition is harder than most pilots expect. The simulator cannot replicate wind, weight, latency, or the psychological pressure of flying something that costs money.
The Psychology of Real Flight
The biggest jump from sim to real is anxiety. In the simulator, you fly aggressively because crashes are free. In real life, every maneuver carries the weight of “what if I break it.” This anxiety tightens your thumbs, slows your reactions, and makes you crash more, not less. I have watched excellent simulator pilots freeze up on their first real flight and do things they would never do in virtual practice.
The fix is to start small and cheap. Do not make your first real flight with a 5-inch racing quad. Fly a $40 tiny whoop indoors or in a grassy yard. Tiny whoops are nearly indestructible, they crash harmlessly, and they let you practice real stick inputs without the financial fear. Many experienced pilots recommend spending 5 to 10 hours on a real tiny whoop before stepping up to a 5-inch quad.
Physics Differences to Expect
Real quads feel heavier. Wind pushes them around. The camera has more latency than your monitor. The motors sound different, the battery sags, and the prop wash is real. Plan for these differences. On your first real flights, fly in calm weather, stay high enough to recover from mistakes, and avoid tight gaps until your thumbs relax.
Recommended Bridge: Tiny Whoops
Tiny whoops like the Mobula7, Meteor75, or any 65mm-85mm brushless whoop are the perfect bridge between simulator and 5-inch FPV. They handle like real FPV quads, they cost less than $150 fully built, and they bounce off walls without damage. Spend your first real flight hours on one of these and you will arrive at 5-inch flying with confidence instead of fear.
Common FPV Simulator Mistakes to Avoid
Practicing in the simulator the wrong way can build bad habits that take months to undo. Here are the mistakes I see most often.
Mistake 1: Using a Keyboard or Gamepad
If you practice with a keyboard or Xbox controller, you are not building FPV muscle memory. You are building keyboard muscle memory. Spend the $60 on a real radio before you spend a single hour in the simulator.
Mistake 2: Practicing Only in Angle Mode
Angle mode (self-leveling) feels easier, but real FPV is Acro mode. The sooner you switch to Acro, the sooner you start building the reflexes that actually matter. Most pilots should switch to Acro within the first 3-5 hours of practice.
Mistake 3: Skipping the Basics
If you cannot hold a hover, you have no business flying gates. The basics are not exciting, but every advanced skill is built on them. Spend real time on hovering, orientation, and throttle precision before chasing thrills.
Mistake 4: Bad Posture
Slouching on a couch builds slouchy reflexes. Sit upright, hold the radio at the same height every session, and use the same finger placement (pinch vs thumbs) that you plan to use in real flight. Consistency in posture is consistency in muscle memory.
Mistake 5: False Confidence
Simulator skills do not perfectly transfer. The biggest mistake I see is pilots with 50 simulator hours assuming they can fly a real 5-inch quad through a forest on day one. They cannot. Treat real flight as a new skill that builds on your simulator foundation, not as a continuation of it.
Mistake 6: Not Matching Simulator Settings to Real Setup
If your simulator rates, expo, and throttle curve do not match your real Betaflight configuration, you are training for the wrong quad. Match them. The first time you fly real, your thumbs should feel at home.
How to practice flying FPV?
The best way to practice flying FPV is to buy a real radio transmitter, connect it via USB to a computer running an FPV simulator like Liftoff or VelociDrone, and follow a structured practice progression. Start with hovering in Acro mode, move to figure-eights, then gates, then freestyle. Most experienced pilots recommend 10 to 50 hours of simulator time before your first real flight.
Is there an app to practice drone flying?
Yes. FPV.SkyDive is free on Steam and works well for desktop practice. For mobile, apps like DCL (Drone Champions League) are available on phones and tablets, but a real radio connected via USB OTG cable gives far better training than a touchscreen.
Can I use the DJI simulator to learn drone flying?
DJI offers the DJI Virtual Flight simulator designed specifically for DJI FPV systems like the DJI FPV and Avata. It is a solid option if you already own DJI gear, but it does not accurately simulate custom-built Betaflight quads. For most pilots training on a real radio, Liftoff or VelociDrone are better choices.
How long should I practice in an FPV simulator?
The community consensus is a minimum of 10 hours before your first real flight, with 30 to 50 hours being a much safer target. The real benchmark is the milestone checklist: if you can hover in Acro mode, fly figure-eights, complete a clean 10-gate run, and land softly 8 times out of 10, you are likely ready for a real tiny whoop.
Is IRL flying harder than simulator flying?
Yes. Real FPV flying adds wind, weight, battery sag, video latency, and the psychological pressure of crashing something that costs money. Most pilots fly worse in real life for the first several hours even after extensive simulator practice. Start with a cheap tiny whoop to bridge the gap between simulator and expensive 5-inch quads.
What FPV simulator is beginner friendly?
Liftoff is widely considered the most beginner-friendly FPV simulator thanks to its structured training mode, gentle difficulty curve, and lower hardware requirements. The free FPV.SkyDive is also a strong beginner choice if you want to test the waters without spending money. Both work with any USB radio transmitter.
Conclusion
Knowing how to practice FPV flying on a simulator before you crash is what separates pilots who progress quickly from pilots who quit after their first $200 repair bill. The formula is simple: get a real radio, pick a simulator with realistic physics (Liftoff or VelociDrone are my top picks for 2026), match your simulator settings to your real Betaflight setup, and follow the skill progression from hover to gates to freestyle.
Aim for 30 to 50 hours of focused simulator practice, work through the milestone checklist, and bridge the gap to real flight with an indestructible tiny whoop before you ever spin up a 5-inch quad. Treat the simulator as real training, not as a video game, and your real-world flying will thank you for it. See you in the air.