
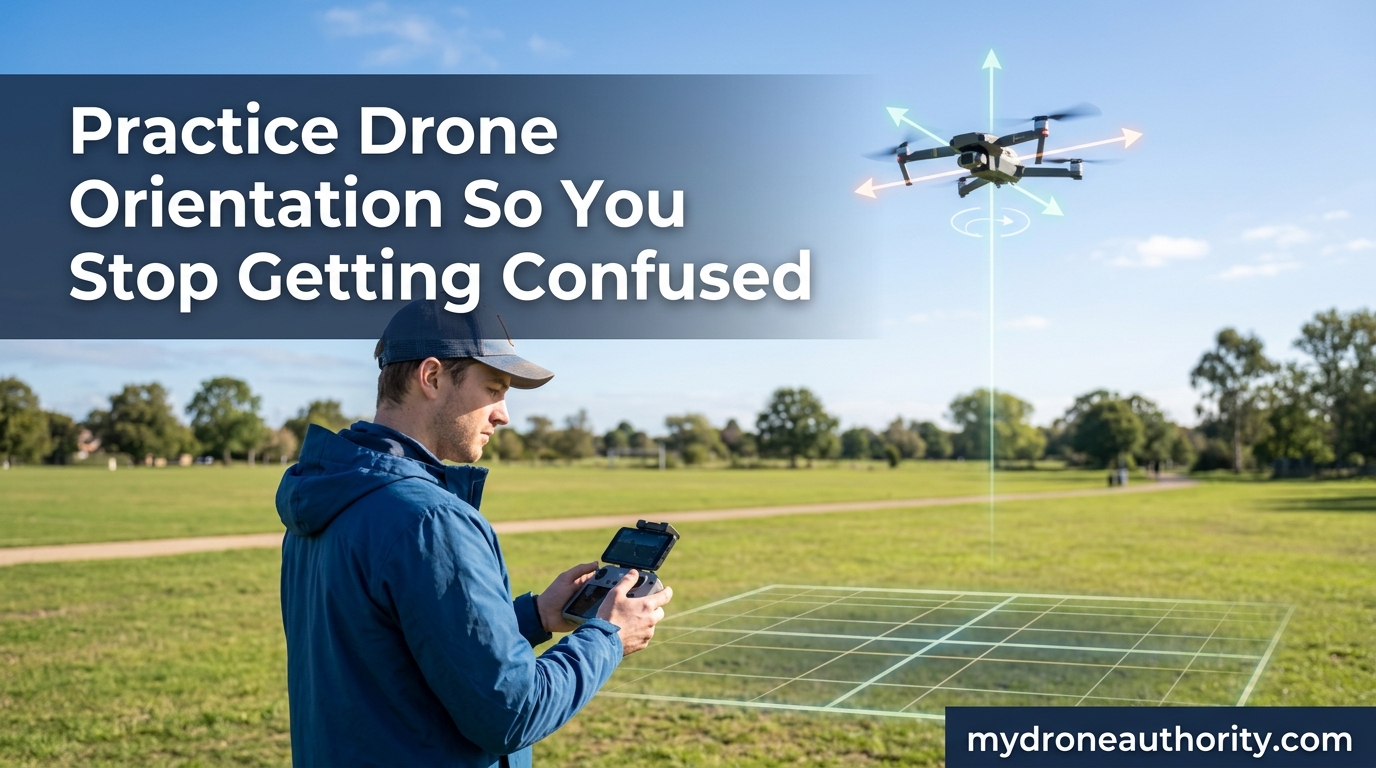
If you have ever watched your drone rotate to face you and suddenly felt like your controller was broken, you are not alone. That moment of panic, where every stick input seems to send the drone the wrong way, is the single most common frustration new pilots share on every drone forum. The good news is that drone orientation is a learned skill, not a talent, and there are proven practice techniques that make it click.
Drone orientation simply means knowing which way your drone is pointing relative to where you are standing. When the drone faces away from you, the controls feel natural. When it turns around and faces you, the same controls suddenly feel inverted because they are mapped to the drone’s perspective, not yours.
In this guide, I will walk you through the exact practice drills, mental frameworks, and visualization techniques that experienced pilots use to build bulletproof orientation awareness. You will learn the cockpit visualization method that forum pilots swear by, the five flight patterns that train your brain step by step, and the common mistakes that keep beginners stuck in confusion.
Whether you are crashing a cheap trainer quad in your living room or nervous about taking your first real drone beyond arm’s reach, these techniques will help you stop getting confused and start flying with confidence. Everything here is drawn from real pilots who have been through the same struggle and found their way to the other side.
Table of Contents
Why Drone Orientation Confuses Every Beginner
Drone orientation confusion has nothing to do with intelligence or coordination. It happens because of one simple design choice: your control sticks move the drone relative to where the drone is pointing, not relative to where you are standing.
When the drone faces away from you with its tail pointing back, pushing the right stick forward sends it forward from its perspective, which also looks like forward from yours. Everything feels intuitive. But the moment the drone yaws 180 degrees and faces you, pushing the right stick forward still sends the drone forward from its perspective, which now looks like it is coming straight at you. Your brain expects one thing, the drone does another, and a crash usually follows.
This is why beginners freeze up the instant their drone rotates. The control mapping that felt natural a second ago suddenly seems broken. Your instinct says pull back to bring the drone toward you, but pulling back actually sends it further away because the drone is now facing you.
Visual cues make the problem worse. At a distance, a quadcopter looks almost identical from all four sides, especially small toy drones without colored props or LED strips. Without a clear indicator of which way is front, your eyes cannot help your brain, and the confusion deepens. Many pilots only realize how reliant they were on visual cues when the drone gets far enough that those cues disappear.
The frustration is real, and experienced pilots remember it well. One pilot on the Phantom Pilots forum, Kai Mele, described his early practice sessions bluntly: lots of confusion, lots of crashes. He was practicing indoors with small camera-less quadcopters, the recommended starting point, and still struggled. That honesty matters because it confirms orientation confusion is a normal phase every pilot pushes through.
The emotional side of orientation confusion deserves attention too. Beginners often feel embarrassed, as if they are uniquely bad at flying. The opposite is true. Every pilot you admire went through weeks or months of the same confusion, and the only difference between them and someone who quit is that they kept practicing. Treat every crash as data, not failure, and you will progress faster than you expect.
The reason it eventually clicks is that your brain learns to stop mapping controls to your own body and starts mapping them to the drone’s facing direction instead. That shift does not happen by accident. It happens through specific practice drills and mental frameworks that retrain how you think about the controls. The rest of this guide walks through those drills in order.
Drone Orientation Starts With Control Basics: Roll, Pitch, Yaw, Throttle
Before you can practice orientation drills, you need a clear mental model of what each stick actually does. Most consumer drones use a Mode 2 controller, which is the standard layout worldwide. Once you understand the four basic movements, orientation practice becomes far easier.
The right stick controls roll and pitch. Push it left or right and the drone rolls side to side, which moves it laterally left or right from its own perspective. Push it forward or back and the drone pitches, tilting to move forward or backward from its own perspective. Notice the emphasis on the drone’s perspective, because that is the entire key to orientation.
The left stick controls yaw and throttle. Push it left or right and the drone yaws, rotating around its vertical axis to point in a new direction. Push it up or down and the throttle adjusts altitude, climbing or descending.
Here is the critical detail that causes all the confusion: roll and pitch are always relative to where the drone’s nose is pointing. If the drone is facing north and you push the right stick right, the drone moves east. If the drone then yaws to face south and you push the right stick right, the drone now moves west, because right from the drone’s new perspective is now the opposite direction.
Yaw and throttle, on the other hand, work the same no matter which way the drone is facing. Throttle always means up or down in real space, and yaw always rotates the drone on the spot. This is why beginners often learn throttle and yaw first, then struggle when they start using pitch and roll after the drone has turned.
The simple way to remember it: the right stick does what the drone would do if it were a person walking. Forward means walk forward in the direction you are facing, left means sidestep to your left. If you turn around and face the opposite way, forward and left now point the opposite direction in the real world.
One useful drill for cementing this model is to physically hold your drone in your hand with the motors off and walk through each stick input. Move the right stick forward while imagining you are the drone, and tilt the drone forward in your hand. Now yaw it 180 degrees and do the same thing. Notice how the same stick input now tilts the drone toward where you are standing. This thirty-second exercise can replace hours of confusion with a clear mental picture.
If your drone supports a simulator mode or you have a desktop flight simulator, spend time learning the controls there before flying for real. A simulator lets you make every mistake in the book with zero cost, and the muscle memory transfers directly to your real drone.
The Cockpit Visualization Technique (The Tip Pilots Swear By)
Of all the orientation tips shared across drone forums, one comes up again and again as the moment everything clicked. It is called the cockpit visualization technique, and it was popularized by a Phantom Pilots forum user named Matchlock.
The technique is simple. Instead of thinking of yourself as a pilot standing on the ground watching a drone fly around, you picture yourself sitting inside the cockpit of the drone. You imagine looking out through the drone’s nose, seeing the world from its perspective, and steering as if you were actually aboard.
When you adopt that mental viewpoint, the controls suddenly make intuitive sense. If you imagine sitting in the drone facing forward, then pushing the right stick forward obviously sends you forward. Pushing it left obviously sends you left. The drone’s perspective becomes your perspective, and the control mapping stops feeling inverted because you are no longer thinking from the ground.
Matchlock’s exact advice was to picture yourself inside the cockpit of the bird you are flying, so that stick inputs become a natural decision about which direction to push. Pilots in that thread called it the single most useful tip they had ever received for orientation practice. Several said they had struggled for months until they tried it, and within a single flight everything made sense.
To build this habit, try the following drill before every flight. Close your eyes for ten seconds and visualize sitting inside the drone looking out through its front. Imagine the ground below you, the sky ahead, and the direction your drone is pointing. Hold that mental image as you open your eyes and start flying. Every time you rotate the drone with yaw, briefly close your eyes again and re-visualize the new facing direction.
This sounds almost too simple to work, but the reason it is so effective is that it forces your brain to adopt the drone’s reference frame instead of your own. With a few flights of practice, the visualization becomes automatic and you stop needing to consciously think about it. The drone’s nose becomes your nose, and the controls start to feel as natural as walking.
A useful variation is to add physical motion to the visualization. As you fly, gently turn your head and shoulders in the direction the drone is facing. If the drone yaws right, rotate your body slightly right. This physical reinforcement helps lock the mental image in place and speeds up the learning process. Some pilots even report that after a few sessions of this, they start to feel a phantom sensation of being inside the drone during flight.
The cockpit visualization technique works for both line-of-sight flying and FPV flying, but it is especially powerful for line-of-sight because that is where the perspective mismatch is greatest. In FPV, you literally see from the drone’s perspective through goggles, so the mapping is already correct. In line-of-sight, you are watching from the ground, and your brain needs help adopting the right reference frame.
Nose-In vs Nose-Out Flying: Where Most Confusion Happens
To practice drone orientation effectively, you need to understand the two fundamental positions: nose-out and nose-in. These two terms describe which way the drone is facing relative to you, and they are the basis for every orientation drill you will ever do.
Nose-out flying means the drone’s tail is pointing toward you and its nose is pointing away. This is the easy position. Every control input behaves the way your brain expects because the drone’s forward is also your forward. Push the right stick forward and the drone moves away from you. Push it right and the drone moves to your right. Most beginners spend their first flights entirely in nose-out mode without even realizing it.
Nose-in flying means the drone has rotated 180 degrees and its nose is now pointing toward you. This is where confusion hits hard. Now the drone’s forward is your backward, and the drone’s right is your left. Every pitch and roll input feels inverted. This is the exact moment most beginners panic and either freeze or crash.
A memorable analogy for this comes from forum user Chasbro, who calls it the good dog / bad dog method. When the drone is facing away from you, it is a good dog. You use the right stick to tell it where to go, and it listens. When the drone is facing you, it is a bad dog. You use the stick and tell it to get away from there, which means you push the stick in the opposite direction from what feels natural.
The good dog / bad dog framing works because it gives your brain a fast mental shortcut. Instead of recalculating the control mapping every time the drone rotates, you simply check whether it is a good dog or a bad dog and adjust accordingly. With practice, this check becomes instant and unconscious.
The problem is that most beginners avoid nose-in flying because it feels uncomfortable. They keep the drone facing away the entire flight, which feels safe but never builds the skill. If you want to stop getting confused, you have to deliberately practice nose-in flying. It will feel awkward at first, but it is the only way to train your brain to handle the inverted controls.
A simple way to start nose-in practice is to land the drone, walk around to the other side, and take off again with it facing you. This removes the cognitive load of rotating the drone mid-flight and lets you focus purely on the inverted control feel. Once nose-in hovering feels comfortable from this setup, progress to yawing the drone in flight and recovering.
Color coding your drone also helps. Most drones have colored propellers or lights on the front and back, typically with red on one side and green or white on the other. Learn your drone’s color scheme cold, so you can identify which way it is facing at a glance. If your drone lacks color indicators, add small strips of colored tape to the front arms. This tiny change can dramatically reduce orientation confusion in the air.
How to Practice Drone Orientation: The 5 Essential Flight Patterns
The fastest way to build orientation awareness is to fly specific patterns that progressively challenge your brain. Each pattern adds a new layer of difficulty, and together they form a complete practice progression. Forum user WetDog recommended exactly this approach: practice close-in figure-8s, H patterns, and threading through objects, and after some time you will start to feel much more comfortable.
Work through these patterns in order, and do not move on to the next one until the current pattern feels smooth and predictable. Trying to skip ahead leads to crashes and frustration. Each drill builds on the last, and the cumulative effect is what creates bulletproof orientation awareness.
Pattern 1: The Box (Square Pattern, Nose-Out)
This is your starting drill and it builds the foundation for everything else. With the drone facing away from you, fly a square pattern in front of you.
Push the right stick forward to send the drone away from you about 20 feet. Stop and hover. Push the right stick right to send the drone 20 feet to your right. Stop and hover. Pull the right stick back to bring the drone 20 feet toward you. Stop and hover. Push the right stick left to bring the drone 20 feet back to its starting position. You have just flown a box.
Repeat this pattern until it feels smooth and predictable. The goal is not speed, it is precision. Stop cleanly at each corner and hover for two seconds before making the next move. This drill teaches you how pitch and roll work when the drone is nose-out, and it builds the muscle memory you need before adding rotation.
Once the clockwise box feels easy, fly it counterclockwise. The mirrored motion engages different control inputs and prevents you from developing a one-sided habit. Spend at least two full practice sessions on the box before moving to the next pattern.
Pattern 2: The 180 (Yaw Turn and Return)
Once the box feels easy, add a single yaw rotation to start training nose-in awareness.
Fly the drone forward about 30 feet, stop and hover, then slowly push the left stick left or right to yaw the drone 180 degrees until its nose is pointing back toward you. You are now in nose-in position. Take a breath and consciously engage the cockpit visualization technique: imagine sitting inside the drone facing back toward yourself on the ground.
Now fly the drone back toward yourself. Because the drone is facing you, pulling the right stick back is actually the correct input to bring it toward you, since that is forward from the drone’s perspective. This feels wrong at first, and that is exactly the point. Repeat this out-and-back pattern at least ten times per session.
Vary the yaw direction each time. Sometimes rotate left, sometimes rotate right. This trains both sides of the maneuver and prevents the common problem of being comfortable rotating one way but panicked rotating the other.
Pattern 3: Box with Yaw (Rotating at Each Corner)
This pattern combines the box with rotation and is where orientation training gets serious.
Fly forward 20 feet and stop. Instead of rolling right to the next corner, yaw the drone 90 degrees to the right so its nose now points along the next side of the box. Fly forward 20 feet in the new direction and stop. Yaw right 90 degrees again. Repeat until you have completed the full box, always flying forward in the direction the nose is pointing.
This drill forces your brain to constantly recalculate the control mapping as the drone rotates through four different facing directions. It is challenging and you will make mistakes, but it is one of the single best exercises for building true orientation awareness.
The key to this drill is pausing at each corner long enough to re-establish your cockpit visualization. Do not rush. Hover for a full two seconds at each stop, picture yourself inside the drone with its new facing direction, then make the next move. The pause is where the learning happens, not the movement itself.
Pattern 4: The Circle (Continuous Curved Flight)
The circle pattern removes the stop-and-hover pauses and forces you to manage two stick inputs at once.
With the drone facing away from you, gently combine forward pitch with a slight roll to trace a circle in the sky. Start large, maybe 30 feet across, and keep the drone moving smoothly through the curve. As you get comfortable, shrink the circle and increase your speed slightly.
This drill trains you to blend pitch and roll smoothly, and it builds the feel for how the drone responds to combined inputs. Once you can fly a clean circle nose-out, try flying a circle while the drone faces the center of the circle, which means it is always in nose-in position relative to you.
Circles also teach you to manage yaw corrections on the fly. As the drone traces the curve, small wind gusts or pilot error will push it off the ideal path, and you will need to make continuous micro-adjustments. This is the bridge between static drills and real flying.
Pattern 5: The Figure-8 (Advanced Crossover)
The figure-8 is the gold standard orientation drill and the one most experienced pilots still practice regularly.
Imagine a large figure-8 laid sideways in front of you, with you standing at the center crossover point. Fly the drone through the figure-8 path, which means it will constantly rotate between nose-out and nose-in positions as it traces each loop. The drone is nose-out on the far side of each loop and nose-in on the near side, with the crossover point requiring a smooth yaw transition.
This drill combines everything: pitch, roll, yaw, throttle management, and constant orientation recalculation. It will feel impossible the first few attempts, and that is normal. Start large and slow, and prioritize keeping the drone under control over tracing a perfect shape. Over weeks of practice, the figure-8 becomes second nature and you will know your orientation training has paid off.
Once you can fly a figure-8 smoothly, try flying it in the opposite direction. Then try tightening the loops and increasing speed. The figure-8 is a drill you can return to for years, and even professional pilots use it as a warmup before serious flights.
Mental Frameworks That Lock In Orientation Awareness
Beyond the specific flight patterns, experienced pilots rely on a handful of mental principles that make orientation second nature. These frameworks reduce the cognitive load of flying and give you faster reaction time when something goes wrong.
Altitude Is Your Friend
One of the most repeated pieces of advice on drone forums is that height buys you time to think. When you fly low, you have seconds to react before the drone hits something. When you fly at a comfortable altitude of 50 to 100 feet, a moment of disorientation becomes a non-event because you have room to recover.
This is especially important when you are pushing yourself to try new orientation drills. Fly higher than feels necessary at first. The extra altitude removes the pressure of imminent crashes and lets your brain focus on the orientation skill you are actually trying to build.
There is a safety balance to strike here. The FAA limits recreational drone flights to 400 feet above ground level, and the 1:1 rule of thumb suggests maintaining at least one foot of altitude for every foot of horizontal distance from yourself. Both rules exist for good reason, and they give you a useful framework for choosing a practice altitude.
Stand Downwind in ATTI Mode
This is an advanced tip from forum user Dronemaster that applies once you start practicing in ATTI mode, where GPS positioning is disabled and the drone drifts with the wind.
The principle is simple: stand downwind of where you are flying, so that when the drone drifts, it drifts toward you rather than away from you. If you fly the drone into the wind first, then as it drifts it will come nearer to you instead of flying off into the distance. This gives you a built-in safety margin when you are still building orientation skills in a more challenging flight mode.
Note the wind direction before every flight by watching trees, grass, or tossing a handful of grass into the air. Position yourself so the wind is at your back when you face your flying area. This small habit becomes automatic and gives you a free safety margin on every ATTI session.
Always Watch the Drone, Not the Screen
It is tempting to stare at your phone or controller screen, especially when your drone has a camera. But every experienced pilot agrees this is one of the fastest ways to lose orientation.
The screen tells you what the camera sees, not which way the drone is facing from your perspective. You can be perfectly oriented on the screen while having no idea where the drone actually is in the sky. Build the habit of keeping your eyes on the drone itself, glancing at the screen only briefly for framing or telemetry. This is the only way to develop real orientation awareness.
If you find yourself constantly drawn to the screen, try flying with the screen off or covered for the first few minutes of each session. This forces you to rely on visual line of sight and accelerates your orientation skill development dramatically.
GPS Helps But Should Not Become a Crutch
Modern drones hold their position automatically with GPS, which makes flying feel easy and stable. The danger is that GPS becomes a crutch that masks your lack of manual orientation skill. When GPS signal drops out, the drone switches to ATTI mode and suddenly drifts with the wind, and pilots who never built manual skills panic.
If you want true orientation mastery, practice in ATTI mode once you are comfortable in GPS mode. The drone will move differently, and you will have to actively manage its position, but this is the only way to build the skills that hold up when technology fails.
Many intermediate pilots never make this transition and pay for it the first time they lose GPS in a real flight. A sudden switch to ATTI mode in wind is one of the most common causes of lost drones, and the pilots who handle it well are the ones who practiced it on purpose.
Practice Tools: Simulators, Apps, and Trainer Quads
You do not need to risk your main drone to practice orientation. In fact, the best practice often happens with tools that carry zero crash risk, which lets you repeat drills far more often and learn faster.
Flight Simulators
Drone flight simulators are the single best tool for building orientation skills without consequences. A simulator lets you crash a hundred times in a single session, and each crash teaches you something without costing a dollar in repairs.
Popular options include Liftoff, VelociDrone, and the DRL Simulator. All three support FPV-style flying with a controller connected to your computer, and all three force you to manage orientation from the drone’s perspective. Even if you fly line-of-sight rather than FPV, simulator practice builds the control muscle memory that translates directly to real flying.
Spend at least ten hours in a simulator before you fly your real drone for the first time. Then keep using it between real flights to drill patterns and push your limits safely. Many experienced pilots still warm up in a simulator before every serious flying session.
Trainer Quadcopters
A cheap trainer quad is the bridge between simulator practice and real flying. These small, lightweight drones cost under fifty dollars and are designed to survive crashes. They also lack GPS stabilization, which means you have to actively fly them the entire time.
This is exactly what makes them valuable for orientation practice. Without GPS holding position for you, every input matters, and you build real manual skill quickly. Fly a trainer quad indoors in a large open room, where wind and obstacles are minimal, and drill the five flight patterns repeatedly.
Expect crashes. Expect frustration. This is the same path every experienced pilot walked, and it is the fastest way to build muscle memory that sticks. A trainer quad that survives a hundred crashes will teach you more about orientation than a thousand dollar drone that you are too afraid to push.
Mobile Apps for Drone Practice
There are several mobile apps designed to help pilots practice drone flying on their phones or tablets. These range from simplified flight simulators to orientation-specific trainers that teach control mapping through games.
Apps are not a replacement for real flying or a full simulator, but they are useful for filling spare moments with productive practice. If you have ten minutes on a commute or in a waiting room, an app can reinforce the mental model of stick inputs and drone response.
Look for apps that specifically focus on orientation drills rather than full flight simulation. The best ones present you with a drone’s-eye view and ask you to choose the correct stick input for a given movement, which is exactly the mental skill you are trying to build.
Common Mistakes That Keep You Disoriented
Most beginners who struggle with drone orientation are making one or two preventable mistakes. Recognizing these traps is often the fastest way to break through a plateau.
The first mistake is watching the screen instead of the drone. As covered above, the screen does not show you which way the drone is facing from your perspective. If you fly by screen, you will never build real orientation awareness, and the moment you look up you will be lost.
The second mistake is flying too low and too far too quickly. Low altitude removes your recovery time, and long distance makes the drone hard to see clearly. Both amplify confusion. Stay at 50 to 100 feet and within 100 feet of horizontal distance until orientation feels natural.
The third mistake is skipping nose-in practice entirely. It feels uncomfortable, so beginners avoid it. But avoiding it means the skill never develops, and the drone’s first unplanned rotation becomes a crash. Force yourself to practice nose-in flying from your very first session, even if only for a few minutes.
The fourth mistake is over-relying on headless mode or GPS. Headless mode makes the controller always map to the pilot’s perspective regardless of which way the drone is facing, which sounds helpful but completely prevents you from learning real orientation. GPS mode holds position automatically, which masks weak manual flying. Both have their place, but neither teaches orientation.
The fifth mistake is not practicing often enough. Orientation is a muscle memory skill, and muscle memory requires frequent repetition. One long practice session per month is far less effective than ten short sessions spread across the same period. Aim for at least three short practice sessions per week, even if each is only fifteen minutes.
The sixth mistake is flying in challenging conditions too early. Wind, low light, and unfamiliar locations all add cognitive load that makes orientation harder. Start with calm mornings in a wide open field you know well, and only gradually introduce more challenging conditions as your skills solidify.
How to avoid spatial disorientation when flying?
Avoid spatial disorientation by using the cockpit visualization technique: picture yourself sitting inside the drone looking out through its nose, so your brain adopts the drone’s reference frame instead of your own. Always keep your eyes on the drone rather than the screen, fly at comfortable altitude so you have time to recover, and practice the five core flight patterns regularly to build muscle memory.
What is the 1:1 rule for drones?
The 1:1 rule for drones states that for every foot of horizontal distance you fly from yourself, you should maintain at least one foot of altitude. For example, if your drone is 100 feet away horizontally, it should be at least 100 feet high. This keeps the drone within visual line of sight, improves visibility, and reduces the risk of collisions with obstacles or people.
Is there an app to practice drone flying?
Yes, there are several apps for practicing drone flying. Popular options include Liftoff, VelociDrone, and the DRL Simulator for desktop, and various mobile apps that teach drone control basics through simplified flight simulations. These tools let you build muscle memory and practice orientation drills without risking a real drone.
What is the 400 foot rule for drones?
The 400 foot rule is an FAA regulation that limits recreational and most commercial drone flights to a maximum altitude of 400 feet above ground level. This altitude ceiling exists to keep drones safely separated from manned aircraft, which generally fly above that height. Flying above 400 feet without authorization violates FAA rules.
What is the orientation of a drone?
Drone orientation refers to which direction the drone’s nose is pointing relative to you as the pilot. The drone’s orientation determines how the control sticks affect its movement, because pitch and roll inputs are always relative to the drone’s facing direction. Knowing your drone’s orientation at all times is the core skill of safe line-of-sight flying.
How hard is it to pass the drone test?
The FAA Part 107 drone test, also called the Remote Pilot Knowledge Test, is moderately challenging but very passable with preparation. The exam covers regulations, airspace classification, weather, loading, and operations. Most pilots who study for 15 to 20 hours using a structured prep course pass on the first attempt. It is a multiple-choice test with 60 questions and a passing score of 70 percent.
Stop Getting Confused: Your Drone Orientation Practice Plan
If you take only a few ideas from this guide, let them be these. First, use the cockpit visualization technique every time you fly. Picture yourself inside the drone, looking out through its nose, and the controls will start to feel natural from the drone’s perspective.
Second, work through the five flight patterns in order: the box, the 180, the box with yaw, the circle, and the figure-8. Each one adds a layer of difficulty, and together they build complete orientation awareness.
Third, practice often. Three short sessions a week will beat one long session every time, because drone orientation is a muscle memory skill and muscle memory needs repetition.
Fourth, use every tool at your disposal. Simulators, trainer quads, and apps all accelerate your learning by letting you practice without consequence. The more repetitions you log, the faster the skill sticks.
Learning how to practice drone orientation so you stop getting confused takes patience, but the moment it clicks is one of the most rewarding milestones in flying. Every pilot who now flies confidently started exactly where you are. Keep showing up, keep visualizing, keep drilling the patterns, and the confusion will give way to instinct.