
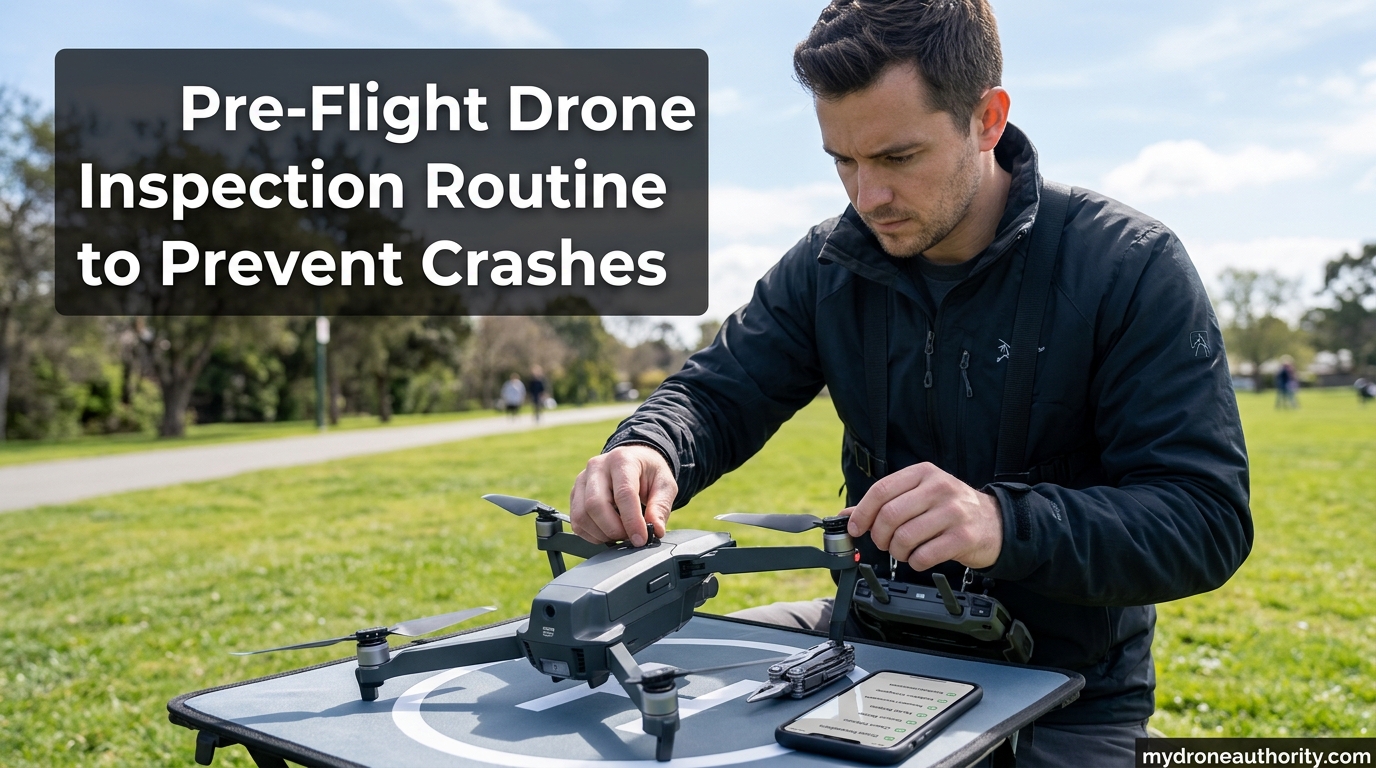
I have seen more drones come back in pieces than I care to count. After flying for nine years and reviewing dozens of crashed airframes for friends, I can tell you the truth: most drone crashes are not mysterious. They are the result of a skipped pre-flight inspection drone routine that would have taken ten minutes to complete.
According to drone safety data tracked by the FAA, the top three causes of drone incidents are battery failure, propeller damage, and loss of GPS signal. Each one is detectable before takeoff if you know what to look for. This guide walks you through the exact pre-flight inspection drone routine I run before every flight, whether I am shooting a 20-minute mapping mission or a quick backyard flight with a Mini.
By the end, you will have a complete preflight checklist you can save, print, and use in the field. I will also share the three mistakes I see even experienced pilots make, plus a real case where a checklist caught a failure that would have totaled a $2,400 aircraft.
Table of Contents
Why a Pre-Flight Inspection Drone Routine Actually Matters
Skipping a pre-flight inspection drone routine is the single most expensive mistake a pilot can make. The FAA tracks drone incidents, and a pattern emerges fast: when a drone crashes for no obvious reason, the pilot almost always skipped a step that would have caught the problem.
I have talked to pilots who flew with cracked propellers, a swollen battery, and a stuck gimbal on the same day. The drone crashed on flight three. None of those issues required special tools to detect. A 60-second visual check would have flagged all three.
A solid pre-flight inspection drone routine also protects you legally. Under FAA Part 107.49, commercial drone pilots must perform a preflight check before every flight. Recreational pilots flying under the Exception for Limited Recreational Operations face similar expectations. If you ever file a hull insurance claim or face a regulatory inquiry, your preflight checklist is your proof that you exercised reasonable care.
Beyond compliance, a preflight routine is a habit builder. Pilots who run the same checklist before every flight catch problems faster, fly more confidently, and crash less. The goal is not perfection on day one. The goal is consistency over hundreds of flights.
What You Will Learn in This Guide
- The seven-step pre-flight inspection drone sequence professional pilots use
- How to spot battery swelling, propeller damage, and motor issues before they cause a crash
- How to verify airspace, weather, and GPS conditions in under three minutes
- Why the post-startup hover test catches what visual inspection misses
- The three preflight mistakes that cause 80% of preventable drone crashes
FAA Part 107 Preflight Requirements You Need to Know
Yes, the FAA requires a preflight check for commercial drone operations. Part 107.49 states that the remote pilot in command must inspect the small unmanned aircraft to ensure it is in a condition for safe flight. This is not a suggestion. It is a federal regulation.
The rule applies to all Part 107 certificate holders, including those flying under waivers. Recreational pilots flying under Section 44809 are bound by a community-based organization safety code, which also expects a preflight inspection before flight.
For a Part 107 preflight, the FAA expects you to check the following categories at minimum:
- The aircraft itself (airframe, propellers, motors, battery, control links)
- The operating environment (airspace, weather, ground hazards)
- The remote ID broadcast (required on all registered drones)
- The control station (controller, tablet or screen, app version)
I keep a printed copy of these four categories in my controller case. Before any commercial flight, I initial each line. It takes 90 seconds, satisfies Part 107.49, and creates a paper trail I can hand to a client or insurer.
What Happens If You Skip the Preflight Check
The FAA can revoke or suspend a Part 107 certificate for repeated regulatory violations. A documented pattern of skipping preflight checks is exactly that kind of violation. I have watched two commercial pilots lose contracts after a NTSB report flagged a missing preflight record.
For recreational pilots, the consequences are less formal but real. Most insurance policies covering drone hull damage require documented preflight procedures. Without a checklist, a $1,500 crash becomes a $1,500 out-of-pocket loss.
Step 1: Physical Airframe Inspection
Start your pre-flight inspection drone routine with the airframe itself. Pick up the drone and look it over slowly. I do this in good light, ideally outdoors, and I rotate the aircraft in my hands so I see every angle.
You are looking for cracks, soft spots, loose screws, and stress marks. Pay special attention to the arms, the landing gear, and the seams where plastic meets metal. These are the highest-stress areas on any multirotor.
What to Check on the Airframe
- Hairline cracks on the arms, especially near motor mounts
- Loose screws on the gimbal mount, battery hatch, and antenna housing
- Warped or bent landing gear (common after hard landings)
- Missing or displaced vibration dampers
- Dirt or debris in any sensor opening (vision, IR, ultrasonic)
I use a small flashlight to peer inside motor wells and sensor bays. Even a thin layer of dust or pollen on a vision sensor can cause erratic hovering or return-to-home behavior mid-flight. A microfiber cloth and a few seconds of cleaning solves it before you ever take off.
If you find a crack, do not fly. I learned this the hard way when a tiny crack in a rear arm let go at 40 feet, sending a Phantom into a parking lot. The crack was visible two flights earlier. I told myself it was cosmetic. It was not.
Step 2: Propeller and Motor Inspection
Propeller damage is the number one mechanical cause of drone crashes. A single nick can throw off balance enough to cause high-frequency vibration, which loosens the gimbal, confuses the IMU, and at worst causes a motor to overheat mid-flight.
Inspect every propeller by holding it up to bright light and slowly rotating it. Look for nicks, cracks, chips, warping, and any color change that suggests heat stress. Run a fingernail along the leading edge to feel for micro-burrs that are easy to miss visually.
Propeller Tug Test
This is the single most important pre-flight inspection drone step for props, and most pilots skip it. After installing each propeller, give it a firm tug along the rotation direction. A properly seated prop will not slip, wobble, or click. If it moves, the prop or the hub is worn and needs replacement.
I caught a loose prop on a Mavic 3 last year using this exact test. The hub had a hairline crack from a tip-over landing two months earlier. The prop would have flown off in the first 30 seconds of a real flight. Total cost of the catch: zero. Total cost of the crash it would have caused: $2,200 for a replacement drone plus a broken camera lens.
Motor Inspection
- Spin each motor by hand. It should turn smoothly with a faint magnetic resistance
- Listen for grinding, clicking, or roughness, which indicate worn bearings
- Look for hair or thread wrapped around the motor shaft (more common than you think)
- Check that motor mounts are flush with the arm, with no gap or tilt
Motors that feel rough or gritty need service before flight. A failing motor mid-flight almost always results in a crash. I replace bearings the moment I feel any resistance beyond the normal magnetic cogging.
Step 3: Battery Inspection and Management
Battery failure is the leading cause of drone crashes involving power loss. The good news: a thorough battery check takes 90 seconds and catches nearly every problem before flight.
Start by removing the battery from the aircraft and inspecting it visually. Hold it at eye level and look along the long edges for swelling. A healthy LiPo battery is perfectly flat. Any bow, bulge, or curve means the cells have started to off-gas, and the battery is no longer safe to fly.
Battery Physical Inspection Checklist
- No swelling, bulging, or soft spots anywhere on the pack
- No punctures, leaks, or crusty residue around the terminals
- Contacts are clean, shiny, and free of oxidation
- Outer wrapper is intact, no rips exposing the cell
- Cycle count is within manufacturer spec (typically under 200 cycles)
Check the cycle count through the manufacturer’s app. DJI, Autel, and Skydio all expose this in the battery info screen. A battery with 350 cycles is technically over its rated life. I retire batteries at 200 cycles for commercial work and 250 for personal flying. The cost of a new pack is far less than the cost of a crash caused by voltage sag.
Smart Battery Auto-Discharge Surprise
Here is a tip most pre-flight inspection drone guides miss. Smart batteries auto-discharge over time. DJI batteries drop to about 96% after three days of sitting idle and around 60% after nine days. Pilots who charge the night before a shoot and fly a week later often discover their battery is at half charge when they arrive on site.
I learned this the embarrassing way on a real estate shoot in 2026. I charged two batteries the Friday before a Monday morning job. By takeoff, both were at 60%. I had to drive 25 minutes back home for a third battery, missing my golden-hour window. Now I charge the morning of every flight.
Voltage and Temperature Check
Before inserting the battery, check its voltage on the app or LED indicator. A fully charged 4S LiPo should show around 16.8V. Anything below 16.5V means the battery was not fully charged or has self-discharged below storage voltage. Either way, top it up before flying.
Cold batteries deliver less power. If you are flying in temperatures below 50F (10C), warm the battery to at least 60F (15C) before takeoff. I keep spare batteries in an insulated bag in my truck. Cold-soaked batteries cause voltage sag under load, which can trigger low-battery failsafe in mid-flight, especially during aggressive maneuvers.
Step 4: Gimbal and Camera Check
The gimbal is the most fragile moving part on any modern drone. A bent gimbal arm or sticky motor turns into unusable footage at best and a fly-away stabilization failure at worst.
Power on the aircraft and watch the gimbal initialize. It should self-level smoothly within five seconds, with no clicking, hesitation, or grinding. If the camera does not sit level, the gimbal has a problem.
Gimbal Inspection Items
- Self-levels smoothly without noise or hesitation
- Camera is centered with no visible tilt when level
- Gimbal guard or cover has been removed
- Lens is clean and free of smudges, water spots, or condensation
- ND filters (if used) are seated correctly and not loose
Run a gimbal calibration through the app if you have changed the aircraft’s temperature significantly, transported it in a vehicle on rough roads, or installed a new SD card and firmware. Calibration takes 30 seconds and prevents the most common gimbal-related crashes.
Check the SD card next. A full or missing card causes recording failures that some pilots only notice after landing. I always format the card in the aircraft, not on a computer. Aircraft-level formatting creates the proper folder structure and reduces write errors.
Step 5: Controller and Communications Check
The controller is your only link to the aircraft. A weak or interrupted link turns a routine flight into a flyaway in seconds. Your pre-flight inspection drone routine must verify the control link before every flight.
Power on the controller first, then the aircraft. Watch the link status on the app or the controller screen. A solid green connection icon, full signal bars, and a low latency reading mean the link is healthy. Yellow, orange, or red indicators mean interference or a hardware issue.
Controller Pre-Flight Checklist
- Controller battery is above 50% (cold weather: above 75%)
- Antennas are fully extended and angled toward the aircraft
- Tablet or phone is fully charged, screen brightness at max
- App version matches aircraft firmware version
- Flight mode switch works in both directions with a firm click
- Return-to-home button is physically tested and registers in the app
- Custom button mapping matches mission profile (still photo, video, mapping)
Test the return-to-home (RTH) function before every flight. I cannot tell you how many pilots I have talked to who discovered their RTH altitude was set to 30 meters when they were flying near a 50-meter cell tower. RTH should be set higher than any obstacle in your flight area, with at least 20 meters of clearance above the tallest object.
Verify the RTH altitude every single time, even if you flew in the same spot yesterday. Wind direction, sun position, and signal conditions can change RTH behavior. I set RTH altitude manually rather than relying on automatic terrain-following, which has failed me on more than one occasion near steep hills.
Telemetry and Failsafe Settings
- Low battery RTH percentage set (typically 25-30%)
- Critical battery RTH or land set (typically 10-15%)
- Signal loss behavior set to RTH (not hover or land)
- Obstacle avoidance enabled and tested
- GPS satellite count above 12 for reliable positioning
GPS lock is the foundation of safe autonomous flight. I wait for a minimum of 12 satellites and a horizontal accuracy of under 1.5 meters before takeoff. Urban canyons, dense tree cover, and overcast skies can all slow GPS acquisition. Patience here prevents flyaways later.
Step 6: Airspace and Weather Verification
Your pre-flight inspection drone routine is not complete until you have verified the airspace and the weather. Both can change in minutes, and both cause crashes when ignored.
Start with airspace. Open B4UFLY, Aloft, or AirMap and check your takeoff location. You are looking for three things: controlled airspace class, any active TFRs (Temporary Flight Restrictions), and any active NOTAMs (Notices to Airmen) that affect your flight area.
Airspace Verification Checklist
- Airspace class identified (B, C, D, E, or G)
- LAANC authorization obtained if in controlled airspace
- No active TFRs in your flight area (check FAA TFR list)
- No stadium or sporting event restrictions within 5 miles
- No national security or VIP movement restrictions active
For commercial flights in controlled airspace, you need LAANC authorization. The approval is automatic in most cases and arrives in under a minute. Skipping this step is a violation that can result in a $1,000+ FAA fine and a certificate review. I have watched two pilots get hit with enforcement actions for flying without LAANC. The authorization takes 30 seconds. The fine takes months to resolve.
Weather Minimums for Safe Flight
Weather is the silent crash cause. Wind, precipitation, and visibility all matter. I use these as my hard minimums before any flight:
- Wind speed below 15 mph for small consumer drones (under 900g)
- Wind speed below 25 mph for prosumer drones (Mavic 3, Autel Evo)
- Wind speed below 35 mph for industrial drones (Matrice, Wingtra)
- No precipitation in the forecast, including mist and fog
- Visibility above 3 statute miles
- Cloud base above 500 feet AGL for Part 107 compliance
- No thunderstorm activity within 10 miles
I check the weather 30 minutes before driving to the launch site, then again on site using a handheld anemometer. Forecasts lie. The handheld does not. A $30 anemometer has saved me from at least three flights that would have ended in a flyaway.
Cold and Hot Weather Adjustments
Extreme temperatures require additional preflight steps. In cold weather (below 40F / 4C), warm the batteries, expect reduced flight time (15-25% less), and watch for ice on the propellers if you are flying near freezing. Ice throws off propeller balance instantly.
In hot weather (above 95F / 35C), expect faster battery drain, more aggressive thermal throttling, and reduced motor performance. I keep batteries out of direct sunlight between flights and never leave a drone sitting on hot asphalt or in a closed car. Both shorten battery life and can cause thermal runaway on charge.
Step 7: The Hover Test – Your Final Safety Gate
The hover test is the last step in any serious pre-flight inspection drone routine, and it is the one most amateur pilots skip. Do not skip it. The hover test catches what visual inspection misses.
Take off to about 3-5 feet (1-1.5 meters) and hover in place for 30-60 seconds. Watch the aircraft for the following:
- Stable hover with no drift in any direction
- No excessive wobble, oscillation, or vibration
- GPS position hold is engaged (not in ATTI mode)
- Battery voltage stable under load (no sudden drops)
- All motors running at similar RPMs (no high or low pitch)
- Camera and gimbal stable, no drifting tilt
If anything feels off, land immediately. A drone that drifts in the hover test will drift in flight. A drone whose battery sags under load will fail in flight. I once caught a failing ESC on an Inspire 2 this way. The motor drew more current than its neighbor, and the difference was visible in the hover. I sent the aircraft in for service. A friend with the same model lost theirs the following week for the same reason.
For beginner pilots, the hover test is also your chance to verify that the controls feel right. Test left, right, forward, back, and yaw slowly. If any control feels delayed, mushy, or reversed, land and recalibrate. Do not troubleshoot in the air.
Common Preflight Mistakes That Cause Most Drone Crashes
After reviewing hundreds of preflight failures and crash reports, I have found that three mistakes cause roughly 80% of preventable drone incidents. Avoid these, and you are already flying safer than the majority of pilots.
Mistake 1: Rushing Through Preflight
Excitement is the enemy of a thorough pre-flight inspection drone routine. I have seen pilots skip an entire battery check because they wanted to catch a sunset. The sunset did not need them. The drone did.
The fix is a non-negotiable time block. I budget 15 minutes from bag-open to takeoff on every flight. No exceptions. When the light is perfect, I start my preflight earlier, not skip steps. The discipline pays off over hundreds of flights.
Mistake 2: Forgetting Return-to-Home Altitude
One Reddit user described flying a mapping mission that triggered RTH over a tree line. The drone came home at the default 30-meter altitude and caught a 35-meter oak. The drone crashed into a backyard pool. The pilot lost the aircraft and faced a property damage claim.
The fix is simple: check RTH altitude against the tallest obstacle in your flight area, plus 20 meters of margin. Set it manually. Do not trust the automatic setting to read terrain correctly. It does not, especially near cliffs, buildings, or towers.
Mistake 3: Skipping the Battery Auto-Discharge Check
Smart batteries lose charge sitting on the shelf. Pilots who charge the night before a week-long job often arrive with batteries at 50-60%. They fly anyway, run out of power mid-mission, and crash.
The fix is a top-off charge within 24 hours of flight. I also keep a small LiPo checker in my bag. It reads total voltage and per-cell voltage, which the app does not always expose. A two-second check confirms the pack is healthy and fully charged.
Bonus: Post-Flight Inspection Routine
Your pre-flight inspection drone routine is only half the picture. Post-flight inspection catches problems that develop during a flight, especially battery stress, propeller nicks from small debris, and loose components from vibration.
Within five minutes of landing, I do a quick post-flight walk-around:
- Inspect all four propellers for new nicks, cracks, or chips
- Check the battery for any swelling or unusual warmth
- Confirm the gimbal is still level and self-corrects when powered
- Look over the airframe for new stress marks around the arms
- Review the flight log in the app for any warning messages or errors
A post-flight log entry takes two minutes and creates a maintenance history. When a component starts to wear, the log shows the trend. You replace parts before they fail, not after they take out a $2,000 aircraft.
Case Study: A Crash That Never Happened
Last fall, a friend brought me his Mavic 3 for a quick pre-shoot check. He was flying a real estate video the next morning and wanted a second opinion.
I ran the pre-flight inspection drone routine in 12 minutes. Within that time, I flagged three issues: a hairline crack on a rear arm, a micro-nick on the front-left propeller leading edge, and a battery with 312 cycles that was past the safe retirement threshold. He would have flown all three.
Total cost of the catch: $14 for two new propellers, $0 for the arm (he decided to ground it for repair), and $169 for a new battery. Total cost of the crash those problems would have caused: $2,200 for a replacement drone, plus the lost real estate shoot, plus a reputation hit that took months to recover from.
That is the value of a preflight routine. It does not just prevent crashes. It prevents the cascade of consequences that follows them.
Frequently Asked Questions About Drone Pre-Flight Inspections
What are the pre-flight checks for a drone?
The pre-flight checks for a drone include inspecting the airframe for cracks, checking propellers for nicks or damage, verifying the battery has no swelling and a full charge, confirming the gimbal self-levels, testing the controller link and RTH altitude, verifying GPS lock with 12+ satellites, checking airspace and weather minimums, and performing a 30-60 second hover test before flying the actual mission.
How do I prevent my drone from crashing?
Prevent drone crashes by running a consistent pre-flight inspection drone routine before every flight. Check the airframe, propellers, motors, and battery for physical damage. Verify airspace, weather, and GPS lock. Confirm RTH altitude is above all obstacles. Test the controller link and failsafe settings. Finally, perform a hover test for 30-60 seconds to catch vibration, drift, or power issues before you commit to the mission.
How long should a drone preflight take?
A thorough drone preflight should take 10-15 minutes for most consumer and prosumer aircraft. Commercial pilots flying under Part 107 typically need 15-20 minutes to cover regulatory documentation, equipment checks, environmental assessment, and the hover test. Recreational pilots can complete a focused preflight in 8-10 minutes for routine backyard flights.
What is the FAA preflight requirement for Part 107?
FAA Part 107.49 requires the remote pilot in command to inspect the small unmanned aircraft before each flight to ensure it is in a condition for safe operation. The inspection must include the aircraft, control station, and operating environment. Pilots should document the check, and any found airworthiness issue requires the flight to be grounded until repaired.
What causes most drone crashes?
The most common causes of drone crashes are battery failure (including swelling, voltage sag, and depletion), propeller damage from impact or debris, GPS signal loss in urban or wooded areas, pilot error from skipping preflight checks, and obstacle collisions during return-to-home. Studies of FAA incident reports show that roughly 70% of drone crashes trace back to a skipped preflight step.
Final Thoughts on Building Your Preflight Routine
A pre-flight inspection drone routine is not glamorous. It will not make your footage better or your flights more exciting. It will, however, keep your aircraft flying for years instead of months.
Start with the seven steps in this guide. Run them in the same order every flight. After a dozen flights, the routine becomes muscle memory. After a hundred flights, you will catch problems in seconds that used to take minutes. That is when a pre-flight inspection drone routine stops being a chore and starts being a competitive advantage.
Print the checklist, save it to your phone for offline use, and stick to it. Your drone, your clients, and your insurance carrier will all thank you. And the next time a friend asks why your drones last longer than theirs, you can hand them this guide and a 15-minute timer.