
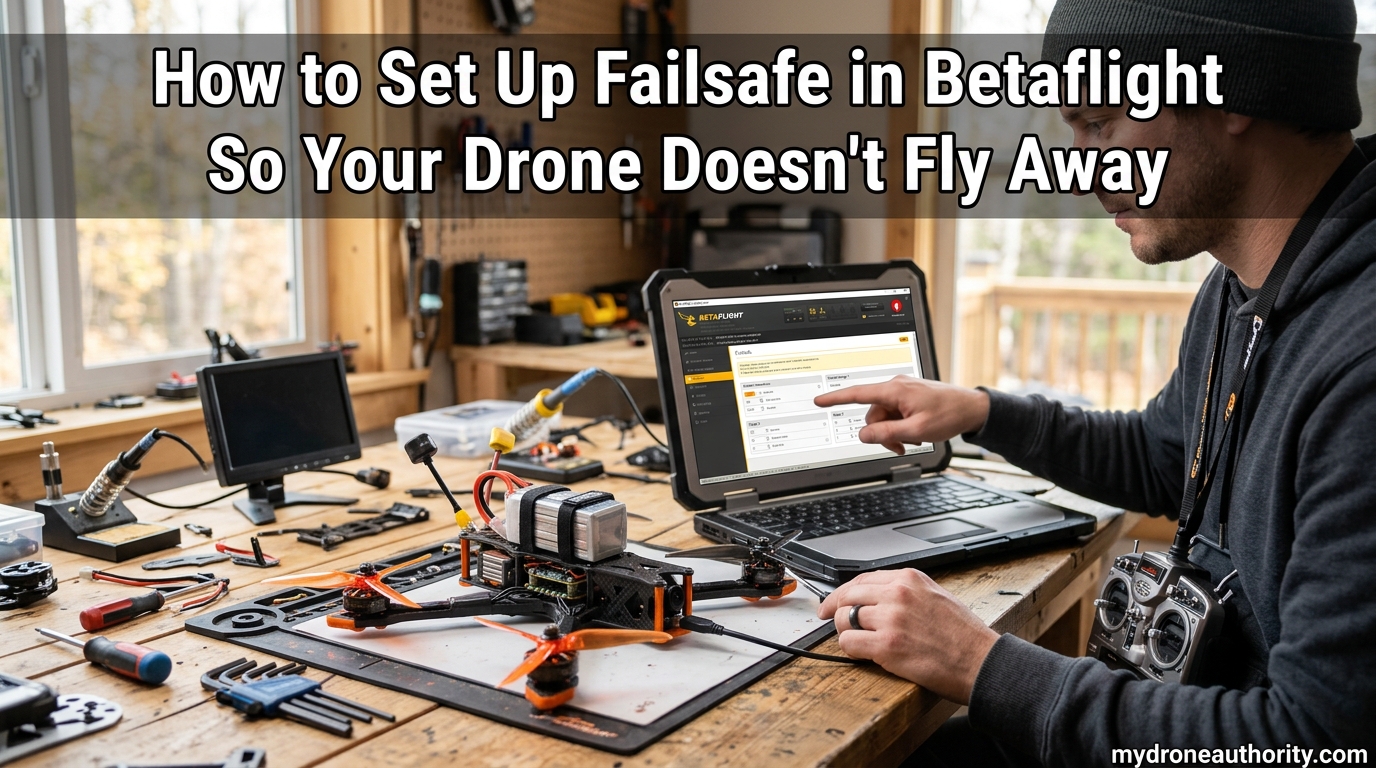
Every FPV pilot’s worst nightmare is watching their quad disappear over the horizon after a sudden signal loss. I have seen it happen at my local flying field more times than I can count, and in almost every case, the cause was a missing or misconfigured Betaflight failsafe setup. The good news is that Betaflight gives you a powerful, two-stage safety system that can bring your drone home safely, or at least bring it down in a controlled descent instead of a flyaway.
This guide walks through how to set up failsafe in Betaflight so your drone does not fly away. I will cover what failsafe actually does, the difference between Stage 1 and Stage 2, every configuration option in the Failsafe tab, GPS Rescue setup, radio-specific settings for ExpressLRS and Crossfire, and exactly how to bench test your failsafe before you ever trust it in the air.
Whether you fly a 5-inch freestyle rig, a long-range wing, or a tiny whoop, the principles here apply. By the end, you will know exactly which buttons to click, which CLI values to type, and how to verify the system works before you take off. Let’s get your quad protected.
Table of Contents
What Is Failsafe and Why Your Drone Needs It
Failsafe is a built-in safety feature that tells your flight controller what to do when the radio link between your transmitter and your drone is lost. Think of it as an automatic emergency plan that runs the instant your receiver stops getting clean signal. Without it, your drone keeps doing whatever it was doing when the signal dropped, which usually means it keeps flying in whatever direction it was heading until the battery dies or it hits something.
The risk is real. A flyaway quad can travel miles on a fully charged pack, smash through windows, injure people, damage property, and trigger serious legal problems for you as the operator. I have talked to pilots whose drones flew into restricted airspace because they had no failsafe configured, and the outcome was never good.
Here is the important distinction that trips up many beginners: there are actually two failsafe systems at play. Your receiver has a failsafe, and your flight controller running Betaflight has a separate failsafe. The receiver failsafe decides what signal gets sent to the FC when the radio link dies. The Betaflight failsafe decides what the drone physically does in response to that signal loss. You need to understand both, but the flight controller side is where the real protection happens.
Most modern receivers, when configured correctly with a serial protocol like CRSF or SBUS, will simply report RXLOSS (receiver signal loss) to the flight controller and let Betaflight handle the rest. This is the cleanest approach and the one I recommend. We will cover the receiver-side settings later in the radio-specific section.
How the Two-Stage Failsafe System Works in Betaflight
Betaflight uses a two-stage failsafe system that gives your drone two different layers of protection. Understanding how these stages interact is the single most important part of getting your failsafe configuration right, because each stage does something fundamentally different.
Stage 1 kicks in the moment Betaflight detects signal loss. Instead of immediately dropping your drone out of the sky, Stage 1 holds specific channels at predefined fallback values for a short guard period. The default guard time is around 1.5 seconds, which gives the radio link a chance to recover if the signal loss was just a brief glitch from interference or a momentary obstruction.
Stage 2 takes over if signal loss continues past the guard period. At that point, Betaflight assumes the link is genuinely gone and executes the failsafe procedure you selected. You have three choices here: Drop, Land, or GPS Rescue. Each one has trade-offs that we will dig into in the Stage 2 section.
Under the hood, Betaflight uses a signal validation process that runs before Stage 1 even starts. When the receiver stops sending valid channel data, the FC waits roughly 300 milliseconds to confirm the loss is real and not a corrupted packet. Only after that validation does the failsafe timer begin counting toward Stage 1 and eventually Stage 2. This three-step chain, validation to Stage 1 to Stage 2, is what prevents your drone from twitching or dropping every time you fly behind a tree.
The reason Betaflight splits this into two stages is simple. Brief signal hits happen constantly in FPV, especially around buildings, trees, and other pilots at crowded flying spots. A single-stage failsafe that disarmed the moment signal dropped would cause crashes on every minor interference event. The two-stage approach tolerates short losses while still protecting you against real disconnects.
How to Configure Stage 1 Failsafe (Channel Fallback)
Stage 1 is where you decide what your drone does during that brief guard period before Stage 2 takes over. The goal here is to keep the quad flying in a stable, predictable way for a few seconds so you have time to recover the link. Done right, Stage 1 alone can save you from most short signal dropouts without ever needing Stage 2.
Open Betaflight Configurator, connect your flight controller, and click the Failsafe tab on the left sidebar. The first section you see controls Stage 1. Here is how to set it up.
Step 1: Set the guard time. The Stage 1 guard time is how long Betaflight holds the fallback values before escalating to Stage 2. The default is typically around 0.2 seconds of additional delay on top of the signal validation, but many pilots bump this up slightly. I leave it at default for racing and bump it to about 0.5 seconds for freestyle and long range, since brief interference is more common in those scenarios and you want to give the link more chances to recover.
Step 2: Set the channel fallback values. For each channel, you can choose Hold, Set, or Auto. Hold keeps the channel at its last known value. Set forces it to a specific value you define. Auto uses the value you configured when you ran the receiver failsafe setup.
For the throttle channel specifically, this is the most important decision in Stage 1. If you hold throttle at its last value, the drone will keep flying at whatever speed it was at when signal dropped, which could mean full throttle into a tree. If you set it to zero, the drone immediately falls out of the sky, which is also bad.
The community-recommended approach, and the one I personally use on every build, is to set Stage 1 throttle to your hover value. For a typical 5-inch quad, that lands around 1300 in Betaflight terms, which is roughly 25 to 35 percent throttle. This keeps the drone airborne and roughly level for the guard period, giving you a window to recover signal without losing altitude.
Step 3: Configure the failsafe delay. The failsafe_delay CLI parameter defines how many tenths of a second of bad signal must occur before failsafe triggers at all. Default is usually 10, meaning one full second. You can tune this, but I would not go below 5 (half a second) because it makes the system twitchy on brief interference.
Step 4: Set failsafe_off_delay. This parameter, measured in tenths of a second, controls how long Stage 1 stays active before Stage 2 kicks in. Default is around 20, meaning two seconds. If you fly with Stage 2 set to GPS Rescue, you might want to extend this slightly so the link has more time to recover before the drone commits to flying home.
Once Stage 1 is configured, save and reboot. Your drone now has a proper fallback plan for short signal hits, instead of just dropping the moment the link flickers.
How to Configure Stage 2 Failsafe: Drop, Land, or GPS Rescue
Stage 2 is where you pick what your drone physically does when signal loss is confirmed and the guard period expires. Betaflight gives you three procedures, and choosing the right one depends on what kind of flying you do, where you fly, and whether your quad has GPS onboard.
Drop Mode is the simplest and most aggressive option. The drone instantly disarms and falls out of the sky. This is the safest choice for populated areas because the quad cannot fly off uncontrollably, but it also guarantees a crash. If you are flying over soft grass at low altitude, Drop is fine. If you are 100 meters up over concrete, Drop means a destroyed quad.
Land Mode keeps the drone armed and brings it down in a controlled descent using Angle mode and a fixed hover throttle. The drone levels itself, holds a steady descent rate, and touches down softly without needing GPS. This is my preferred choice for freestyle and racing quads that fly at parks and fields without GPS onboard. The descent is predictable and the landing is usually gentle enough to avoid damage.
GPS Rescue Mode is the most sophisticated option. The drone activates GPS, calculates a return path to the home point you armed from, and flies itself back. Once it reaches home, it descends and lands. This is what you want for long-range flying, mountain surfing, or any scenario where dropping or landing in place would mean losing the quad in inaccessible terrain.
Here is a quick comparison to help you choose.
Drop Mode: Best for beginners, racing quads, indoor whoops, and flying over soft ground. Instant disarm, guaranteed crash, zero flyaway risk. No GPS required.
Land Mode: Best for freestyle pilots who fly at parks without GPS. Controlled descent, soft landing, keeps the quad intact on smooth surfaces. No GPS required.
GPS Rescue: Best for long-range pilots, mountain flyers, and anyone with a GPS module. Flies home and lands automatically. Requires GPS lock before arming and a properly configured home point.
To select Stage 2 in Betaflight Configurator, look for the Failsafe Procedure dropdown in the Failsafe tab. Pick Drop, Land, or GPS Rescue. Save and reboot. If you choose GPS Rescue, you also need to configure the GPS Rescue sub-section, which we cover next.
One critical safety note: whatever Stage 2 procedure you choose, your Stage 2 settings cannot be tested live without actually triggering a failsafe. Always do bench testing with props removed before flying with new failsafe settings. This is the most common way pilots destroy their quads, by trusting untested failsafe behavior in the air.
GPS Rescue Mode: Return to Home Without Crossfire Firmware
GPS Rescue is Betaflight’s built-in return-to-home system. Unlike the more sophisticated GPS lock-on systems in DJI or ArduPilot, GPS Rescue is intentionally simple. It flies the drone in a straight line back to the arming point and lands. It does not avoid obstacles, so you should only rely on it when you have clear line of sight between where the drone is and where home is.
To use GPS Rescue, you need a GPS module connected to your flight controller and configured in the Ports and Configuration tabs. Without a working GPS, the option will appear greyed out or the rescue will fail immediately on activation.
Minimum satellites: Betaflight requires a minimum number of GPS satellites before it will allow GPS Rescue to function. The default is usually 7 or 8 sats, but I bump mine up to 8 for safety. Lowering this number increases the risk that GPS Rescue activates with an unreliable position fix, which can cause the drone to fly in the wrong direction. Always wait for a solid lock before arming.
Allow arming without GPS fix: This is a setting in the Configuration tab. If you enable it, you can arm and fly before GPS has a fix. If you disable it, Betaflight will refuse to arm until GPS is locked. I disable it on long-range builds so I cannot accidentally take off without GPS protection. On my freestyle quads, I enable it because I do not always need GPS and waiting for a lock wastes flying time.
Altitude and distance limits: GPS Rescue has configurable altitude and distance parameters in the Failsafe tab. There is a minimum distance to home, typically around 5 meters, below which GPS Rescue will not activate and the drone will just land in place. There is also a maximum altitude the rescue will climb to on its way home, which matters if you fly in areas with ceilings.
Recovering control during GPS Rescue: Here is something many beginners miss. If signal returns while GPS Rescue is active, the drone does not immediately hand control back to you. You need to move your sticks deliberately, usually by wiggling the throttle or roll, to signal that the pilot is back in control. Once Betaflight detects stick movement with a valid signal, it cancels GPS Rescue and returns to normal flight.
This catches a lot of pilots off guard. They see the drone flying home on GPS Rescue, the radio link is back, and they wonder why the quad will not respond to their inputs. The fix is simple: move the sticks. Betaflight is waiting for that confirmation.
One last warning about GPS Rescue: the system can cause the drone to fall 10 to 15 meters before the rescue fully kicks in and stabilizes. This is normal behavior as the FC transitions through Stage 1 into the rescue mode. If you fly low, GPS Rescue might not have enough altitude to recover, and the drone will crash before the rescue completes. Always fly with some altitude buffer if you rely on GPS Rescue.
How to Test Your Failsafe Before Flying
Testing your failsafe is not optional. It is the only way to know with confidence that your configuration actually works and behaves the way you expect. The first time you trigger a failsafe should never be during a real signal loss over a populated area. Here is the bench and field testing process I follow on every new build.
Step 1: Bench test with props removed. Take the props off your drone. This is non-negotiable for the first test. A drone that misbehaves on the bench with props attached will cut you, and a drone that flies off the bench will break things.
Step 2: Power on transmitter and drone. Make sure your radio is bound to the receiver and you have full signal. Arm the drone on the bench. Verify the motors are spinning at idle and you have normal control.
Step 3: Power off the transmitter. Just turn the radio off while the drone is armed and on the bench. Watch what happens.
If Stage 1 is configured correctly, the motors should hold at whatever fallback values you set for the guard period. If Stage 1 throttle is at hover, the motors will spin up to roughly hover speed. If you set Stage 1 throttle to zero, the motors will stop.
After the guard period expires, Stage 2 kicks in. If Stage 2 is Drop, the drone disarms and motors stop. If Stage 2 is Land, the drone enters Angle mode and holds the configured descent throttle. If Stage 2 is GPS Rescue and you have GPS lock, the drone will try to fly home (which on the bench means nothing visible, since props are off).
Watch the OSD or Betaflight Configurator status for the failsafe messages. You should see RXLOSS appear when signal is lost. In older Betaflight versions, you might see BAD_RX. In current versions, after a disarm from Stage 2, you may see NOT_DISARMED warnings when you try to re-arm, which we cover in troubleshooting.
Step 4: Field test at safe altitude. Once bench testing confirms the basics work, take the drone to an open field. Fly to a safe altitude, at least 30 meters up, and over soft grass. Power off your transmitter deliberately to trigger a real failsafe.
Watch what the drone does. It should follow the exact sequence you tested on the bench, but now you can see the actual flight behavior. If everything works, you have a verified failsafe configuration you can trust. If something goes wrong, you have altitude and soft ground to limit the damage.
Step 5: Test recovery. Power the transmitter back on after a few seconds. With Stage 1, the drone should respond to your inputs immediately once signal returns. With Stage 2 Drop, the drone is disarmed and you must land and re-arm manually. With Stage 2 GPS Rescue, you need to move the sticks to cancel the rescue and take manual control.
Run this full sequence at least once before relying on the failsafe for real flying. It takes 15 minutes and it has saved me from more than one bad configuration.
Radio-Specific Failsafe Settings: ExpressLRS, Crossfire, FrSky
The receiver side of failsafe matters as much as the Betaflight side. Different radio protocols handle signal loss differently, and if your receiver is not configured correctly, your flight controller will never even know the link is dead.
ExpressLRS (ELRS) is the most popular modern protocol for FPV. ELRS receivers, when used with a serial output like CRSF, automatically report signal loss to Betaflight through the protocol itself. There is no separate failsafe value to configure on the receiver. When the ELRS link dies, the receiver stops sending valid CRSF data, and Betaflight detects RXLOSS. The only thing you need to verify is that your ELRS receiver is set to CRSF output in the ELRS configurator or Lua script, not SBUS or other legacy outputs.
TBS Crossfire works similarly to ELRS when using the CRSF protocol. The Crossfire receiver reports link status to Betaflight, and signal loss is detected by the FC. Crossfire also has its own internal failsafe behavior where it can output a predefined channel state on signal loss, but for most pilots running CRSF, you want the receiver to simply stop outputting valid data and let Betaflight handle everything.
FrSky receivers with older protocols like SBUS or ACCST work a bit differently. The receiver has its own internal failsafe that can either hold last position, output predefined channel values, or output no signal at all. You configure this in your radio, typically through the EdgeTX or OpenTX failsafe menu, or by binding the receiver with a specific failsafe position recorded.
For FrSky, I recommend setting the receiver failsafe to output zero throttle and centered sticks. This way, even if Betaflight somehow misses the RXLOSS detection, the drone still gets a zero-throttle signal and will not fly away. Think of this as a belt-and-suspenders approach for older FrSky gear.
EdgeTX and OpenTX radio-side settings: Both radio firmwares have a failsafe configuration screen per model. For modern protocols like ELRS and Crossfire, you typically leave this alone and let the protocol handle it. For legacy FrSky, you set the per-channel failsafe values here. The general rule is to configure the receiver to report signal loss to Betaflight, then do all your actual failsafe logic in the Betaflight Failsafe tab.
One common mistake with ExpressLRS specifically: if you flash your ELRS receiver with the wrong output protocol or set the baud rate wrong, the receiver may appear to work but Betaflight will not detect signal loss properly. Always verify your receiver protocol matches what Betaflight expects in the Ports tab.
Common Failsafe Problems and How to Fix Them
Even with careful configuration, things can go wrong. Here are the most common failsafe problems pilots report, and how to diagnose and fix each one.
Problem: The drone drops immediately instead of hovering during failsafe. This almost always means your Stage 1 throttle fallback is set to zero or Auto with no value defined. Open the Failsafe tab and check the Stage 1 throttle channel. Set it to a fixed hover value, around 1300 for a typical 5-inch, and save.
Problem: GPS Rescue causes the drone to fall from the sky. This usually means GPS Rescue activated without a valid satellite lock, or the rescue transition dropped altitude before stabilizing. Verify you have at least 8 satellites before arming. Also check that the GPS Rescue altitude and climb settings in the Failsafe tab are configured for your flying environment. If you fly low, GPS Rescue may not work well for you.
Problem: Cannot re-arm after a failsafe disarm. When Stage 2 Drop fires, Betaflight disarms the drone and will not let you re-arm until certain conditions are met. You usually need to land, power cycle the drone, or move the throttle to the off position and back to arm. You may also see the NOT_DISARMED OSD message, which is a reminder that the previous flight ended in a failsafe disarm.
Problem: Failsafe does not trigger at all. This typically means the receiver is not reporting signal loss to Betaflight. Check your receiver protocol in the Ports tab, verify your wiring, and make sure your radio is actually dropping the link when powered off. Some receivers have a feature called “racing mode” or “boost” that can mask signal loss detection.
Problem: NOT_DISARMED message on OSD. After Betaflight 4.5, the old BAD_RX OSD message was renamed to NOT_DISARMED. This message appears after a failsafe disarm and reminds you that the previous flight ended unexpectedly. To clear it, land, power cycle the drone, and re-arm normally. It is informational, not an error.
Problem: Failsafe triggers randomly during normal flight. This points to intermittent signal loss, not a failsafe configuration issue. Check your receiver antenna placement, verify no metal is touching the antenna, check for loose solder joints on the receiver, and make sure you are flying within the range of your radio system. If you fly long range on a short-range protocol, you will see failsafes that are actually real signal loss events.
Problem: GPS Rescue flies the drone in the wrong direction. This usually means the home point was not set correctly, or GPS has a poor fix. GPS Rescue flies back to the point where you armed, so if you moved after arming, the home point is wrong. Always arm at your flying position and let GPS get a solid lock before takeoff. You can also verify the home point in the OSD before flying.
Betaflight CLI Failsafe Parameters Reference
For pilots who want to tune failsafe beyond what the Configurator UI exposes, here are the most useful CLI parameters and their typical values.
failsafe_delay defines how many tenths of a second of bad signal before failsafe triggers. Default is 10 (one second). Lower values make failsafe trigger faster, higher values tolerate more interference.
failsafe_off_delay controls how long Stage 1 lasts before Stage 2 kicks in, measured in tenths of a second. Default is around 20 (two seconds).
failsafe_throttle is the throttle value used during Stage 1 fallback and during Land Mode descent. Default is typically around 1000 to 1200. Set this to your hover value, around 1300, for controlled descent.
failsafe_procedure sets the Stage 2 procedure. Values are 0 for Drop, 1 for Land, 2 for GPS Rescue. Default is usually 0 (Drop).
failsafe_recovery_delay controls how quickly Betaflight returns to normal flight after signal is restored. This prevents accidental recovery during brief signal blips within Stage 2.
failsafe_switch_mode defines how a manually assigned failsafe switch behaves. Stage 1 or Stage 2 behavior can be selected.
rx_min_usec and rx_max_usec define the valid range for receiver channel pulse widths. Signals outside this range are treated as invalid, which can trigger failsafe even without true signal loss.
To change any of these, open the CLI tab in Betaflight Configurator, type the parameter name followed by the new value (for example, set failsafe_throttle = 1300), then type save and let the FC reboot. Always test changes on the bench before flying.
How do you set failsafe in Betaflight?
Open Betaflight Configurator, connect your flight controller, and open the Failsafe tab. Configure Stage 1 channel fallback values, set the throttle to your hover value (around 1300), then choose a Stage 2 procedure (Drop, Land, or GPS Rescue) from the dropdown. Save, reboot, and bench test with props removed before flying.
What is failsafe mode in Betaflight?
Failsafe mode is the safety system that takes control of your drone when the radio link to your transmitter is lost. It uses a two-stage process where Stage 1 holds fallback channel values briefly, then Stage 2 executes a chosen procedure like Drop, Land, or GPS Rescue to bring the drone down safely.
How do I test failsafe in Betaflight?
Remove the props, arm the drone on the bench, and power off your transmitter. Watch the motors respond according to your Stage 1 and Stage 2 settings. Then do a field test at safe altitude over soft grass by powering off the radio in flight and observing the drone’s behavior.
What is the difference between Stage 1 and Stage 2 failsafe?
Stage 1 activates immediately on signal loss and holds predefined channel fallback values for a short guard period, typically about 1.5 seconds, to give the link a chance to recover. Stage 2 takes over if signal loss persists past the guard period and executes the chosen procedure like Drop, Land, or GPS Rescue.
How many satellites does GPS Rescue need in Betaflight?
GPS Rescue typically requires a minimum of 7 to 8 satellites to function reliably. Most pilots set the minimum to 8 for safety. Lowering this value increases the risk of an inaccurate position fix causing the drone to fly in the wrong direction during rescue.
What does the NOT_DISARMED message mean?
NOT_DISARMED appears on your OSD after a failsafe disarm to remind you that the previous flight ended unexpectedly. It replaced the older BAD_RX message in Betaflight 4.5 and later. To clear it, land, power cycle the drone, and re-arm normally.
Should I use Drop, Land, or GPS Rescue?
Use Drop for racing, indoor flying, and flights over soft ground where a crash is acceptable. Use Land for freestyle over parks and fields when you want a controlled descent without GPS. Use GPS Rescue for long-range flying and mountain surfing where you need the drone to return home automatically.
Can I disable failsafe in Betaflight?
You cannot fully disable failsafe in Betaflight because it is a core safety feature, but you can configure Stage 1 to hold channels and set Stage 2 to Drop, which effectively makes the drone fall immediately on signal loss. This is the most aggressive failsafe behavior and is the closest thing to disabling the protection layer.
Final Thoughts on Betaflight Failsafe Setup
A properly configured Betaflight failsafe setup is the difference between a brief moment of panic and a permanently lost drone. Take the time to understand the two-stage system, set Stage 1 throttle to your hover value, pick a Stage 2 procedure that fits how you fly, and bench test before every new build.
The biggest mistake I see at my flying field is pilots trusting default failsafe settings without ever testing them. Defaults work, but they may not work the way you expect for your specific flying style and environment. Spend 15 minutes on the bench with props off, then do one controlled field test at altitude. That single effort will save you from losing a quad to a flyaway.
If you fly long range or over difficult terrain, GPS Rescue is worth the setup effort. If you stick to local parks and freestyle, Land Mode gives you a soft landing without needing GPS. And if you fly racing or indoors, Drop is the safe default that prevents flyaways entirely. Match the procedure to your flying, test it, and trust it. Your drones will last longer, and your flying will be safer because of it.