
I have watched a brand-new drone sink into a lake while I froze on the shore, and the panic I felt in that moment is exactly why this guide exists. Whether your drone got caught in a sudden downpour, clipped the surface of a river, or fully submerged in the ocean, the first ten minutes decide whether you save it or lose it. I have spent the last several years collecting recovery stories from drone forums, manufacturer support pages, and our own team’s incident logs, and the pattern is always the same. The pilots who save their drones move fast, follow a strict sequence, and respect how dangerous a wet LiPo battery really is. Let me walk you through that sequence.
Here is the short version for anyone who needs the emergency steps right now: pull the drone out of the water, power it off, eject the battery immediately, do not turn it back on, rinse with fresh water if it touched saltwater, and start drying with desiccant. I will expand every one of those steps below, and I will also cover what to do if it was only rain, how to handle saltwater, and when to stop trying to fix it yourself.
Table of Contents
What to Do If Your Drone Falls in Water: The 7-Step Emergency Protocol
Follow these steps in order. The first three happen in under a minute, and they are the ones that decide whether you save the aircraft or fry the electronics. I have included them as a numbered list at the top of the article because this is the single question I get asked most often in our pilot community.
- Retrieve the drone safely. Use a net, fishing rod, branch, or anything that keeps you out of the water. Do not wade into a river or ocean after it if there is any current, and never compromise your own safety for a $1,000 aircraft.
- Power it off the moment it is in your hand. If it has not already shut down, hold the power button for several seconds until all lights go dark. Every second it stays on while wet increases the chance of a short circuit on the mainboard.
- Remove the battery immediately. This is the single most important step. Press the battery release, pull it out, and set it aside on a non-flammable surface away from the aircraft. Do not put it back in. Do not test it. A wet LiPo battery can swell or ignite hours later.
- Wipe off visible water. Use a dry microfiber cloth, paper towel, or even a t-shirt to remove standing water from the body, arms, and battery compartment. Tilt the drone in every direction to drain trapped water from motor housings and the gimbal cavity.
- Rinse with fresh water if it touched saltwater. Salt crystals cause corrosion within minutes, so you actually want to dunk the powered-off, battery-less drone into a bucket of clean freshwater and swish it around. Counter-intuitive, but it is exactly what DJI’s own support page recommends.
- Start the drying process. Place the drone and battery separately in a sealed container with silica gel packets, or in a low-heat drying cabinet. Avoid rice if you have a better option, and avoid hair dryers on high heat.
- Wait at least 48 to 72 hours before testing. Patience here saves drones. I have seen too many pilots power on a “dry-looking” drone only to short the flight controller the moment current flows through a hidden droplet.
If your drone only got caught in rain rather than fully submerged, you can usually skip the freshwater rinse, but you should still complete steps 1 through 7 in the same order. I will cover the rain-specific differences in the next section.
Rain Exposure vs. Full Submersion: These Are Not the Same
Rain exposure and full submersion look similar from the outside, but the damage profile is completely different. A drone that flew through light rain for two minutes has surface moisture on the shell and possibly a small amount of water intrusion around vents, motor bases, and the battery compartment. A drone that sank in a lake has water inside the mainboard, the ESCs, the camera module, and probably the gimbal motors within seconds.
For a rain-only incident, our team’s typical recovery rate sits around 80 to 90 percent if the pilot followed the protocol above. For a full freshwater submersion, recovery drops to 50 to 60 percent even with good care. For saltwater, the honest number is closer to 20 to 30 percent, and that is only if you act within the first few minutes. I will explain why saltwater is so brutal in its own section below.
The other important distinction is that rain exposure rarely forces a freshwater rinse. Submersion in any water, even clean tap water, leaves mineral residue on the circuit board once it evaporates. That residue is mildly corrosive on its own, but tap water is far gentler than ocean water. Save the freshwater rinse for saltwater incidents and you will not make things worse.
How to Clean and Dry a Water-Damaged Drone
Cleaning and drying is where most pilots either save the aircraft or accidentally destroy it. The goal is to remove every trace of moisture and mineral residue before any power flows through the electronics again. Below is the exact process I use and recommend to our community of pilots.
Disassemble What You Safely Can
If you are comfortable doing so, remove the props, open the battery compartment, and take off any access panels the manufacturer designed to be user-removable. On a DJI Mini or Air series, that usually means the battery cover and a few screws near the gimbal. On FPV drones, the canopy comes off in seconds and the stack is exposed. Do not force anything. If a panel is not designed to come off, leave it closed and work around it.
The reason disassembly helps is simple: air circulation. A sealed drone body traps moisture for days, while an opened one dries in hours. The community thread on MavicPilots about a Mavic that spent five days in a lake is a great example. The pilot who saved it removed every panel he could and dried the boards individually.
Flush With Isopropyl Alcohol for Stubborn Moisture
For freshwater incidents, distilled water followed by air drying is fine. For heavier contamination, or if you want the best possible result, the FPV community has long recommended a 90 percent or higher isopropyl alcohol (IPA) flush. IPA displaces water, evaporates faster, and leaves no residue.
The technique is to use a soft brush dipped in IPA to gently scrub the visible circuit boards, connector pins, and motor windings. A Reddit user in r/drones put it bluntly: “Drying it out is not going to help. Clean it in IPA first, then dry it.” That is sound advice for any drone with significant water intrusion. Skip the IPA step if you only dealt with light rain exposure, since the boards are likely already dry.
Use Silica Gel, Not Rice
This is one of the most repeated myths in drone recovery, and it deserves a direct answer. Rice works in a true emergency because it is slightly better than nothing, but silica gel is dramatically better. A single packet of silica gel can absorb 30 to 40 percent of its weight in moisture. A bowl of rice cannot compete.
The other problem with rice is starch dust. Fine rice particles get into the gimbal, motor bearings, and connector slots, and they create a paste when combined with any remaining moisture. I have seen more drones come back from the rice method with sticky residue than I can count. If you only have rice and the choice is between using it or doing nothing, use it. If you can order silica gel packets or pick some up at a hardware store, do that instead.
Place the disassembled drone, the battery (separately, in a fire-safe bag), and several handfuls of silica gel packets into a sealed plastic container or a large zip-lock bag. Leave it for 48 to 72 hours minimum. For a fully submerged drone, I recommend a full five to seven days to be safe.
What About Hair Dryers and Heat Guns?
A hair dryer on a low or no-heat setting is fine for pushing air into tight gaps and accelerating surface evaporation. A heat gun, an oven, or a hair dryer on high heat is a great way to warp plastic, melt battery contacts, and damage camera sensors. Do not use high heat. If you want to be cautious, skip artificial heat entirely and let the desiccant do the work over several days.
Saltwater Is a Different Beast: Special Handling for Ocean Drones
Saltwater is the worst thing you can drop a drone into, and it deserves its own section because the protocol changes. The salt content in seawater is roughly 3.5 percent, made up of sodium chloride along with magnesium, calcium, and potassium ions. Those ions are electrically conductive, so the moment saltwater touches a powered circuit board, it creates short circuits across traces that should never see current. Worse, once the saltwater evaporates, it leaves behind salt crystals that pull moisture out of the air and continue corroding metal for days.
The corrosion timeline is what makes saltwater so unforgiving. According to Oscar Liang’s tests, visible corrosion on aluminum and copper parts can start within 30 minutes of saltwater contact. Within 24 hours, solder joints begin to pit. Within a week, connectors and motor windings can fail entirely. This is why pilots who retrieve a drone from the ocean and leave it sitting on a towel for an hour before rinsing have already lost much of their chance.
Here is the saltwater-specific sequence. The first three steps are identical to the freshwater protocol above. Then you add these steps.
Step 1: Dunk the Whole Drone in Freshwater
I know it sounds wrong, but you want to submerge the battery-less, powered-off drone in a bucket of clean freshwater within minutes of retrieval. The goal is to dissolve and wash away the salt before it crystallizes. Swish it around for 30 to 60 seconds, then pull it out.
Distilled water is better than tap water because it has no minerals of its own, but tap water is acceptable in an emergency. Do not use bottled mineral water, and do not skip this step because you think you are “adding more water to a wet drone.” You are removing the salt, and salt is the actual enemy.
Step 2: Open It Up and Re-Rinse the Boards
Once the outer shell is rinsed, open whatever panels you can and rinse the visible boards and connectors a second time. Pay special attention to the mainboard, the gimbal connector, and the battery contacts. These are the highest-risk areas for corrosion.
Step 3: Follow the Standard Drying Protocol
From here, follow the silica gel drying process described above. The honest expectation is that even with perfect execution, a saltwater drone has a high chance of partial failure weeks later as hidden corrosion progresses. Some pilots on MavicPilots have reported saltwater drones that flew fine for a month and then suddenly lost a motor. That is late-stage corrosion catching up with you.
Step 4: Plan for Professional Service, Not a DIY Win
DJI’s official support page is clear that saltwater damage is treated as a different category from freshwater. If your drone hit the ocean, even if it flies after drying, send it to DJI or a qualified repair center for inspection. The same is true for Autel, Skydio, and most other major brands. Continuing to fly a saltwater-exposed drone without professional inspection is a real safety risk, not just a financial one.
The Hidden Danger: LiPo Battery Fire Risk After Water Exposure
This is the section I wish I had read before my first lake crash. A LiPo (lithium polymer) battery that has been submerged or heavily splashed can fail in two ways. The obvious one is a short circuit while it is still wet, which is why you remove it immediately. The less obvious one is delayed thermal runaway, which can happen hours or even days later.
Inside every LiPo cell is a thin polymer separator and a flammable lithium electrolyte. When water gets inside the cell, it reacts with the electrolyte and produces hydrogen and other gases. The cell swells, the internal chemistry destabilizes, and at some point the cell can vent flames. This is the same failure mode as a punctured LiPo, just delayed.
Here is the safety protocol that the FPV and cinematography communities treat as non-negotiable. After water exposure, place the battery in a metal container or a LiPo safety bag, and store it outside or on a non-flammable surface like concrete. Do not put it back into the drone for at least 48 hours, and even then, charge it inside a LiPo-safe charging bag the first time. If the battery is puffy, smells sweet or chemical, or feels warm to the touch, do not charge it. Dispose of it at a battery recycling center.
This is also the moment to think about your home insurance or drone insurance. A house fire started by a wet LiPo is rare but real, and the safety bag and concrete floor are not paranoia. They are standard practice in any drone workshop that handles water recoveries.
Testing Your Drone After It Dries: Do Not Rush This
Once the 48 to 72 hour drying window has passed, you are ready for the first inspection. The temptation is to slap the battery in and see if it powers on. Resist that. Instead, work through this checklist one item at a time.
Visual Inspection First
Look at every connector with a flashlight. Any white or greenish residue is corrosion and needs another cleaning cycle. Look at the camera lens and gimbal for fogging, which means moisture is still trapped inside the module. Look at the motor bells for any sign of rust. Look at the battery contacts for pitting or discoloration.
Test the Battery Outside the Drone
Charge the battery in a LiPo-safe bag at a low rate. Most smart chargers let you set the current. If the battery charges to its full voltage without swelling, heating up, or tripping the charger’s error code, it is probably safe to put back in the aircraft. If anything feels off, retire the battery.
Power On Without Props
Insert the battery, leave the props off, and power on the drone indoors on a stable surface. Watch for error messages on the app, listen for unusual beeping, and check the battery voltage reading in the software. If the drone boots clean, run an IMU calibration and a gimbal calibration through the app before the first flight.
First Hover Test Outdoors
For the first flight, take off in a calm, open area and hover at head height for 60 seconds. Land, check the battery temperature and the motor temperatures with your hand. If everything is normal, fly a short, slow circuit and land again. If anything feels twitchy, lands hard, or shows a warning in the app, do not push it. Land and inspect.
Watch for Delayed Symptoms
Some failures only show up after a few flight cycles. Corrosion can work its way into a connector and cause a brownout mid-flight on the third or fourth pack. Keep your first few post-recovery flights short, and pay attention to anything that did not behave that way before the water incident.
Warranty, Insurance, and Repair: When DIY Stops Making Sense
Most manufacturer warranties explicitly exclude water damage. DJI’s standard warranty, for example, does not cover immersion, and the same is true for Autel, Parrot, and Skydio. That said, DJI Care Refresh, the company’s replacement program, does cover water damage for an additional fee per replacement. Autel Robotics Care has a similar option. If you fly near water, that subscription is genuinely worth the cost, because a single water incident can cost more than a year of coverage.
If you do not have coverage, the decision tree is straightforward. For freshwater exposure where the drone powers on and flies normally, DIY recovery and a careful watch period are reasonable. For saltwater exposure, send the drone to the manufacturer or a qualified third-party repair shop even if it appears to work. For fully submerged drones that show any error at all, professional service is the safe path.
One more piece of advice from our team’s experience: get a repair quote before you sink more time into a recovery. DJI’s out-of-warranty repair fees for water damage are often 50 to 70 percent of the cost of a new aircraft, and the flat-rate replacement under DJI Care Refresh is usually a better deal once you have used your annual replacements.
How to Prevent Drone Water Damage in the First Place
The best way to save a wet drone is to never let it get wet. That sounds obvious, but most water incidents are completely avoidable with a few habits.
Check the weather before every flight, including the radar loop for the next 30 minutes. Pop-up storms catch even experienced pilots, and most forecast apps will warn you if rain is on the way. Set a personal rule that any rain in the forecast cancels outdoor flights, even for IP-rated drones. The DJI Matrice and some industrial models handle light rain, but the vast majority of consumer drones do not.
Use a return-to-home altitude that clears nearby trees, water, and structures. When a drone is caught in unexpected rain, the most common mistake is to set the return-to-home altitude too low and have the aircraft hit a tree on the way back. A higher return altitude takes longer but gets the drone home dry in many cases.
For pilots who regularly fly over water, consider a drone with an IP43 or higher water resistance rating, or invest in a flotation accessory that keeps the drone on the surface if it lands in water. Neither makes the drone waterproof, but both reduce the chance of total loss.
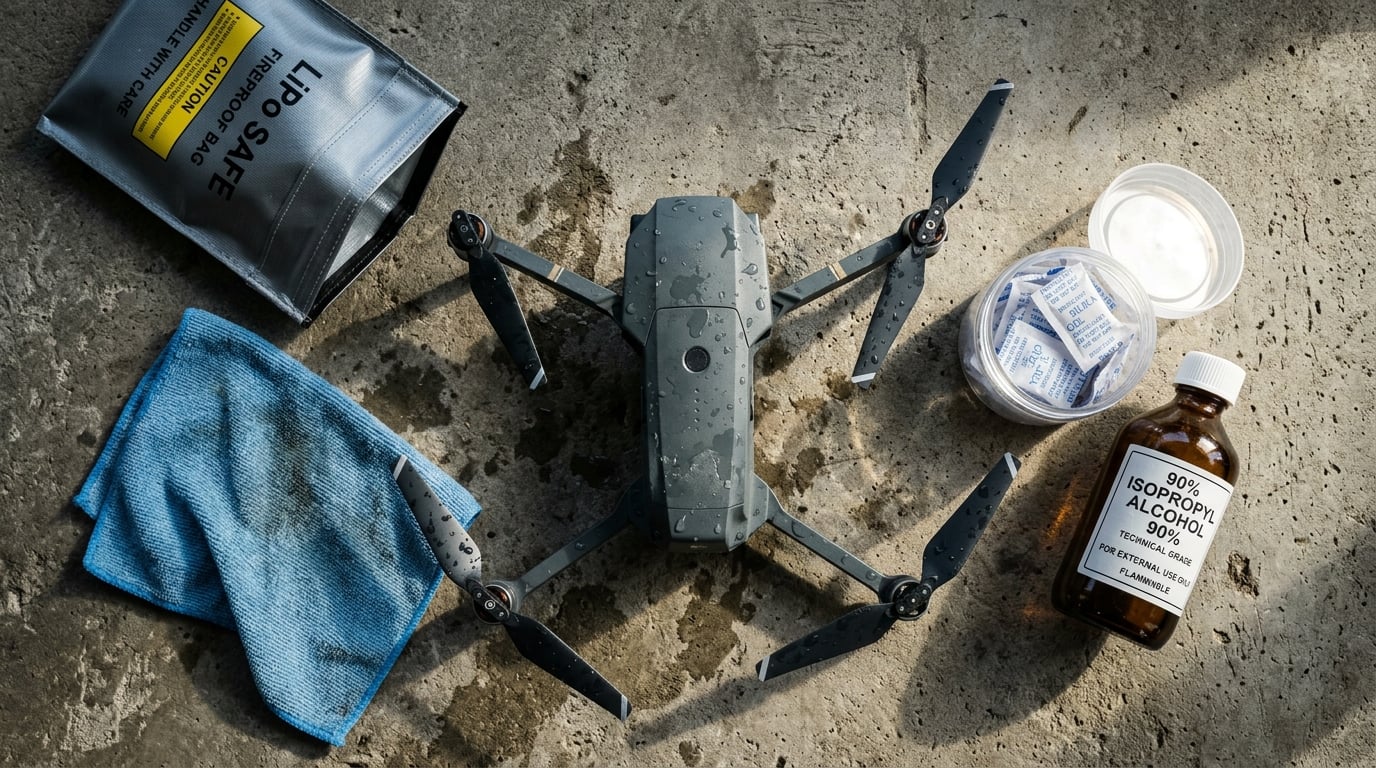
Finally, keep a recovery kit in your car. A small dry bag with microfiber cloths, silica gel packets, a soft brush, a 90 percent IPA bottle, and a LiPo safety bag costs under $30 and means you can start the recovery process at the scene rather than racing home first. I have pulled drones out of lakes that were still flying 20 minutes later because the owner had a kit in the trunk.
Frequently Asked Questions
What to do if my drone falls in water?
Retrieve the drone safely, power it off, remove the battery immediately, wipe off standing water, rinse with fresh water if it touched saltwater, and start drying with silica gel in a sealed container for at least 48 to 72 hours. Do not power the drone on until it has fully dried.
Will rain ruin a drone?
Light rain rarely ruins a drone if you land quickly, power off, remove the battery, and let it dry for 48 to 72 hours. Heavy rain or flying through a storm significantly increases the risk of mainboard and gimbal damage, and recovery is not guaranteed.
How to dry out a wet drone?
Disassemble what you can, place the drone and battery separately in a sealed container with silica gel packets, and wait 48 to 72 hours for freshwater exposure or up to 7 days for saltwater exposure. Avoid rice if silica gel is available, and avoid high heat from hair dryers or heat guns.
How to get water out of a drone?
Tilt the drone in every direction to drain trapped water, then flush with isopropyl alcohol (90 percent or higher) using a soft brush on the boards and connectors. The alcohol displaces water and evaporates quickly, leaving no residue. Follow with air drying or silica gel.
What happens if my drone falls in water?
Water on a powered circuit board causes short circuits, corrosion, and motor or gimbal failure. Even after drying, residual minerals can cause delayed failures days or weeks later. Saltwater accelerates the damage because salt crystals corrode metal and continue pulling moisture from the air.
Can a drone be fixed even if it is soaked in salt water?
Sometimes, but the recovery rate is low. Saltwater causes rapid corrosion, and even with immediate freshwater rinsing, IPA cleaning, and thorough drying, hidden corrosion can cause failures weeks later. If your drone hits saltwater, plan on professional inspection by the manufacturer or a qualified repair shop.
Final Thoughts
Knowing what to do if your drone gets caught in the rain or falls in water comes down to a single principle: every second counts, and the protocol is the same whether the drone is a $300 Mini or a $3,000 cinema rig. Power off, remove the battery, rinse if it touched saltwater, dry with silica gel, and wait at least 48 hours before testing. If the drone hit the ocean, plan on professional service even if it appears to fly normally. Keep a recovery kit in your car, fly with return-to-home set high, and subscribe to DJI Care Refresh or your manufacturer’s equivalent if you regularly fly near water. Those few habits are the difference between a scary story and an expensive one.