
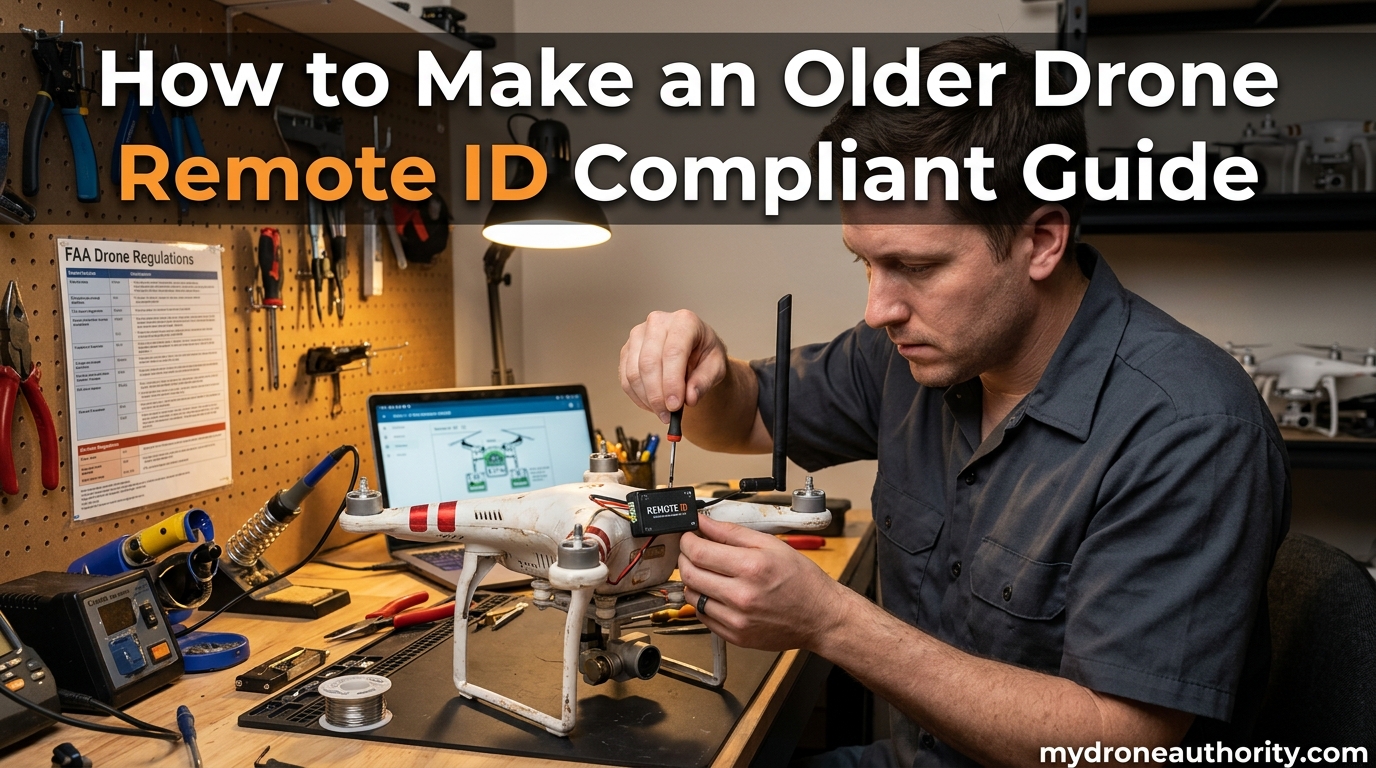
If you bought a DJI Mavic 2 Pro, Phantom 4, or an older Air series drone a few years ago, you have probably run into the same wall hundreds of pilots in our community have hit: the FAA now expects every drone over 250 grams to broadcast identification data, and your aircraft may not do it out of the box. Learning how to make an older drone Remote ID compliant is no longer optional. Enforcement is live, fines are being issued, and airspace access depends on it.
I have spent the past two years working through this exact problem with readers who refuse to retire perfectly good hardware. Some drones can be fixed with a free firmware update. Others need a small broadcast module strapped on with Velcro. And a small group of older models, including the Mavic 2 Pro and the original Air 2, have no internal compliance path at all.
This guide walks through every option, in plain language, with the steps our team has tested on real aircraft. By the end you will know exactly which path applies to your drone, what it costs, and how to verify the broadcast is actually working before you fly.
Whether you fly recreationally or hold a Part 107 certificate, the same FAA Remote ID rule covers you. We will cover the three compliance paths, the model-by-model breakdown that forums keep asking for, the cost comparison no competitor has published, and the verification checklist you can run on the flight line.
The frustration in the older-drone community is real. A Mavic 2 Pro was a $1,500 investment a few years ago, and many pilots feel that investment is being forcibly retired. The good news is that almost every older drone can stay in the air legally with a $60 to $250 add-on. The bad news is that the FAA has not made the process obvious, and a lot of the information online is outdated, partial, or just wrong.
Our goal here is to give you one place where every path is laid out clearly. No assumptions about your technical skill, no skipping steps, and no pretending a non-compliant drone will somehow grandfather through. By the end of this article you will have a printable checklist, a model-by-model reference, and a clear next step.
Table of Contents
Quick Answer: How to Make an Older Drone Remote ID Compliant
To make an older drone Remote ID compliant, you have three FAA-approved options. First, check with the manufacturer for a Remote ID firmware update, which is free but only available on select models. Second, attach an FAA-accepted Remote ID broadcast module to the aircraft, which works on virtually any drone over 250 grams. Third, fly exclusively inside an FAA-Recognized Identification Area, or FRIA, where no broadcast is required.
Most older drone owners end up on path two. A broadcast module costs roughly $60 to $250 depending on features, attaches with Velcro or zip ties, and turns a non-compliant aircraft into a legal one in minutes. The catch is that not every module sold online is FAA-accepted, so you must verify it on the FAA Declaration of Compliance list before buying.
For a quick decision: if your drone was released after early 2021, try the firmware update first. If your drone is a Mavic 2, Air 2, or Phantom 4 Pro V2, go straight to the broadcast module. If you only fly at one AMA club field, check the FRIA map before spending anything.
What Is Remote ID and How Does It Work?
Remote ID is an FAA-mandated broadcast system that functions like a digital license plate for unmanned aircraft. It transmits identification and location data from the drone to anyone with a compatible receiver, including the FAA, law enforcement, and other pilots using scanner apps on their phones.
The rule is codified under 14 CFR Part 89 and aligns with the ASTM F3411 technical standard, the same protocol Europe uses under EASA Regulation 2019/947. In practical terms, this means a drone built to broadcast Remote ID in the US will also be compliant in the EU and UK with minimal adjustment.
The original FAA Remote ID rule was finalized in late 2020 with an initial compliance deadline of September 16, 2023. The FAA granted a six-month enforcement extension through March 16, 2024, citing supply chain issues with approved modules, the slow pace of DOC approvals, incomplete manufacturer software updates, and limited FRIA availability. As of 2026, full enforcement is active and no further grace periods have been announced.
What Information Gets Broadcast
A compliant drone transmits several specific data fields at least once per second. The broadcast includes the drone’s serial number or operator registration number, latitude and longitude of the aircraft, altitude, velocity, the takeoff location, and a time stamp. Some aircraft also broadcast an emergency status flag.
This data rides over either Bluetooth LE, Wi-Fi Beacon frames, or Wi-Fi NaN, depending on the drone or module. The broadcast range is typically 800 to 1,000 meters, which gives observers on the ground plenty of room to detect and identify an aircraft in flight.
The transmission itself uses very little power, which is why battery impact on the drone is negligible. On broadcast modules, the module’s own internal battery handles the transmission, not the drone’s main pack. This is one reason even small older drones can carry a module without noticeably shorter flight times.
Why the FAA Created Remote ID
The FAA’s stated goal is airspace safety and accountability. Before Remote ID, there was no practical way for law enforcement to trace a drone back to its operator after an incident. Remote ID closes that gap, and it also lays the technical groundwork for future BVLOS operations under Part 108.
Remote ID is also the foundation for U-space traffic management in Europe and for the FAA’s own UTM (Unmanned Traffic Management) framework. Without a way to identify every aircraft in the sky, neither agency can approve the kind of automated, long-distance drone deliveries and inspections that the industry has been promising.
If you have heard the privacy concerns, they are legitimate. Anyone with a smartphone scanner app can read your broadcast. The FAA does not store the broadcast data centrally, but the signal itself is public during flight. For most pilots, this is a reasonable tradeoff for continued airspace access. If you fly commercially, your clients and the public already expect accountability.
Standard Remote ID vs. Broadcast Module: The Core Difference
Standard Remote ID means the broadcast hardware is integrated into the drone itself by the manufacturer. The drone’s serial number is permanently tied to the broadcast, and the data is generated by the drone’s own flight controller, GPS, and barometer.
A broadcast module is a separate device that produces the same broadcast externally. The module does not know what the drone is doing; it relies on its own GPS to determine location, and it transmits a static operator ID rather than the drone’s serial number. From the FAA’s perspective, both are valid for VLOS flight under Part 89. The difference matters only for advanced operations like Part 108 BVLOS, which require Standard Remote ID specifically.
Who Must Comply with Remote ID?
The short answer is almost everyone. Any drone weighing more than 0.55 pounds (250 grams) at takeoff must comply with Remote ID, regardless of whether you fly commercially under Part 107 or recreationally under the Exception for Limited Recreational Operations.
The rule applies to every flight in the National Airspace System, including Class G uncontrolled airspace. There is no altitude threshold, no rural exemption, and no carve-out for personal property. If the aircraft is over 250 grams and in the air, it must be broadcasting.
This includes FPV drones, racing quads, survey aircraft, inspection platforms, photography rigs, and even homemade builds. The rule is aircraft-based, not use-case-based. Whether you are flying for fun, for a client, or for a government contract, the broadcast requirement is the same.
Who Is Exempt from Remote ID
A narrow set of aircraft and operations are exempt. Drones under 250 grams flown purely for recreation are exempt from Remote ID, which is why the DJI Mini series remains so popular. Aircraft flown entirely inside a FRIA are also exempt for the duration of that flight.
Other exemptions include most toy drones weighing less than 250 grams that are not equipped with a camera, amateur-built aircraft that meet specific criteria spelled out in the rule, and public aircraft operated by government agencies under a COA. If your drone does not fit one of those categories, plan to comply.
The recreational sub-250g exemption has a catch. If you attach any payload that pushes the takeoff weight over 250 grams, even temporarily, the exemption no longer applies. Pilots who fly a sub-250g drone with propeller guards, a larger battery, or an action camera mount should weigh the fully loaded aircraft on a kitchen scale before relying on the exemption.
Commercial vs. Recreational Pilots
The compliance requirement is identical for both groups, but the consequences differ. A Part 107 certificate holder caught flying without Remote ID can face certificate suspension or revocation in addition to civil penalties. Recreational flyers face civil penalties that the FAA has reportedly issued starting around $1,000 per violation.
Forum reports from the past year confirm that enforcement is no longer theoretical. Several pilots on the Mavic Pilots forum have described being approached by law enforcement while flying and asked to demonstrate their Remote ID broadcast. In at least one reported case, a pilot was grounded on the spot until a parent brought their registration paperwork.
For commercial Part 107 operators, the calculus is even simpler. A single compliance violation can threaten the certificate that your business depends on. The cost of a broadcast module or the 30 minutes needed for a firmware update is trivial compared to losing the ability to fly for paying clients.
The Three Paths to Remote ID Compliance
The FAA defines exactly three ways an older drone can satisfy the Remote ID rule. Understanding the differences before you spend money will save you time and frustration.
1. Standard Remote ID. This is built into the aircraft at the firmware level. The drone broadcasts its own serial number and flight data without any added hardware. Some older drones can be upgraded to this status with a free firmware update from the manufacturer.
2. Broadcast Module. An external device attaches to the drone and transmits the required Remote ID data on the aircraft’s behalf. This is the most common solution for older drones that have no firmware update path.
3. FRIA. Flying inside an FAA-Recognized Identification Area removes the broadcast requirement entirely for that specific flight. FRIAs are fixed geographic zones established by community-based organizations or educational institutions.
When a Person May NOT Use a Broadcast Module
This is a question that comes up constantly on Reddit and in the FAA’s own FAQ. A person may not use a Remote ID broadcast module when flying beyond visual line of sight under Part 108, when the operation requires Standard Remote ID specifically, or when operating a drone that already has built-in Standard Remote ID enabled.
The practical takeaway: broadcast modules are perfect for typical VLOS flying, but they will not qualify you for advanced operations. If you plan to apply for Part 108 BVLOS waivers in the future, Standard Remote ID on the aircraft itself is required.
The rule also prohibits moving a broadcast module from one drone to another mid-flight. The module is bound to the operator ID, not to a specific aircraft, but for any given flight the module must stay attached to that one aircraft for the entire duration.
Comparing the Three Paths Side by Side
Firmware Update: Cost is free. Difficulty is low. Works only on supported models. Qualifies for Part 108. No added weight. Broadcasts the drone’s own serial number.
Broadcast Module: Cost is $60 to $250. Difficulty is low once installed. Works on almost any drone. Does not qualify for Part 108 BVLOS. Adds 8 to 60 grams depending on the module. Broadcasts the operator ID rather than the drone serial number.
FRIA: Cost is free if you have access to one. Difficulty is high because FRIAs are limited and location-locked. Works for any drone within the boundary. Does not require any hardware. The flight must remain entirely inside the FRIA boundary at all times.
How to Check if Your Drone Is Already Remote ID Compliant
Before you buy anything, check whether your drone already broadcasts. Many pilots are surprised to learn their aircraft has been compliant for years and they simply never enabled the feature.
Start by checking the manufacturer support page. DJI maintains a comprehensive compliance list that is the most-cited authority in drone forums. Autel, Skydio, and Parrot have published similar lists. If your model appears on the compliant list, the next step is confirming the firmware is current and Remote ID is enabled in the app.
The DJI compliance list is broken into three categories: drones that broadcast out of the box, drones that can be made compliant through firmware, and drones that have no compliance path. Knowing which list your aircraft is on determines everything that follows.
DJI Model Compliance at a Glance
DJI drones released after early 2021 generally have Standard Remote ID built in. This includes the Mavic 3 series, Mavic 3 Pro, Mavic 3 Pro Cine, Mavic 3 Classic, Mavic 3 Cine, Mavic 3 Enterprise, Mavic 3 Thermal, Mavic 3 Multispectral, Air 2S, Air 3, Air 3S, Mini 3, Mini 3 Pro, Mini 4 Pro, Avata, Avata 2, Mavic 4 Pro, Flip, Inspire 3, Mavic Pro Platinum, and the entire Matrice 30, M300 RTK, M350 RTK enterprise line.
Drones that can be made compliant with a firmware update include the Mavic Pro Platinum. Drones with no internal compliance path include the Mavic 2, Mavic 2 Pro, Mavic 2 Zoom, Air 2, and Phantom 4 Pro V2. If you own one of those, a broadcast module is your only practical option.
For Autel owners, the EVO Lite and EVO Nano series both have Standard Remote ID built in. Skydio X2 and later models are compliant. Parrot Anafi USA and Anafi Ai both broadcast natively. If you fly a non-DJI older drone, check the manufacturer support page directly, because the lists are less centralized outside the DJI ecosystem.
Use a Drone Scanner App to Verify
Even if your drone is on the compliant list, verify the broadcast with a scanner app before relying on it. The free Drone Scanner app for iOS and Android, along with OpenDroneID ASM, lets you read Remote ID broadcasts from your phone.
Power on your drone, open the app, and watch for your aircraft’s broadcast. You should see the serial number, location, altitude, and takeoff point. If nothing appears within 30 seconds, Remote ID is either disabled or the firmware is out of date.
The Air Sentinel app is another option, particularly popular with commercial operators who want a more detailed read on surrounding traffic. All three apps read the same broadcast data; pick whichever interface you prefer. The point is to confirm the broadcast is real before a law enforcement officer does it for you.
How to Make an Older Drone Remote ID Compliant: Option 1, Firmware Updates
If your drone is on the supported list, the firmware update path is by far the cheapest and cleanest option. The process takes about 30 minutes and costs nothing. Our team has tested this on multiple Mavic 3 and Air 2S units with consistent results.
This path only works if the manufacturer has built the broadcast capability into the drone’s hardware and simply needs to activate it through software. If the drone lacks the physical transmitter hardware, no firmware update can add it. That is why the Mavic 2 series and Air 2 will never get a compliance update, no matter how many forum threads ask for one.
Step 1: Update the Drone Firmware
Open your manufacturer’s flight app, in most cases DJI Fly. Connect the drone and controller as if you were preparing to fly. The app will alert you if a firmware update is available; if not, navigate to the aircraft settings menu and check for updates manually.
Make sure the drone battery is at least 50 percent charged and the controller stays connected during the entire update. A failed update mid-process can brick the aircraft. Let the firmware install completely before touching anything.
If the update fails repeatedly, try a different mobile device, switch from cellular to Wi-Fi, or move closer to your router. DJI’s update servers can be flaky during peak hours. Some users report that updating through DJI Assistant 2 on a desktop computer is more reliable than the mobile app when the phone version stalls.
Step 2: Enable Remote ID in the App
Once firmware is current, open the aircraft settings inside DJI Fly. Look for the Remote ID menu, which typically appears under Safety or Advanced Settings. Toggle Remote ID broadcasting to On.
The app will prompt you to enter your FAA registration number if you have not already linked it. This binds the operator registration number to the drone so the broadcast transmits the correct pilot information.
You may also be asked to set a Remote ID password. This is a recovery credential in case you ever need to reset or transfer the binding. Write it down somewhere safe; DJI support can reset it, but only after a verification process that can take days.
Step 3: Register and Bind the Drone with the FAA
Even with Standard Remote ID enabled, the drone must be registered through the FAA DroneZone dashboard. If you fly commercially under Part 107, each aircraft needs its own registration. Recreational pilots can register once and apply that number to every aircraft they fly.
After registering, return to the DJI Fly app and bind the Remote ID serial number to your FAA registration. This is the step many pilots skip, and it is the most common reason a “compliant” drone fails a field check.
Binding takes about 60 seconds. The app will confirm when the binding is complete and the broadcast is live. Run the Drone Scanner app one more time to confirm everything is reading correctly before you head to the flight line.
How to Make an Older Drone Remote ID Compliant: Option 2, Broadcast Module Installation
If your drone has no firmware update path, the broadcast module is your solution. This is the path the majority of Mavic 2 Pro, Mavic 2 Zoom, Air 2, and Phantom 4 Pro V2 owners end up taking. The installation is genuinely simple once you have an FAA-accepted module in hand.
I have installed modules from Dronetag, Holybro, and pingRID across several older drones. The process is similar regardless of brand. The most important step happens before installation: confirming the module is actually on the FAA Declaration of Compliance list.
Reddit users on r/drones repeatedly emphasize this point. One user put it bluntly: “There’s not an update they can put out to add remote id to older drones. You will have to purchase a remote id module and stick it to your drone.” The community consensus is clear, and the FAA agrees. The broadcast module is the answer for non-upgradeable aircraft.
Step 1: Verify the Module Is FAA-Accepted
Visit the FAA’s Declaration of Compliance portal at uasdoc.faa.gov. Search the module’s manufacturer name or model number. If the module does not appear in the FAA DOC database, do not buy it, regardless of what the Amazon listing claims.
Forum reports repeatedly mention cheaper third-party modules that look identical to accepted units but lack the DOC listing. Law enforcement and the FAA only recognize modules that appear on the official list. Save the receipt and screenshot the DOC entry for your records.
Some modules are listed under their parent company name rather than the product name. If you cannot find your module, search by manufacturer. The DOC list is updated periodically, so a module that was pending approval a few months ago may now be listed.
Step 2: Choose the Right Module for Your Drone
The most commonly recommended modules in our community include the Dronetag Mini, Dronetag Beacon, Hex Cube ID Serial, pingRID, and Holybro Remote ID modules. Each is FAA-accepted and has a solid track record in the field.
Weight matters, especially on smaller drones. The Dronetag Mini weighs around 8 grams and works well on aircraft like the Air 2. Heavier drones like the Phantom 4 Pro V2 can comfortably carry a pingRID or Hex Cube without affecting flight characteristics.
Battery life is the other factor. Most modules run for 4 to 6 hours on a single charge, which covers a full day of flying for most pilots. If you fly long commercial sessions, look for a module that charges via USB-C while in use, so you can top it off between flights without reprogramming.
Transferability is a feature that gets overlooked. Some pilots own multiple older drones and want to fly them on different days. A single module can be moved from one aircraft to another between flights, which spreads the cost across your fleet. The Spektrum Remote ID Broadcaster is popular with RC pilots for exactly this reason.
Step 3: Program the Module
Most modules ship with a mobile app for configuration. Download the manufacturer’s app, pair the module over Bluetooth, and follow the setup wizard. You will be prompted to enter your FAA registration number and select whether the module broadcasts the operator ID or a session ID.
This step takes about five minutes. As one Gardeners Corner user described it, “Programming the module was quick and easy, then all you have to do is apply it with Velcro and turn it on, presto, you are legal again.”
For operator ID mode, the broadcast transmits your FAA registration number on every flight. This is the most common mode for both recreational and Part 107 pilots. Session ID mode generates a temporary identifier per flight, which is useful for training operations or situations where you do not want a permanent serial number broadcast.
Step 4: Mount the Module to the Drone
Velcro is the universally recommended mounting method in the drone community. Apply the hook side to a flat surface on top of the drone body, ideally near the center of gravity to avoid balance issues. Attach the loop side to the module.
Avoid mounting the module near the GPS antenna, compass, or video transmitter, as interference can degrade the broadcast signal and the drone’s own navigation. For drones like the Mavic 2 Pro, the top rear of the body works well.
For heavier modules or FPV builds, a zip tie through the battery strap is a more secure option. Just make sure the module’s antenna has a clear view of the sky and is not buried under carbon fiber or battery. A blocked antenna is the most common cause of weak or intermittent broadcasts.
Take a moment to check balance after mounting. Even 20 grams added to one side of a Mavic 2 Pro can shift the center of gravity enough to notice in flight. If the drone feels nose-heavy or tail-heavy on the first test hover, reposition the module before flying any real distance.
Step 5: Power On and Verify the Broadcast
Turn the module on first, before powering up the drone. Wait for the module’s status LED to confirm it is broadcasting. Then power on the drone and controller as usual.
Open a Drone Scanner app on your phone before takeoff. You should see the module’s broadcast within 30 seconds. Confirm the operator ID, location, and altitude fields are all populated. If any field is missing, return to the manufacturer app and reconfigure.
This verification step is the single most overlooked part of the process. A Reddit user summed it up well: “Yes, the use of an aftermarket broadcast module will make an older model compliant, but it is only vaguely mentioned by the FAA and from a real world standpoint it is not clear if LE will be able to tell.” The scanner app removes that ambiguity.
Run this verification every time you fly a new location. GPS lock can take longer in urban canyons or under tree cover, and the module may not broadcast correctly until it has a solid fix. Give it a full minute in challenging environments before assuming something is wrong.
Module Cost Breakdown
Basic FAA-accepted modules like the Holybro start around $60. Mid-range options from Dronetag and pingRID run $90 to $180. Premium modules with extended battery life and multi-drone transfer capability, like the Spektrum Remote ID broadcaster, can reach $250.
For context, a $90 module is roughly the same price as one month of insurance for a Part 107 operator. Compared to the cost of a $1,000 civil penalty or a new $1,500 drone, the module pays for itself the first time you fly legally.
If you own multiple older drones, a single mid-range module that transfers between aircraft is more cost-effective than buying a cheap module for each one. The math changes once you have four or five aircraft, but for most pilots one good module covers the fleet.
Module Comparison at a Glance
Dronetag Mini: Around 8 grams, USB-C charging, FAA-accepted, ideal for smaller older drones like the Air 2. Approximate runtime 5 hours. Mid-range price point.
Dronetag Beacon: Longer battery life, real-time tracking via LTE, suited to commercial pilots who want cloud visibility. Slightly heavier but still well under 50 grams. Higher price point with subscription features.
Hex Cube ID Serial: Compact, well-documented SDK, popular in custom and ArduPilot PX4 builds. Particularly favored by FPV builders and Pixhawk integrators.
pingRID: Heavier but rugged, excellent battery life, popular on Phantom 4 airframes. Battery life often quoted at 6+ hours, which suits long commercial sessions.
Holybro Remote ID: Budget-friendly, widely stocked, works with Pixhawk-based builds. The most common entry point for hobbyists on a tight budget.
Spektrum Remote ID Broadcaster: Lightweight, transferable between aircraft, popular in the RC plane community. Designed to move from model to model in minutes.
The Cost Question: Retrofit vs. Replace
A common question on forums is whether it is worth adding a module to an older drone or simply buying a new compliant one. The math depends on how much you fly and what kind of aircraft you are comparing.
A Mavic 2 Pro with a $90 Dronetag Mini is still a capable camera platform, and total cost stays under $100 of additional investment. A replacement DJI Air 3 with similar imaging capability runs roughly $1,300 or more. For pilots who fly occasionally and love the Mavic 2 image quality, the module is the obvious choice.
For pilots flying commercially several times a week, the calculus shifts. Newer drones have better obstacle avoidance, longer flight times, and native Remote ID that requires no installation. If your older drone is showing its age in other ways, the module may just be delaying an upgrade you need anyway.
How to Find Your Remote ID Serial Number
Your Remote ID serial number is not the same as the serial number printed on your drone. It is a unique identifier generated specifically for the Remote ID system, and you need it for registration and binding.
For Drones with Built-In Remote ID
Open the manufacturer’s app, navigate to the Remote ID settings menu, and look for the Serial Number field. On DJI drones, this appears in DJI Fly under the Remote ID section once the feature is enabled. Write this number down because you will need it for FAA registration.
If you cannot find it in the app, contact the manufacturer support with your drone’s regular serial number. DJI support can retrieve the Remote ID serial number for any compatible aircraft.
The Remote ID serial number is typically a long alphanumeric string. Keep it somewhere safe, separate from the drone itself, in case the aircraft is lost or stolen. Law enforcement can use this serial number to trace a recovered drone back to the registered operator.
For Drones Using a Broadcast Module
The module itself has the Remote ID serial number, not the drone. Open the module manufacturer’s app and navigate to device settings. The serial number will be displayed there.
This is one advantage of the module approach: when you swap the module between drones, the same Remote ID serial number follows the module. You do not need to re-register each aircraft individually, although each aircraft still needs its own FAA registration if flown commercially.
Registering Through FAA DroneZone
Go to faadronezone.faa.gov and log in to your account. Select Register a Drone and follow the prompts. For commercial pilots, each aircraft receives its own registration number. Recreational pilots receive one number that applies to all their aircraft.
During registration, you will be asked whether the drone uses Standard Remote ID or a broadcast module. Answer honestly, because this affects how the FAA links your operator information to the broadcast.
Registration fees are $5 per aircraft for commercial Part 107 registration and $5 total for the recreational registration that covers all aircraft. Registrations are valid for three years and must be renewed before expiration. The FAA sends a renewal reminder, but the responsibility for keeping registration current is on the pilot.
FRIA: The Third Alternative
An FAA-Recognized Identification Area, or FRIA, is a fixed geographic zone where drones can fly without broadcasting Remote ID. FRIAs are established by community-based organizations recognized by the FAA, such as the Academy of Model Aeronautics, or by educational institutions.
Flying in a FRIA removes the broadcast requirement for the duration of the flight, but only if the entire operation stays within the FRIA boundary. The moment your drone crosses the line, you are back under the standard Remote ID rule.
FRIAs are not a workaround for pilots who want to fly anywhere without broadcasting. They are a specific accommodation for organized flying sites where the FAA has determined that other safety measures, such as an established operating framework and known participants, are sufficient.
When FRIA Makes Sense
FRIA is most useful for pilots who fly at a fixed club field, race course, or training site on a regular basis. If your local AMA club has a FRIA designation and you never fly anywhere else, you may not need a module or firmware update at all.
For everyone else, FRIA is too restrictive to be a primary solution. Most pilots want flexibility to fly in different locations, which makes the broadcast module or firmware path more practical.
FRIA is also useful for training new pilots in a controlled environment. Flight schools and university programs often establish FRIAs at their training fields so students can focus on flying without the added complexity of Remote ID configuration.
How to Find a FRIA Near You
The FAA maintains a public FRIA map on the uas.faa.gov dashboard. You can search by address or coordinates. The AMA also maintains a list of chartered club fields that hold FRIA status.
If no FRIA exists in your area, you cannot create one as an individual. FRIAs must be sponsored by a recognized organization, which means the practical path for most older-drone owners is still the broadcast module.
The number of FRIAs is growing slowly, but coverage is uneven. Some states have dozens, while others have none. Check the map before you assume a FRIA solution is available to you.
Remote ID Compliance Checklist for Older Drones
Use this checklist before your next flight to confirm your older drone is fully compliant. Print it, screenshot it, or keep it on your phone for reference at the flight line.
1. Confirm your drone is over 250 grams at takeoff, including all payloads. If under 250g and flown only for recreation, you are exempt and can skip the rest.
2. Identify which compliance path applies to your specific drone model by checking the manufacturer support page or the FAA DOC list.
3. If firmware update applies: update firmware, enable Remote ID in the app, register the drone with the FAA, and bind the Remote ID serial number.
4. If broadcast module applies: verify the module is on the FAA DOC list, program it with your operator ID, mount it to the drone, and power it on before the drone.
5. Open a Drone Scanner app and confirm the broadcast is readable. Verify operator ID, location, altitude, and takeoff point are all populated.
6. Confirm your FAA registration is current and the registration number on the drone or in the module matches your DroneZone account.
7. Carry proof of registration and your Part 107 card (if applicable) when you fly. Law enforcement may ask for these during a field check.
8. If flying in a FRIA, confirm the entire flight path will stay within the FRIA boundary. Cross-check against the FAA FRIA map before launch.
Looking Ahead: Remote ID Beyond 2026
Remote ID is the foundation, not the final destination. The FAA is building toward Network Remote ID, where the broadcast travels over cellular networks instead of local Bluetooth or Wi-Fi. This enables tracking at any range, not just within the local 1,000-meter broadcast bubble.
The EU is further along this path under EASA Regulation 2019/947 and the U-space framework. European operators in designated U-space airspace already face additional requirements beyond Remote ID, including network identification and geofencing integration.
For Part 108 BVLOS operations in the US, Standard Remote ID is just the baseline. Waiver applicants will likely need to demonstrate robust network-based tracking as well. Broadcast modules will not qualify for these operations, which is worth considering if you have ambitions beyond VLOS flying.
The practical implication for older-drone owners: a broadcast module keeps you legal today, but it will not future-proof your aircraft. If you plan to scale into commercial BVLOS work, eventually you will need to upgrade to a drone with native Standard Remote ID and network capability.
Frequently Asked Questions
How do I make my drone Remote ID compliant?
You can make a drone Remote ID compliant in one of three ways: install a manufacturer firmware update if your drone supports it, attach an FAA-accepted broadcast module to the aircraft, or fly exclusively inside an FAA-Recognized Identification Area. Most older drones require a broadcast module because they have no firmware update path.
What happens if my drone doesn’t have Remote ID?
Flying a drone that requires Remote ID without broadcasting can result in civil penalties starting around $1,000 per violation, suspension or revocation of a Part 107 certificate, and denial of airspace access. Enforcement is active as of 2026.
What drones are Remote ID capable?
Most drones released after early 2021 have Standard Remote ID built in, including the DJI Mavic 3 series, Air 2S, Air 3, Air 3S, Mini 3, Mini 3 Pro, Mini 4 Pro, Avata, Avata 2, Inspire 3, and the Matrice enterprise line. Older models like the Mavic 2, Air 2, and Phantom 4 Pro V2 require a broadcast module.
What drones are exempt from Remote ID?
Drones under 250 grams flown purely for recreation are exempt. Aircraft flown entirely inside a FRIA, certain toy drones, and qualifying amateur-built aircraft are also exempt. Everything else over 250 grams must broadcast.
What is the best Remote ID module for drones?
The Dronetag Mini is the most popular choice for smaller older drones due to its 8-gram weight. The pingRID is favored for heavier airframes like the Phantom 4 Pro V2. The Hex Cube ID Serial and Holybro modules are popular in custom builds. Always confirm the module is on the FAA Declaration of Compliance list before buying.
When can a person not use a Remote ID broadcast module?
A broadcast module cannot be used for Part 108 BVLOS operations, which require Standard Remote ID built into the aircraft. A module also cannot be used on a drone that already has Standard Remote ID enabled, and it must not be transferred between aircraft mid-flight.
Is Remote ID being enforced?
Yes. As of 2026, the FAA and local law enforcement are actively enforcing Remote ID requirements. Pilots on the Mavic Pilots and Reddit drone communities have reported field checks during routine flights, and civil penalties have been issued for non-compliance.
Can FAA know you flew a DJI drone?
Yes. If your DJI drone has Remote ID enabled, it broadcasts a signal that anyone with a smartphone scanner app can read, including the FAA and law enforcement. The broadcast includes the drone’s identification, location, altitude, and takeoff point. The FAA does not centrally store the broadcast data, but the signal is public during flight.
Conclusion: Getting Your Older Drone Back in the Air Legally
Figuring out how to make an older drone Remote ID compliant is not as daunting as it first appears. Most pilots land on one of two paths: a free firmware update for newer-supported models, or a $60 to $250 broadcast module for the rest. Either way, the process takes minutes once you have the right hardware in hand.
The two steps that matter most are verifying your module is on the FAA Declaration of Compliance list before you buy, and confirming your broadcast with a Drone Scanner app before you fly. Skip either of those and you are flying on faith instead of fact.
If you own a Mavic 2 Pro, Mavic 2 Zoom, Air 2, or Phantom 4 Pro V2, accept that there is no firmware update coming. A broadcast module is the answer, and the retrofit is genuinely simple. As the community keeps confirming, Velcro the module on, power it up, verify the broadcast, and you are legal again.
The Remote ID rule is not going away, and waiting for another grace period is not a strategy. Take action this week. Check your model against the manufacturer compliance list, decide which path fits your drone, and verify the broadcast before your next flight. Getting compliant early means one less thing to worry about next time you launch, and it keeps your older drone in the air where it belongs.
For ongoing reference, bookmark the FAA DOC portal, the DroneZone dashboard, and a scanner app on your phone. Remote ID compliance is now a routine part of preflight, just like checking your props and battery. Build it into your workflow once, and it stops being a headache.